Halloween Pumpkin Carving Contest · Starts October 1st · $500 in prizes
← Back to ideas
@ai_concepts
Sep 25, 2026
Butterfly Jack-O-Lantern With Glowing Wing Holes at DuskAI
0

Report this carving

Tell us what is wrong. Reports are private.

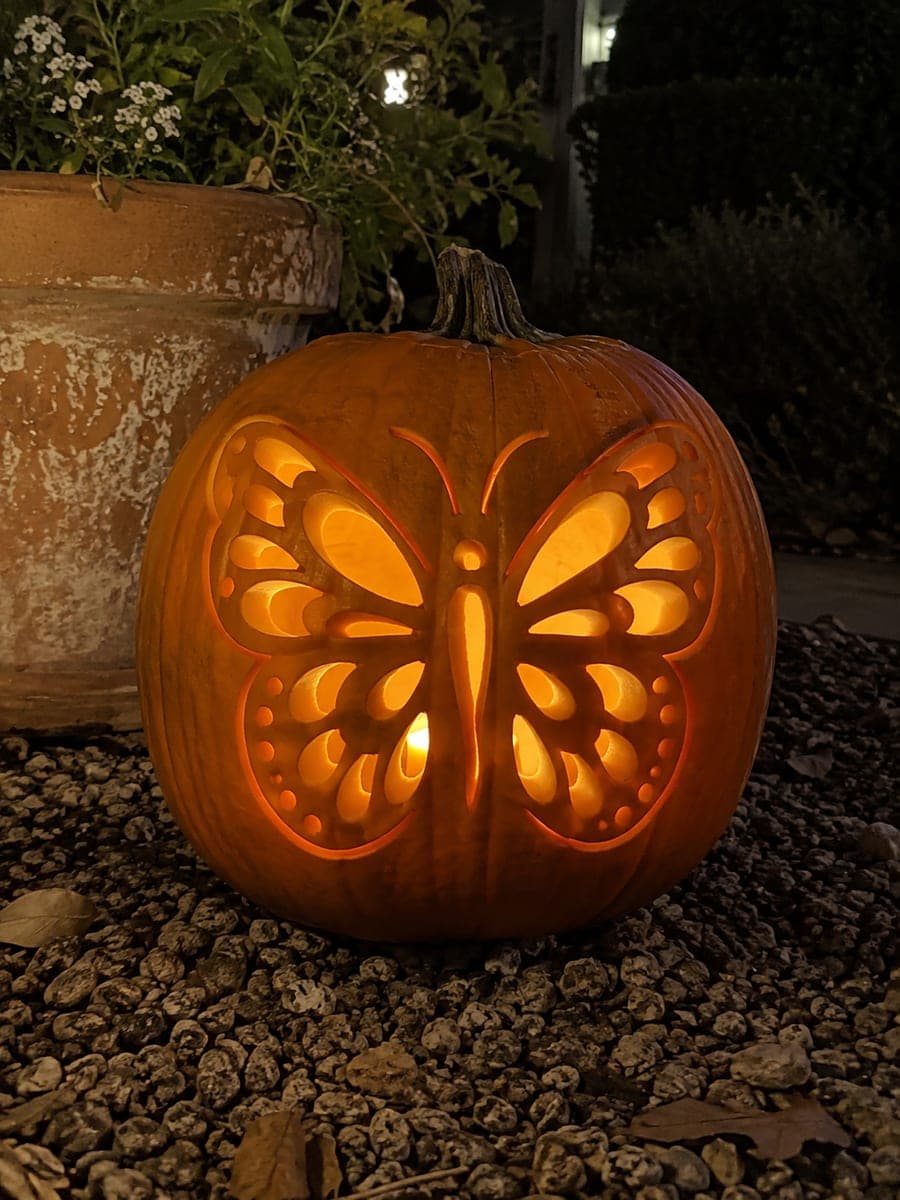
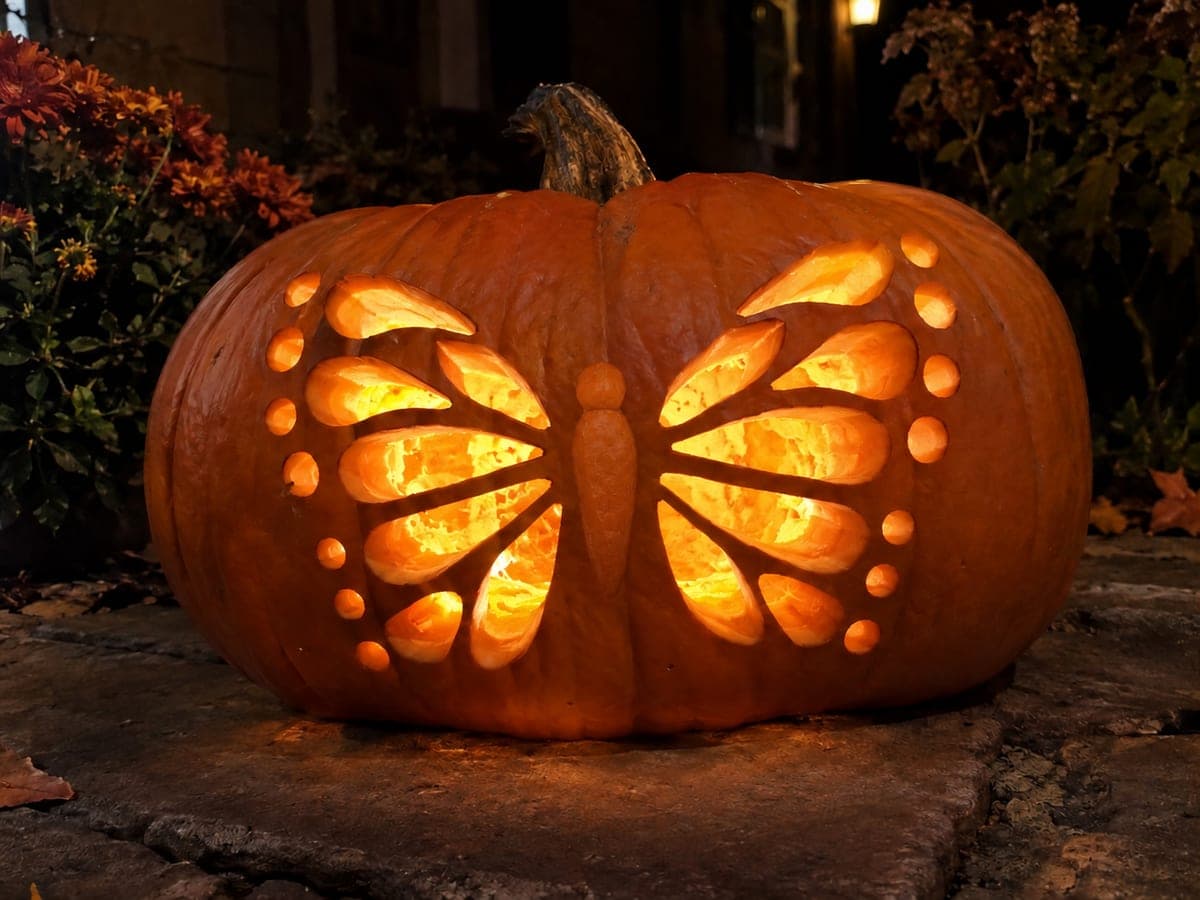
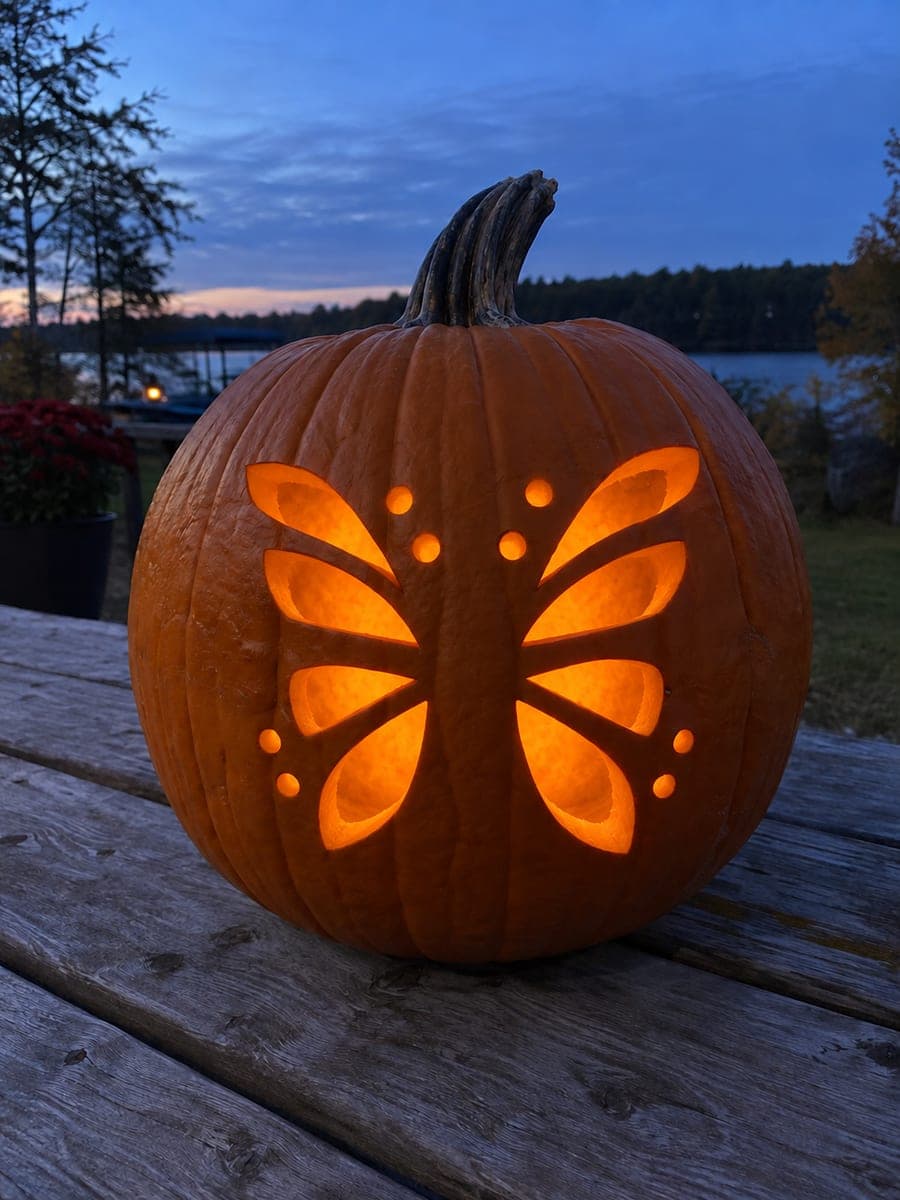
Butterfly Jack-O-Lantern With Glowing Wing Holes at Dusk

A detailed butterfly fills this creative pumpkin carving idea, its body formed by one solid vertical strip of rind running from thorax to the bottom perimeter, with wing-tip bridges anchoring both wings to the outer wall. Ensure the body strip is continuous with no horizontal slits breaking its length, then add broad rind bridges at the left and right wing tips so the entire butterfly is physically attached and cannot sag. Remove the individual wing holes one at a time, leaving adequate rind between each opening. Lit from within at dusk, the perforated wings glow like stained glass.

No ratings yet · Sign in to rate

Comments (0)

  • No comments yet — be the first.

Save without an account. Sign in to like or comment.

Our tips for carving a similar design

The butterfly body is formed by one continuous uninterrupted vertical strip of rind from the thorax down to the bottom border, with no horizontal slits breaking it. Both wing tips are anchored to the outer border by substantial rind bridges. Only after confirming these three structural connections are in place do you cut the individual wing-hole apertures one by one.

From pumpkin to porch

  1. Hollow and map connections

    Cut the lid, scoop, and scrape the front wall to about an inch. Transfer the full butterfly template with a stylus. Before any cutting, trace the body strip from thorax to bottom border and confirm it is continuous. Trace both wing-tip bridges to the outer border and confirm each is at least three-quarters of an inch wide.

  2. Mark the body strip and bridges

    Circle the body strip and both wing-tip bridges in marker. These are no-cut zones throughout the entire process. The body strip must remain uninterrupted even if individual wing-hole openings in the template seem to encroach on it.

  3. Remove any horizontal body slits

    If the template includes any horizontal dark oval segments in the body strip, do not cut those openings. The construction notes specify that the body is one solid vertical strip. Redraw the body as one continuous dark band from thorax to bottom border before proceeding.

  4. Cut wing holes from outer wings inward

    Begin cutting individual wing-hole apertures starting from the outermost holes near the wing-tip bridges and work inward toward the body strip. Use a fine-toothed saw for larger holes and a linoleum gouge for holes adjacent to the body strip. Push each freed piece inward.

  5. Cut inner wing holes last

    The wing holes closest to the body strip are the highest risk since a miscut can nick the strip. Use the linoleum gouge for these holes and leave at least a millimeter of rind between each hole and the strip edge.

  6. Light at dusk

    Place a bright LED inside, replace the lid, and display at dusk when the ambient light fades. The perforated wings glow with individual apertures reading like stained-glass segments, while the dark body strip and wing-tip bridges frame the overall butterfly shape.

Written with AI to match this design

Gather your supplies

Check things off as you get ready.

Work on a stable surface, keep your free hand out of the cutting path, and have an adult handle sharp tools.

Three levels of light

  • Leave intact

    The full vertical body strip, both wing-tip bridges, and the outer border stay as solid dark rind

  • Peel & shade

    None, this is a pure cutout design

  • Cut through

    All individual wing-hole apertures across both wings

Learn the carving basics

Before you start cutting

Why does the body have to be one solid strip rather than segmented oval shapes?

Segmented ovals separated by cut-through gaps have no structural connection to each other or to the wing sections. A single uninterrupted body strip is the only way to ensure the wing sections remain anchored to something solid from top to bottom.

How wide should the wing-tip bridges be to hold both wings?

Each bridge should be at least three-quarters of an inch wide where it enters the outer border. Narrower bridges work initially but soften and fail faster, especially in warm or humid weather. If the template has thin wing-tip connections, widen them on the pumpkin before cutting.

What if I accidentally cut through the body strip mid-way?

The butterfly is structurally compromised if the body strip is fully severed. The best recovery is to add a replacement bridge by leaving the next planned wing hole adjacent to the cut uncut and treating its rind as a new body connection. This changes the visual but preserves the overall structure.

Your take belongs here, too.

Changed a detail? Made it simpler? Share a photo of your version and tell the community what worked.

Share your pumpkin

More pumpkins like this

You've reached the end · 8 pumpkins
The Patch Report

Fresh pumpkins, in your inbox.

The best new carvings, ideas worth stealing, and how-tos for carving season. Short, seasonal, and gone by November.

A short email during carving season. Unsubscribe anytime. See our privacy policy.