@crowsnestcarver
Sep 7, 2026
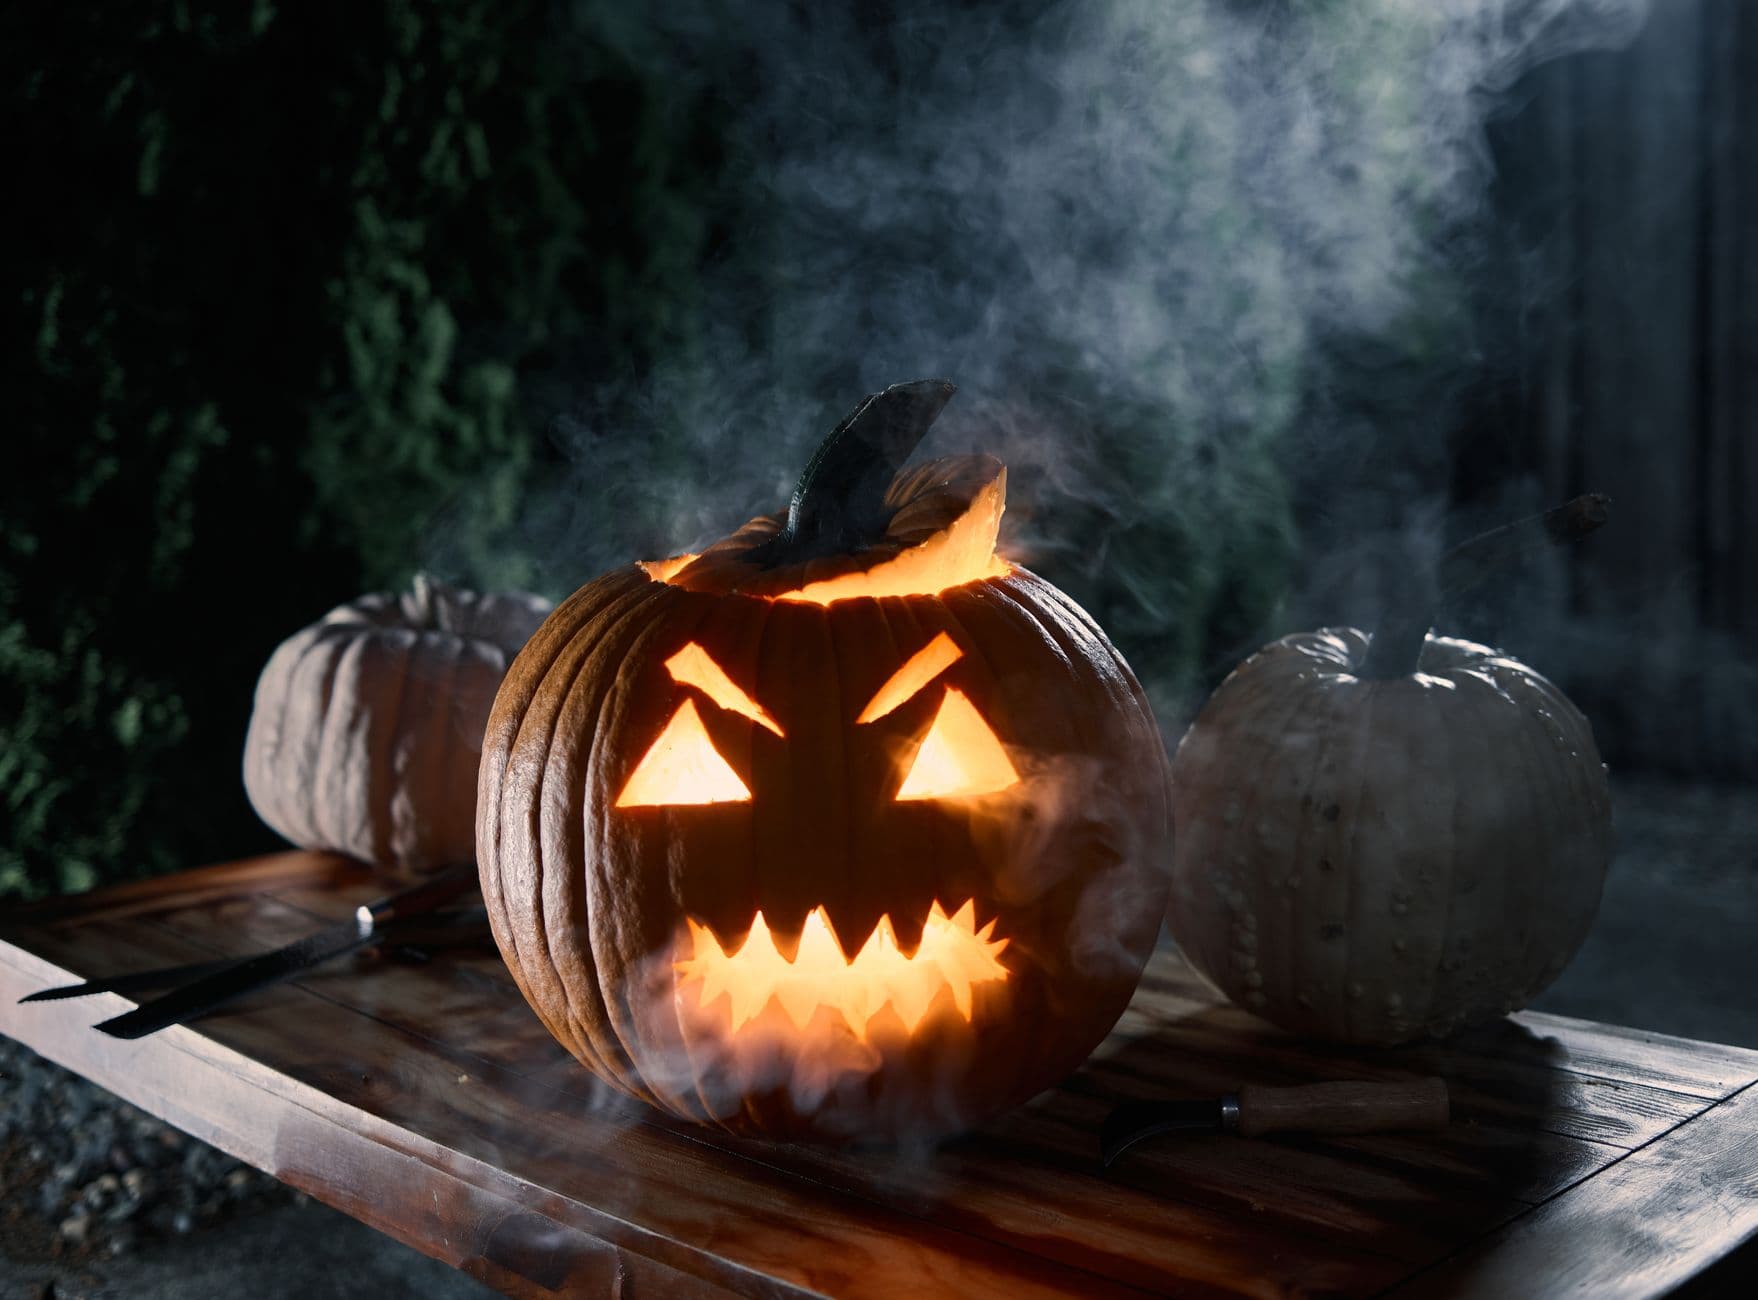
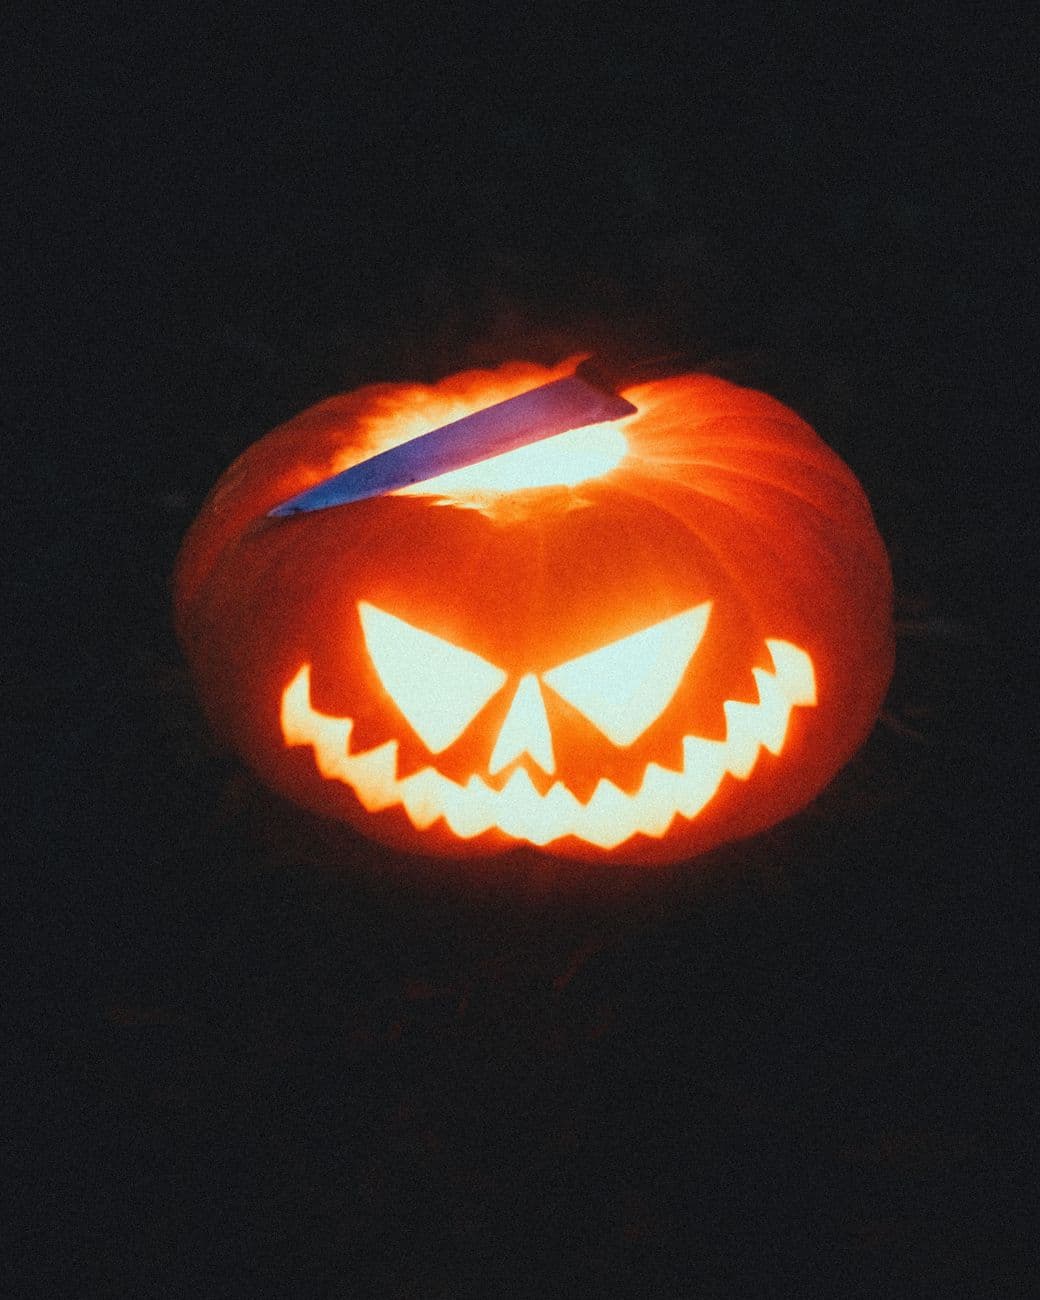
This is the timeless jack-o-lantern face built from clean geometric cutouts: angled triangle eyes, small triangle nose, and a wide zigzag mouth full of pointed teeth. The whole trick is keeping the cuts bold and simple so plenty of light pours out, plus adding a fog machine or dry ice base for the drifting smoke effect. Nothing here is fussy, which makes it a great first real carve.
Written by PumpkinCarvingIdeas.com, inspired by @crowsnestcarver's photo above. These are our suggestions, not instructions from the uploader, and this approach hasn't been tested on their exact carve.
Choose a pumpkin with a smooth, evenly rounded front and a flat base so it sits still. Cut the lid at an angle around the stem so it drops back in without falling through. Angle your knife toward the center as you go. Set the lid aside where it will not roll off the table.
Scrape out all the seeds and stringy pulp with a sturdy spoon or scoop. Thin the carving wall on the front of the pumpkin to about one inch so your blade passes through easily. A thinner wall also lets more light glow through the design. Save the seeds if you want to roast them later.
Sketch two large triangle eyes tilted inward at the top for an angry look. Add a small upright triangle nose between and below them. Draw a wide mouth as a long band, then mark alternating pointed teeth along the top and bottom edges. Step back and check the spacing before you cut anything.
Start with the eyes and nose since they are the smallest and easiest to control. Use a small serrated carving saw and gentle back-and-forth strokes, letting the tool do the work. Push the cut pieces out from the inside with a fingertip. Cutting small shapes first keeps the pumpkin sturdy while you work.
Save the big mouth for last because it removes the most material and weakens the shell. Cut along the top zigzag, then the bottom zigzag, keeping each tooth attached at its base so none snap off. Take your time on the points and make clean single passes. Push the whole mouth section out gently once every edge is freed.
Drop in a battery LED or two for a bright, safe glow, never a candle. For the drifting smoke look, set the pumpkin near a small fog machine or place a dish of dry ice and warm water inside on a raised tray, and handle dry ice only with gloves. Dim the surrounding lights and take your photo at night for the best effect. Keep the lid slightly cracked so air can move.
Check things off as you get ready.
Work on a stable surface, keep your free hand out of the cutting path, and have an adult handle sharp tools.
The entire outer skin of the pumpkin stays dark and untouched.
Optional light shading around the eyes or mouth edges gives a soft dim halo.
The triangle eyes, nose, and jagged toothy mouth are cut fully through for the brightest glow.
The drifting smoke comes from a small fog machine aimed near the pumpkin or from dry ice placed in warm water inside on a raised tray. Always wear gloves when handling dry ice and keep the area ventilated. Never use an open flame to try to create smoke inside the pumpkin.
Keep each tooth attached at its wide base and only cut the zigzag outline, not the roots. Make clean single passes rather than sawing repeatedly at one point. Thinning the mouth wall to about an inch also makes cleaner cuts less likely to crack the tips.
Always carve the smallest shapes first, so the eyes and nose before the mouth. The large mouth removes the most material and weakens the shell, so saving it for last keeps the pumpkin sturdy while you work. This order gives you steadier control throughout.
Changed a detail? Made it simpler? Share a photo of your version and tell the community what worked.
The best new carvings, ideas worth stealing, and how-tos for carving season. Short, seasonal, and gone by November.

Comments (0)