Halloween Pumpkin Carving Contest · Starts October 1st · $500 in prizes
← Back to ideas
@ai_concepts
Aug 2, 2026
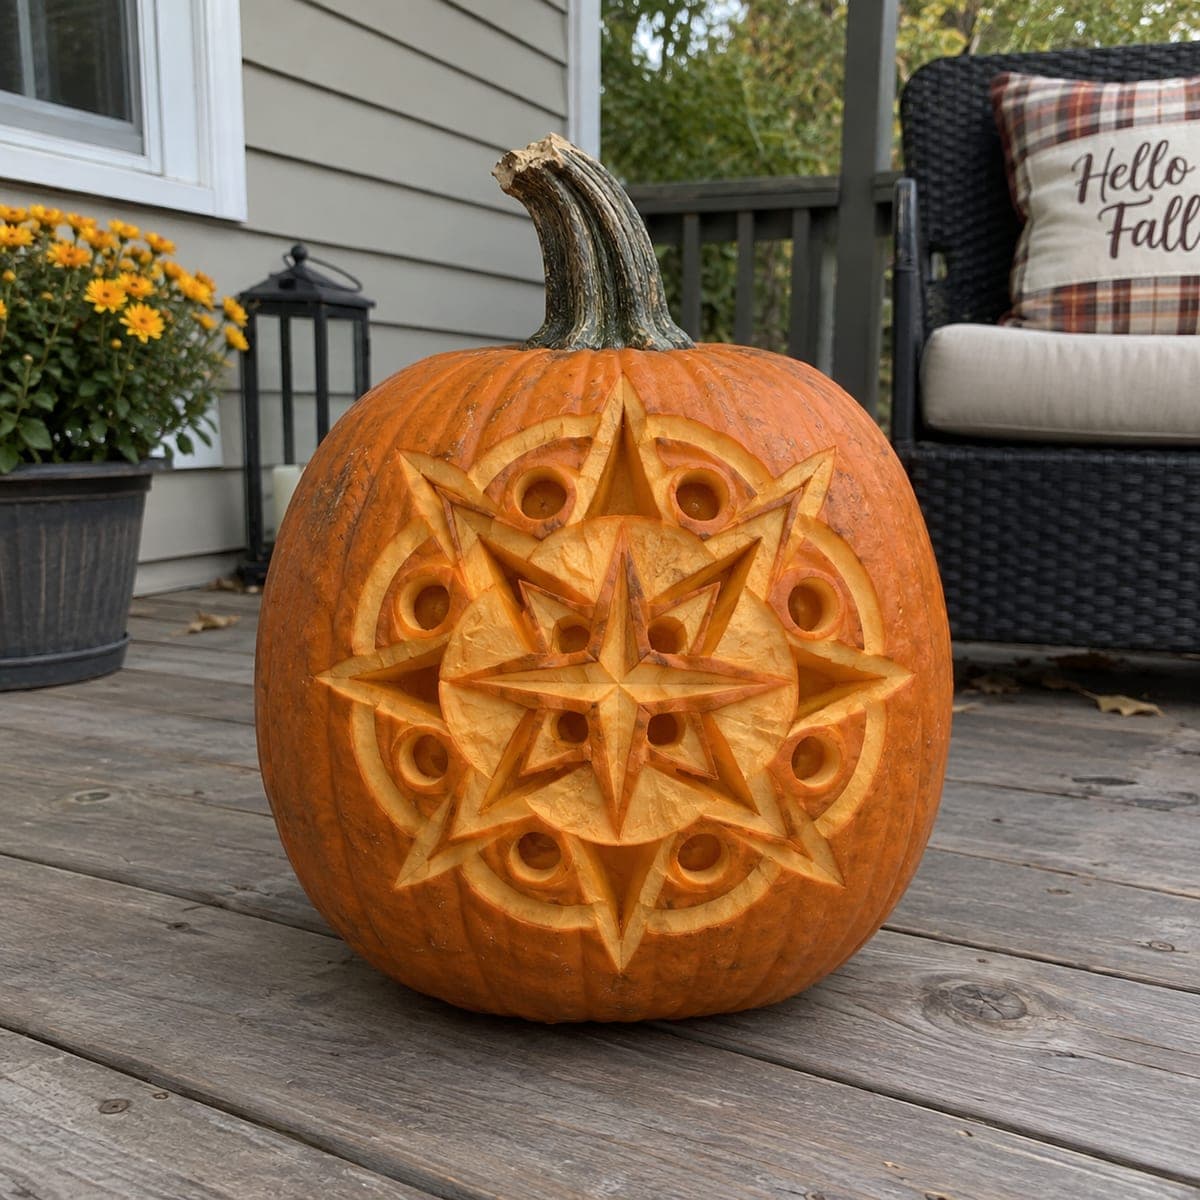
Carved Star Mandala Pumpkin With Compass Rose CenterAI
0

Carved Star Mandala Pumpkin With Compass Rose Center

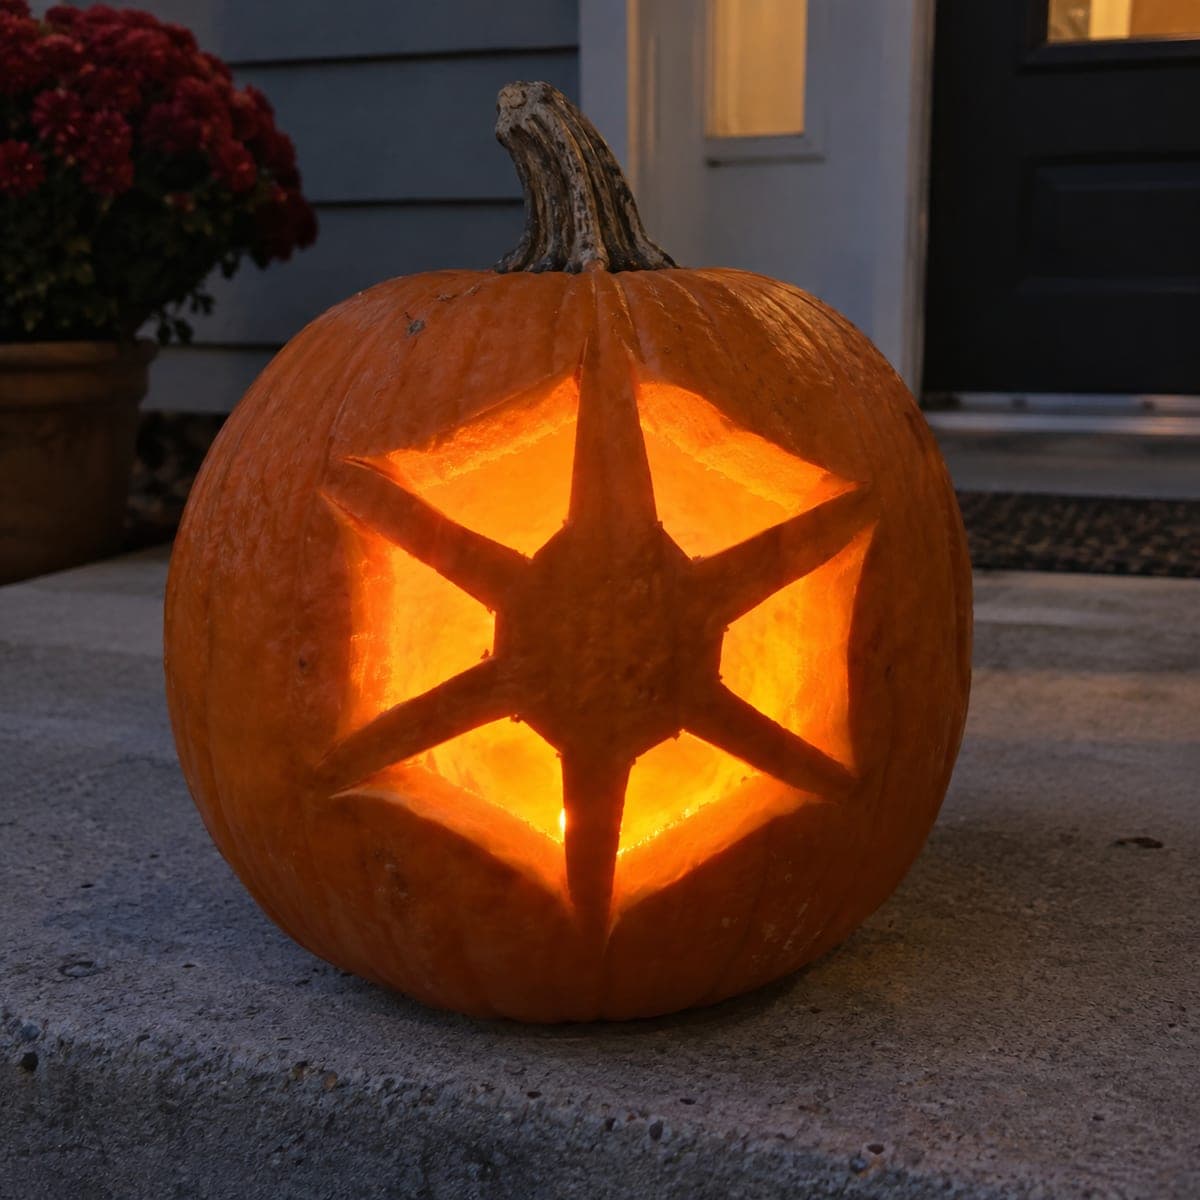
A layered eight-point compass rose sits inside a chip-carved mandala ring, with dot accents circling the design like a decorative medallion. Every facet is cut at an angle so daylight throws crisp shadows, no candle required. Sketch concentric circles with a compass first, then carve the center star before the outer ring so you always have solid rind to brace against. It is a striking geometric pumpkin carving idea for a front porch that looks good all day.

This is an AI-generated concept image: a realistic, carvable design idea rather than a photo of a finished carve. AI concepts are always labeled and sit out the leaderboard and the contest.

No ratings yet · Sign in to rate
Comments (0)

  • No comments yet — be the first.

Save without an account. Sign in to like or comment.

Our tips for carving a similar design

The trick here is relief carving rather than cutting all the way through, so every facet catches daylight and casts crisp shadows without any light inside. Work from the center outward, carving the eight-point compass rose first while you still have plenty of solid rind to brace against, then add the surrounding mandala ring and dot accents. Keep every cut angled so the beveled walls read as clean edges from the porch.

Written by PumpkinCarvingIdeas.com, inspired by the image above. These are our suggestions, not instructions from the uploader. This approach to the AI concept has not been tested on a real pumpkin.

From pumpkin to porch

  1. Prep the pumpkin and plan the grid

    Choose a large, round pumpkin with a smooth, blemish-free face. Wipe it clean and dry, then leave the top intact since this design uses no interior light. Use a compass or a jar and pencil to draw two or three concentric circles centered on the flattest part of the face. Lightly mark the eight star points so everything stays symmetrical before any blade touches the skin.

  2. Transfer the design

    Tape your stencil over the drawn circles and poke through the key lines with a pin or transfer tool. Focus on the eight-point center star, the second star layer behind it, and the ring of dots. Connect the dots with a washable marker so you can see the full pattern. Step back and check that the points are evenly spaced before carving.

  3. Carve the center compass rose

    Start with the innermost star while the surrounding rind is still solid and supportive. Use a small, sharp detail knife to cut each facet at a slant, angling the blade toward the center of each ray so the surface reads as raised, faceted points. This is chip-carving, so you are removing shallow wedges of skin and flesh, not cutting through the wall. Adults should handle all the blades and take slow, controlled passes.

  4. Shade the outer star ring and background

    Move outward to the second layer of star points and the field around them. Peel the skin off the recessed background areas to a shallow, even depth so they glow a soft orange in daylight while the raised facets stay brighter. Keep the beveled walls between light and dark zones crisp for contrast. Rotate the pumpkin as you work so your cutting hand always pulls comfortably.

  5. Add the dot accents and mandala ring

    Ring the design with the circle of small dots using a round gouge or a drill-style tool for consistent size. You can carve these shallow for a dim glow or cut a few fully through for accent highlights, but do the full cutouts last so the surface stays rigid. Clean up the outer mandala band by shaving it to an even mid depth. Check that no bridges between shapes are thinner than about a finger width so nothing sags.

  6. Clean up and photograph

    Brush out loose bits and rub cut edges with a little petroleum jelly to slow drying. Because this design relies on daylight shadows, set it on the porch in morning or late-afternoon sun for the sharpest contrast. If you want evening glow, tuck a small LED puck behind the shallow-carved areas rather than a candle. Photograph it from straight on to show off the symmetry.

Gather your supplies

Check things off as you get ready.

Work on a stable surface, keep your free hand out of the cutting path, and have an adult handle sharp tools.

Three levels of light

  • Leave intact

    The raised star facets and the highest points of the compass rose stay as untouched skin for the darkest tone.

  • Peel & shade

    The recessed background field and the mandala band get skin-peeled to a shallow depth for a soft mid-orange glow.

  • Cut through

    A few of the accent dots can be cut fully through for the brightest highlights, saved for last.

Learn the carving basics

Before you start cutting

Do I need to cut through the pumpkin wall at all?

Mostly no. This design is built on relief and chip-carving, where you shave shallow facets that catch daylight and cast shadows. You can optionally cut a few of the ring dots fully through for accent light, but keep those for the very end so the wall stays strong while you carve the detailed center.

How do I keep the eight points even and symmetrical?

Start with a compass to draw true concentric circles, then mark the eight points at equal angles before transferring the star. Working from the center outward keeps your reference lines intact. Step back often to check spacing, since the eye catches uneven points quickly on a radial design.

Will this show up well without a candle inside?

Yes, that is the whole idea. The angled facets throw crisp shadows in daylight, so it looks good all day on a porch. Position it in direct morning or afternoon sun for the sharpest contrast, and add a small LED puck if you want a gentle evening glow.

Your take belongs here, too.

Changed a detail? Made it simpler? Share a photo of your version and tell the community what worked.

Share your pumpkin

More pumpkins like this

You've reached the end · 8 pumpkins
The Patch Report

Fresh pumpkins, in your inbox.

The best new carvings, ideas worth stealing, and how-tos for carving season. Short, seasonal, and gone by November.

A short email during carving season. Unsubscribe anytime. See our privacy policy.