Halloween Pumpkin Carving Contest · Starts October 1st · $500 in prizes
← Back to ideas
@ai_concepts
Aug 2, 2026
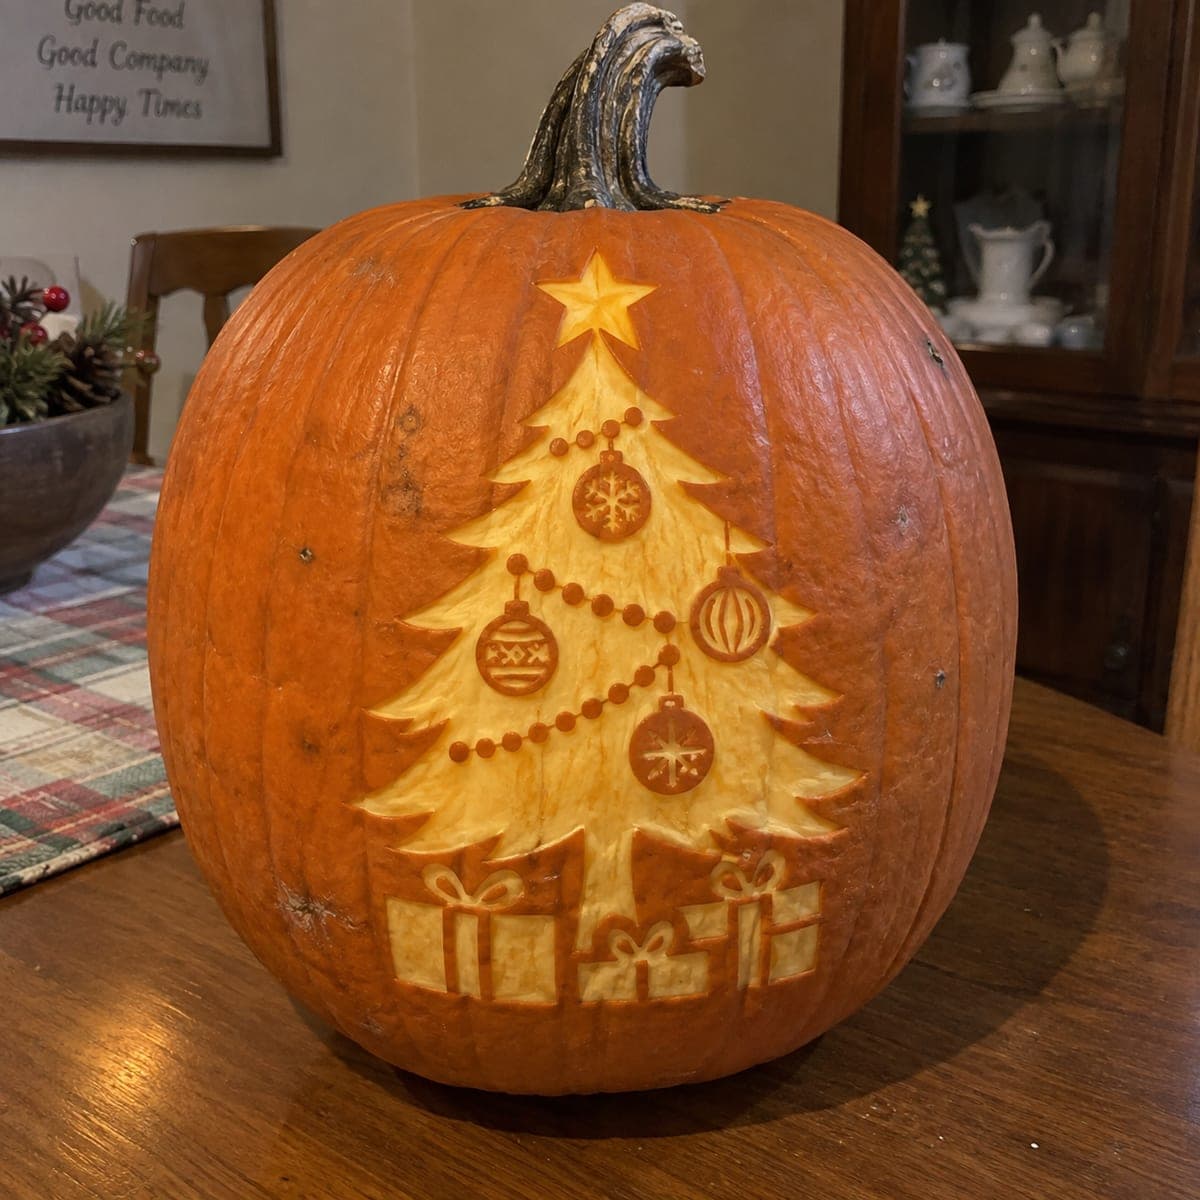
Christmas Tree Jack-O-Lantern With Presents and OrnamentsAI
0

Christmas Tree Jack-O-Lantern With Presents and Ornaments

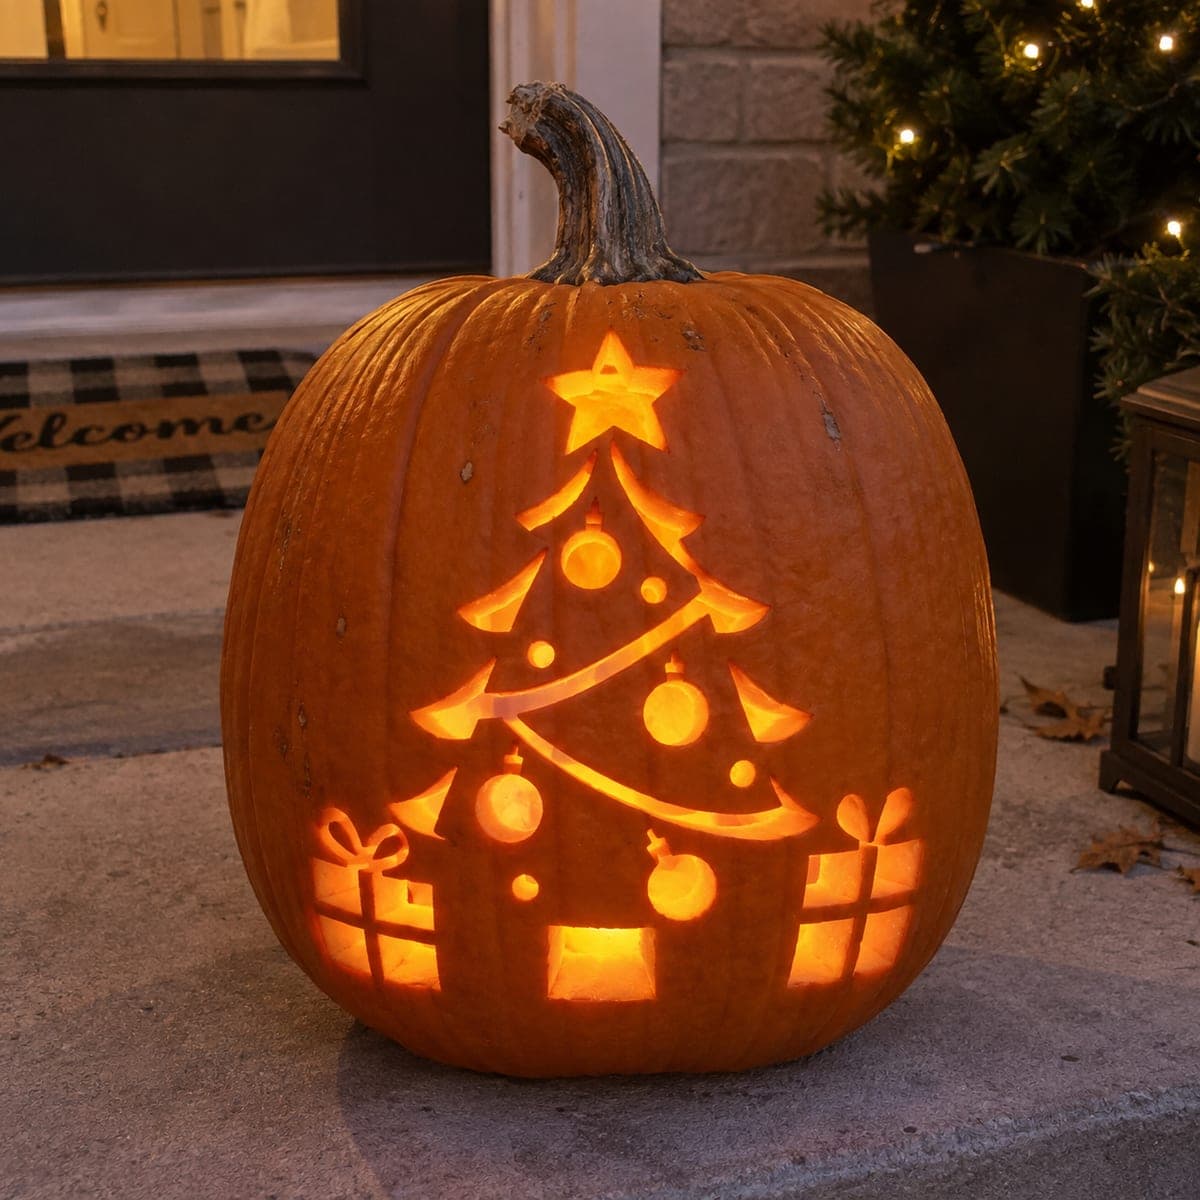
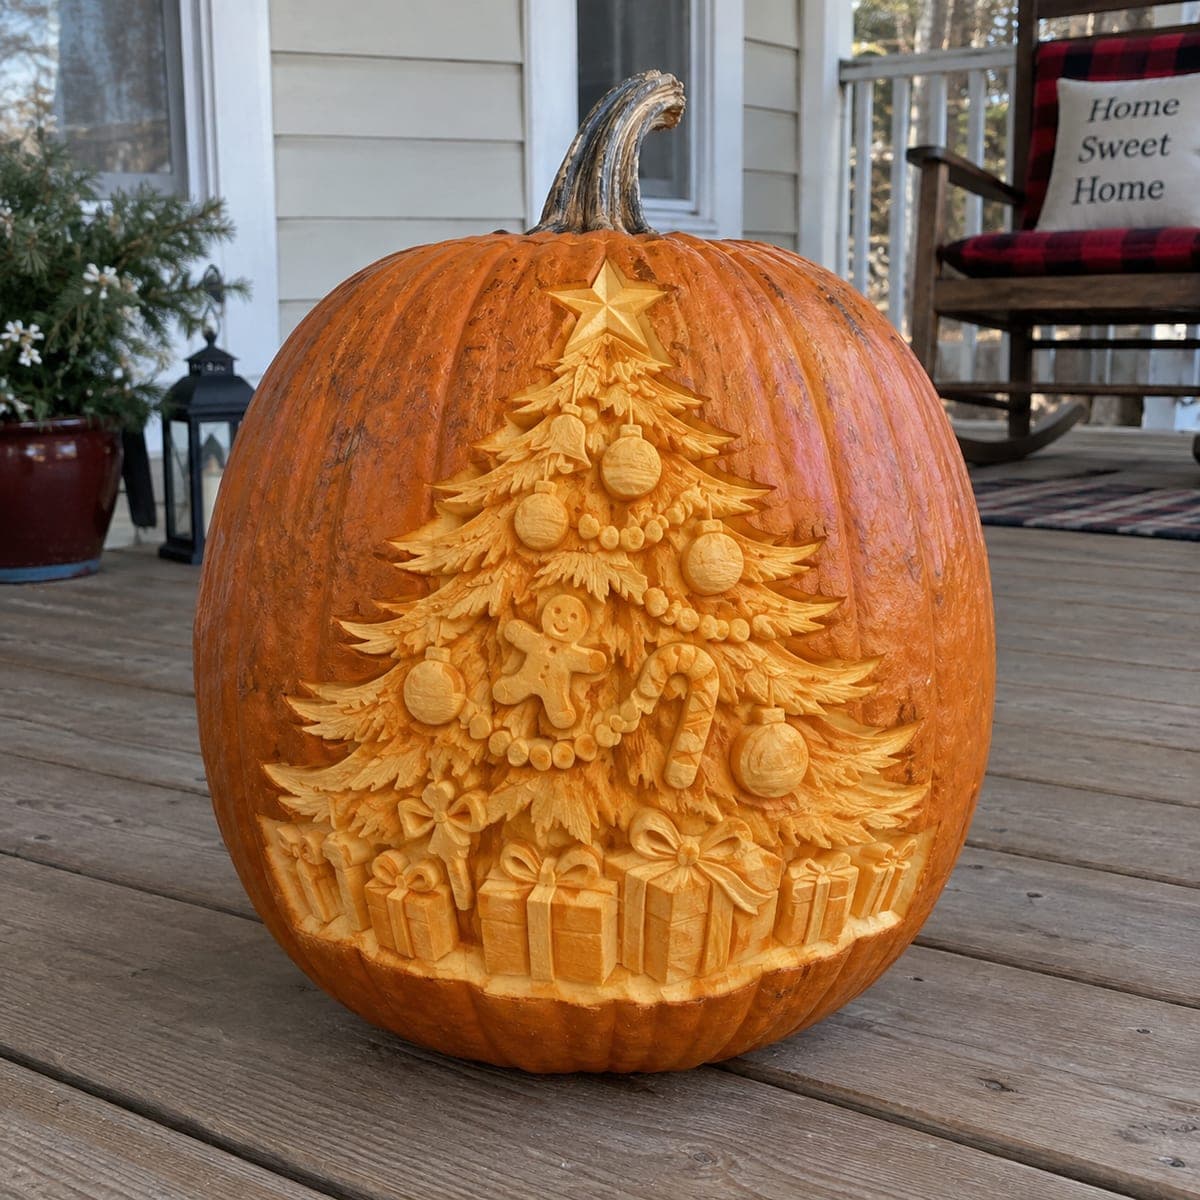
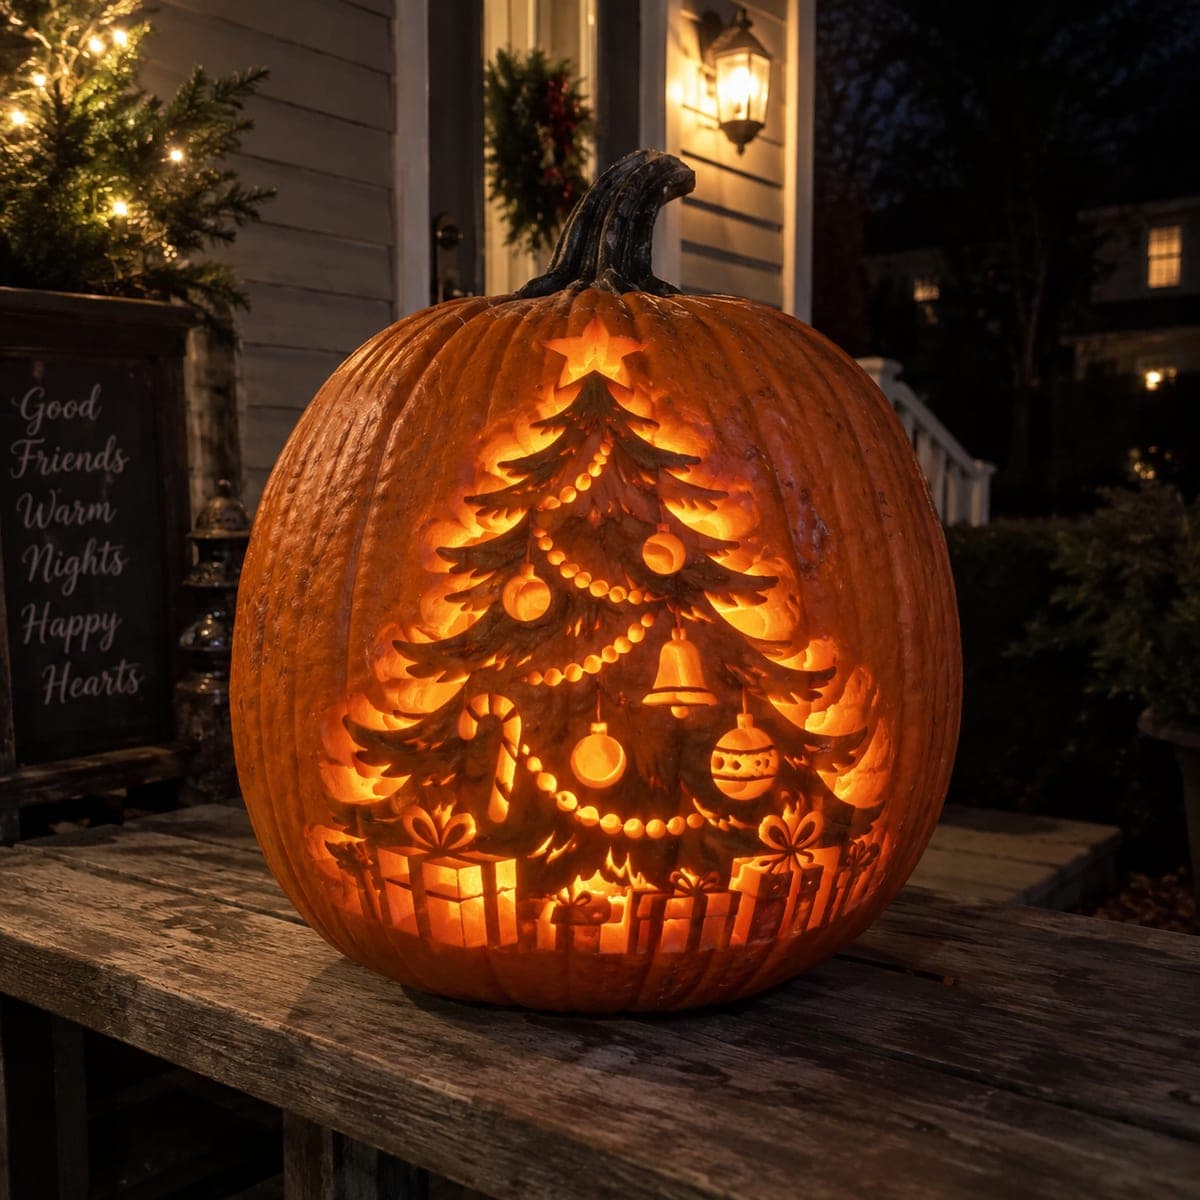
A fully trimmed Christmas tree glows inside this pumpkin, complete with bead garland, ornaments, a bell, a topper star, and wrapped presents underneath. Deep etching leaves the branches dark while the carved background blazes, a striking way to bridge Halloween and the holidays. Carve the tiny ornament circles with a drill bit or apple corer before detailing the branches around them. Warm white light inside sells the cozy effect.

This is an AI-generated concept image: a realistic, carvable design idea rather than a photo of a finished carve. AI concepts are always labeled and sit out the leaderboard and the contest.

No ratings yet · Sign in to rate
Comments (0)

  • No comments yet — be the first.

Save without an account. Sign in to like or comment.

Our tips for carving a similar design

The trick here is contrast: the tree branches and trunk stay as dark, uncut silhouette while the background is carved away so light pours out around the shape. Ornaments, a topper star, and wrapped presents read as bright cutouts and skin-peeled glows nestled into that dark tree. Plan your layers first, carve the fine circles and details before the big background, and save the largest openings for last so the wall stays strong.

Written by PumpkinCarvingIdeas.com, inspired by the image above. These are our suggestions, not instructions from the uploader. This approach to the AI concept has not been tested on a real pumpkin.

From pumpkin to porch

  1. Transfer a layered tree stencil

    Pick or draw a full Christmas tree with a star topper, a few ornaments, a bell, bead garland, and a row of presents at the base. Tape the pattern smoothly onto the front of the pumpkin and poke the outlines with a pin or transfer tool. Mark clearly which areas are dark tree (leave), which are dim glow (peel), and which are full cutouts. On a tall pumpkin like this, keep the design centered on the flattest face.

  2. Open a back or bottom lid and gut it

    Cut your access hole in the back or bottom rather than the top so the stem and shoulders stay clean for the scene. Scoop out the seeds and pulp, then thin the carving wall on the front to about one inch. A consistent, thinner wall makes shading and small circles far easier and more even. Have an adult handle all the sharp tools.

  3. Drill the ornaments and small circles first

    Use a drill bit, apple corer, or small round gouge to make the ornament circles, the bell, and the little garland beads before you touch anything around them. Working the small round shapes first gives you clean edges and something solid to detail against. Vary the sizes so the ornaments feel natural. Go slow and let the tool do the work so you do not blow through the wall.

  4. Shade the branches and details

    Keep the tree branches, trunk, and the outlines of the presents as untouched dark skin so they stay in silhouette. Use a lino or ribbon tool to peel a thin layer where you want soft mid glow, like the inside of ornaments, the star, ribbon on the gifts, and the strands of garland. This shading is the heart of the design, so step back often to check the balance. Peel gently: removing just the skin gives that warm dim orange, going deeper gives brighter light.

  5. Cut the background last

    Once all the fine work is done, carve fully through the background around the tree so the brightest light frames the branches. Cut the largest openings last and leave small bridges of skin where thin dark shapes could break away, especially between branch tips. Trim the edges cleanly from behind to sharpen the glow. Work from the center outward to keep the wall stable.

  6. Light it and photograph

    Set a warm white LED puck or string inside for that cozy holiday tone; skip candles since this design has lots of thin detail. Warm white sells the fireplace feeling better than a cool blue light. Set the pumpkin on a porch table at dusk and shoot slightly to the side to catch the depth of the shading. Mist the cut edges with water and refrigerate overnight to keep it fresh longer.

Gather your supplies

Check things off as you get ready.

Work on a stable surface, keep your free hand out of the cutting path, and have an adult handle sharp tools.

Three levels of light

  • Leave intact

    Tree branches, trunk, and the outlines of the wrapped presents stay as untouched dark skin.

  • Peel & shade

    Ornament interiors, the topper star, bell, bead garland, and gift ribbons get skin-peeled for a soft mid glow.

  • Cut through

    The background around the tree is cut fully through so bright light frames the whole silhouette.

Learn the carving basics

Before you start cutting

How do I keep the thin branch tips from breaking off?

Since the branches stay dark and the background is cut away, the tips can end up as fragile islands of skin. Leave small uncut bridges connecting branch tips to neighboring dark areas so nothing floats free. Carve the big background openings last, after all detail work, so the wall stays rigid as long as possible.

What is the easiest way to make even ornament circles?

Use a drill bit, apple corer, or a round gouge and do these before you carve anything around them. Working the circles first gives clean edges and leaves solid pumpkin to brace against. Vary the diameters slightly so the ornaments look natural rather than mechanical.

Should I use warm or cool light inside?

Warm white is the way to go for this holiday scene. It gives the tree that firelit, cozy glow and flatters the orange flesh. Skip candles entirely because the many thin cuts and shaded areas do better with steady, cool-running LED light.

Your take belongs here, too.

Changed a detail? Made it simpler? Share a photo of your version and tell the community what worked.

Share your pumpkin

More pumpkins like this

You've reached the end · 8 pumpkins
The Patch Report

Fresh pumpkins, in your inbox.

The best new carvings, ideas worth stealing, and how-tos for carving season. Short, seasonal, and gone by November.

A short email during carving season. Unsubscribe anytime. See our privacy policy.