Halloween Pumpkin Carving Contest · Starts October 1st · $500 in prizes
← Back to ideas
@ai_concepts
Aug 20, 2026
Christmas Tree With Presents Pumpkin CarvingAI
0

Christmas Tree With Presents Pumpkin Carving

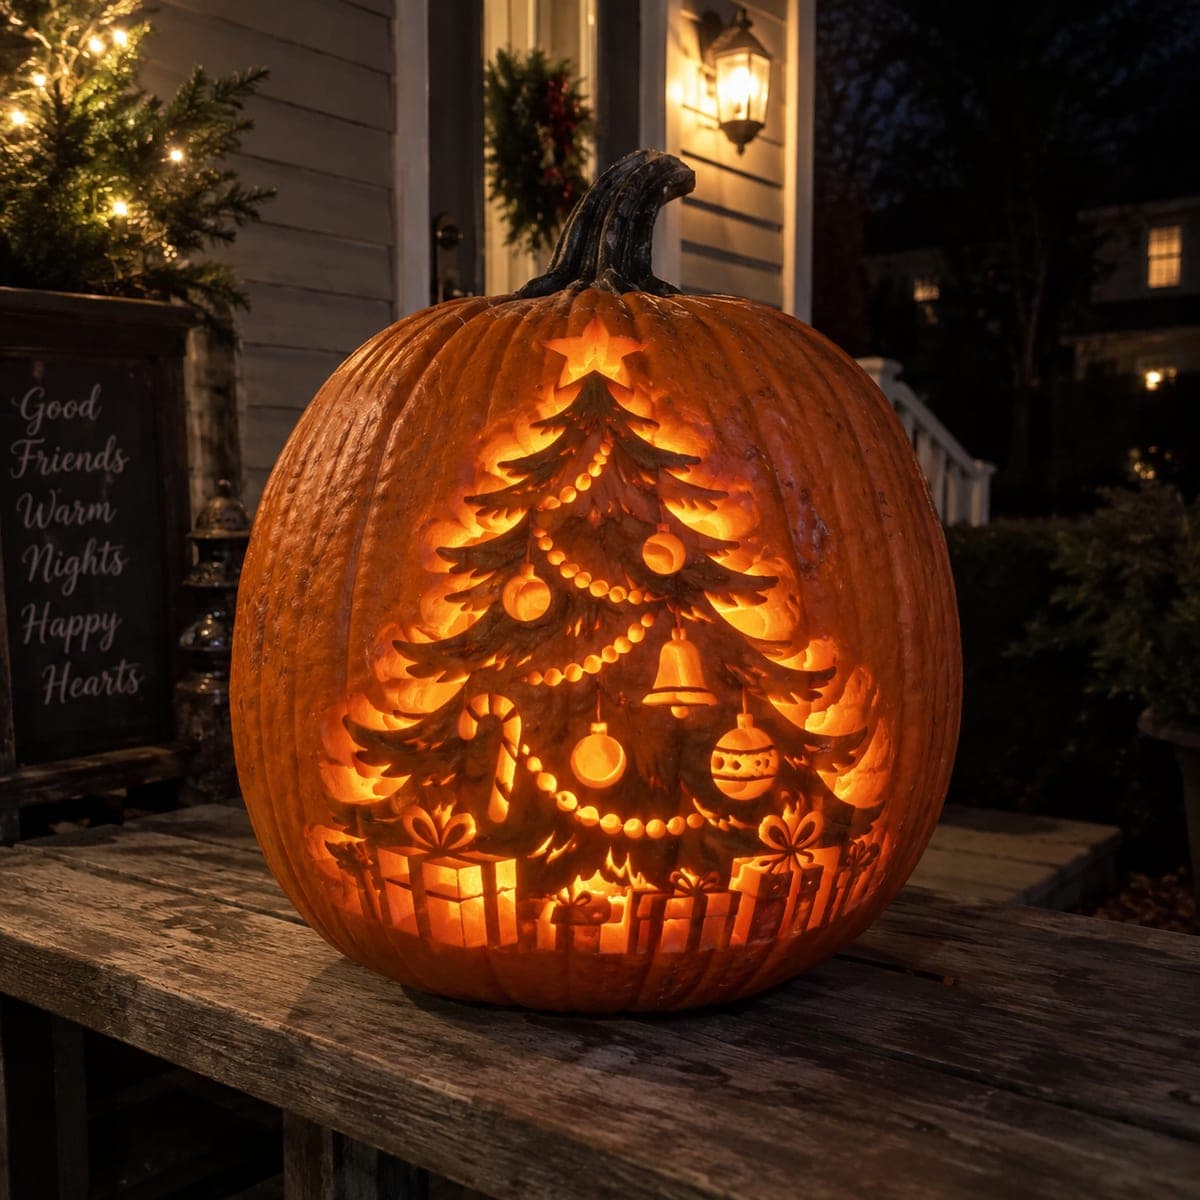
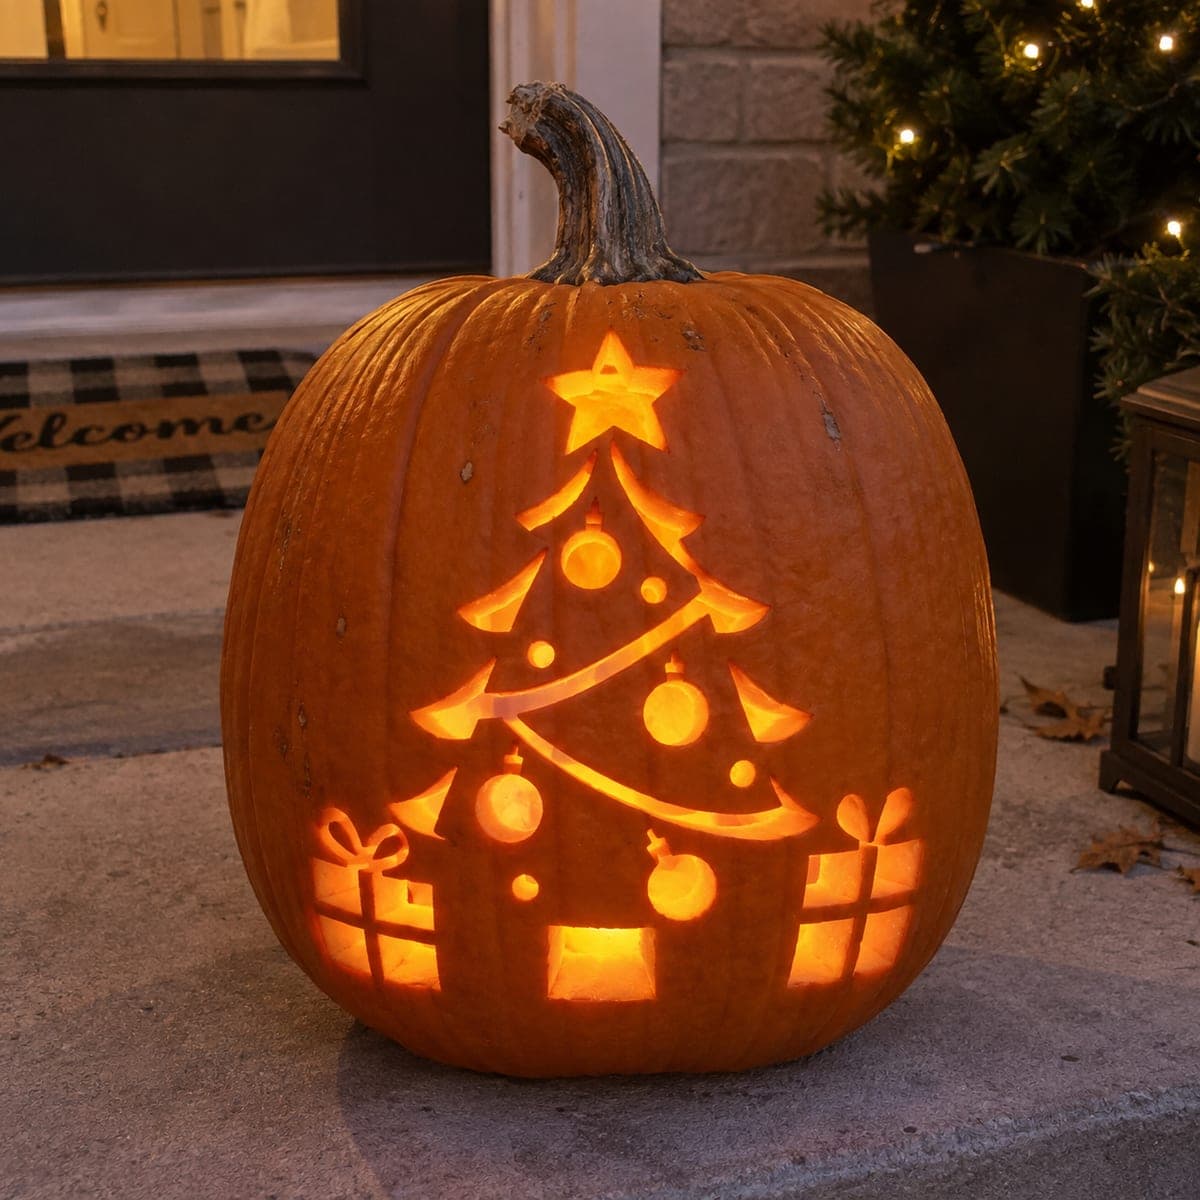
A decorated Christmas tree topped with a glowing star rises from a pair of wrapped presents, all carved into a tall pumpkin for a playful holiday mashup. The swagged branches and round ornaments are pierced cutouts, so a steady saw hand handles the whole design, no etching required. Carve the small ornaments and star first, then the branch sweeps, leaving the trunk bridges for strength. Perfect for a Thanksgiving-to-Christmas porch transition when you are not ready to let pumpkins go.

This is an AI-generated concept image: a realistic, carvable design idea rather than a photo of a finished carve. AI concepts are always labeled and sit out the leaderboard and the contest.

No ratings yet · Sign in to rate
Comments (0)

  • No comments yet — be the first.

Save without an account. Sign in to like or comment.

Our tips for carving a similar design

The core trick here is treating the whole scene as pierced cutouts, so the light does all the work and no surface etching is needed. Carve the tree as stacked branch sweeps with round ornaments and a star on top, then anchor it to a pair of wrapped presents at the base. Keep the trunk and the ribbon lines as small bridges so the shapes stay strong under a bright LED.

Written by PumpkinCarvingIdeas.com, inspired by the image above. These are our suggestions, not instructions from the uploader. This approach to the AI concept has not been tested on a real pumpkin.

From pumpkin to porch

  1. Pick a tall pumpkin and clean it out

    Choose a tall, upright pumpkin with a smooth front panel wide enough for the full tree and both presents. Cut a lid or a back access hole and scoop the inside until the front wall is about one inch thick. A thinner wall makes the pierced cutouts easier and lets more light through. Dry the inside with a paper towel before you transfer the pattern.

  2. Transfer the pattern

    Tape your tree and presents stencil flat against the front, snipping the edges so it hugs the curve. Poke the outlines with a pin or dull pencil to dot the design onto the skin. Pay attention to the star, the tiered branch sweeps, the round ornaments, and the ribbon lines on the two gifts. Step back and check that the tree sits centered above the presents before you cut anything.

  3. Start with the small ornaments and star

    Begin with the smallest shapes while the pumpkin wall is still solid and stable. Use a fine carving saw to pierce each round ornament and the five points of the star, working slowly and letting the blade do the cutting. Small openings first means you avoid flexing a weakened panel later. Push the cut pieces inward or outward gently so you do not tear the edges.

  4. Cut the branch sweeps

    Move on to the layered branch sweeps that form the tree body. Cut each curved tier as its own opening, keeping the narrow strips of skin between tiers intact so the tree reads as separate branches. Leave a small bridge at the trunk to hold everything together and give the design strength. Take breaks to keep your saw hand steady on the long curves.

  5. Open the presents last

    Save the two large gift boxes for last since they are the biggest openings. Cut the box outlines but leave the ribbon and bow lines as uncut bridges so they stay dark and define each present. Keep the base of the pumpkin thick enough to support the weight above. Clear away all the cut pieces and trim any ragged inner edges with your knife.

  6. Light it and photograph

    Drop in a bright LED puck or a string of battery lights, never a candle, so the ornaments and star glow evenly. Set the pumpkin on your porch step at dusk and check that light reaches the top star. If any area looks dim, shave a little skin from the inside behind it. Snap your photo just after sunset when the cutouts glow warmest against the dark.

Gather your supplies

Check things off as you get ready.

Work on a stable surface, keep your free hand out of the cutting path, and have an adult handle sharp tools.

Three levels of light

  • Leave intact

    The pumpkin skin around the tree, the trunk bridge, and the ribbon and bow lines on the presents stay untouched and dark.

  • Peel & shade

    Shave a thin layer inside any cutout that reads too bright to soften it, or skin-peel a faint snow line under the presents for a dim glow.

  • Cut through

    The star, round ornaments, branch sweeps, and gift box panels are cut fully through for the brightest light.

Learn the carving basics

Before you start cutting

How do I keep the tree from falling apart with so many cutouts?

The trunk bridge is your main anchor, so leave it uncut to hold the branch tiers together. Keep the thin strips of skin between each branch sweep intact rather than cutting one big triangle. Working small shapes first and big openings last also keeps the panel stable while you carve.

Should the ornaments be different sizes?

Yes, varying the ornament sizes makes the tree look more natural and playful. Pierce a few larger rounds near the center and scatter smaller dots toward the edges. Mixing sizes also gives you a range of light points, which reads better from the sidewalk.

Can I really display this from Thanksgiving into December?

A carved pumpkin usually lasts one to two weeks, longer in cold weather. To stretch it for a holiday porch transition, keep it in a cool shaded spot and wipe the cut edges dry each day. If it starts to soften, this design also works well recreated on a foam craft pumpkin for a reusable version.

Your take belongs here, too.

Changed a detail? Made it simpler? Share a photo of your version and tell the community what worked.

Share your pumpkin

More pumpkins like this

You've reached the end · 8 pumpkins
The Patch Report

Fresh pumpkins, in your inbox.

The best new carvings, ideas worth stealing, and how-tos for carving season. Short, seasonal, and gone by November.

A short email during carving season. Unsubscribe anytime. See our privacy policy.