Halloween Pumpkin Carving Contest · Starts October 1st · $500 in prizes
← Back to ideas
@ai_concepts
Jul 11, 2026
Christmas Tree Etched Pumpkin With PresentsAI
0

Christmas Tree Etched Pumpkin With Presents

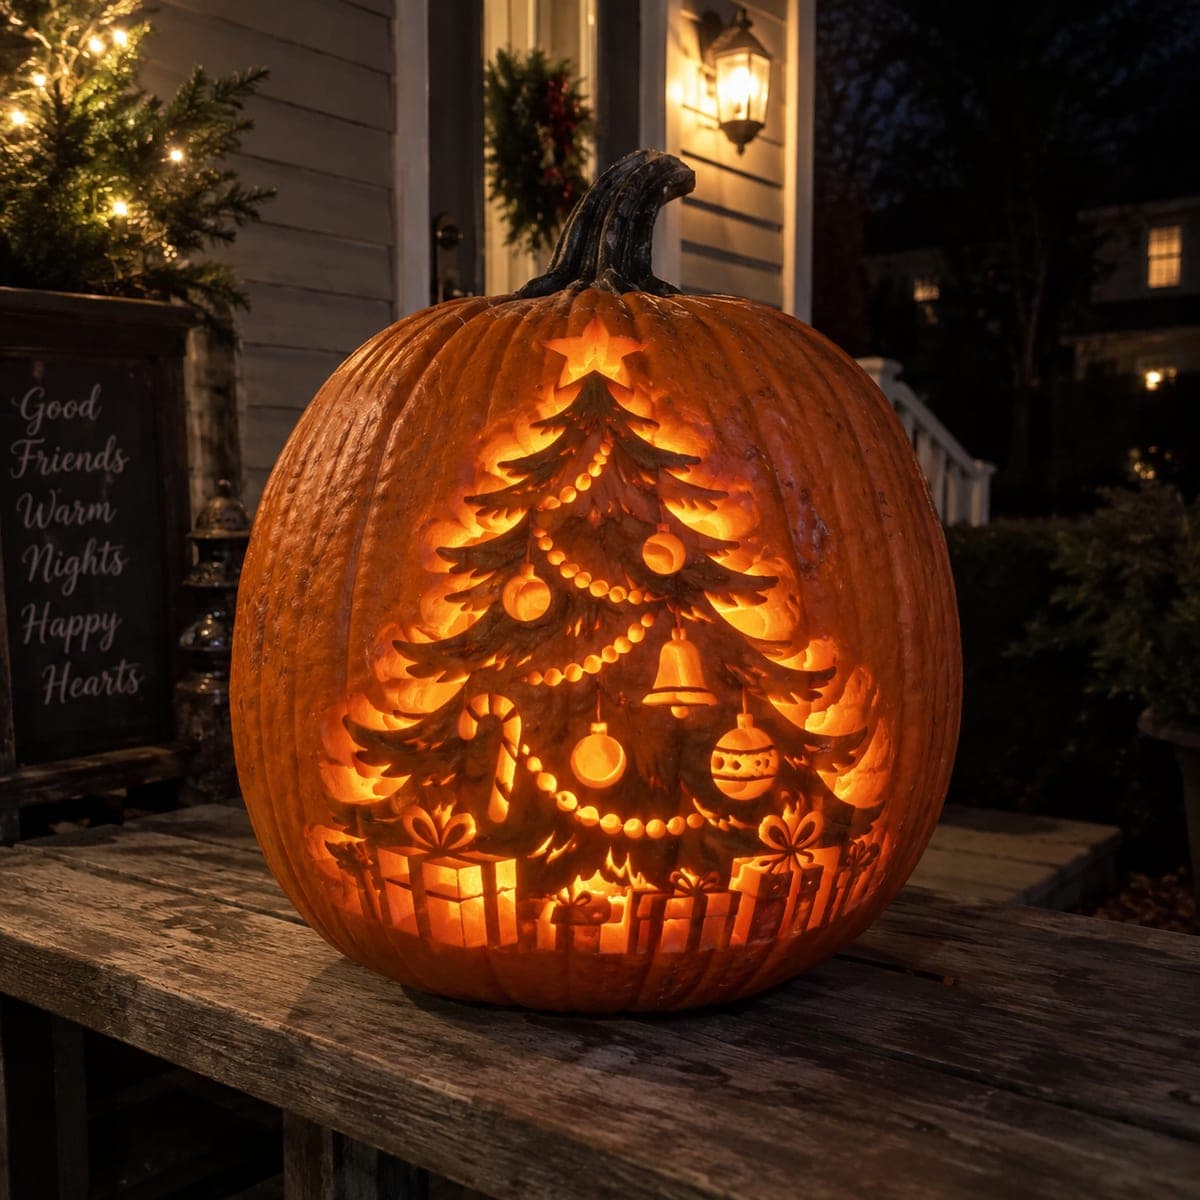
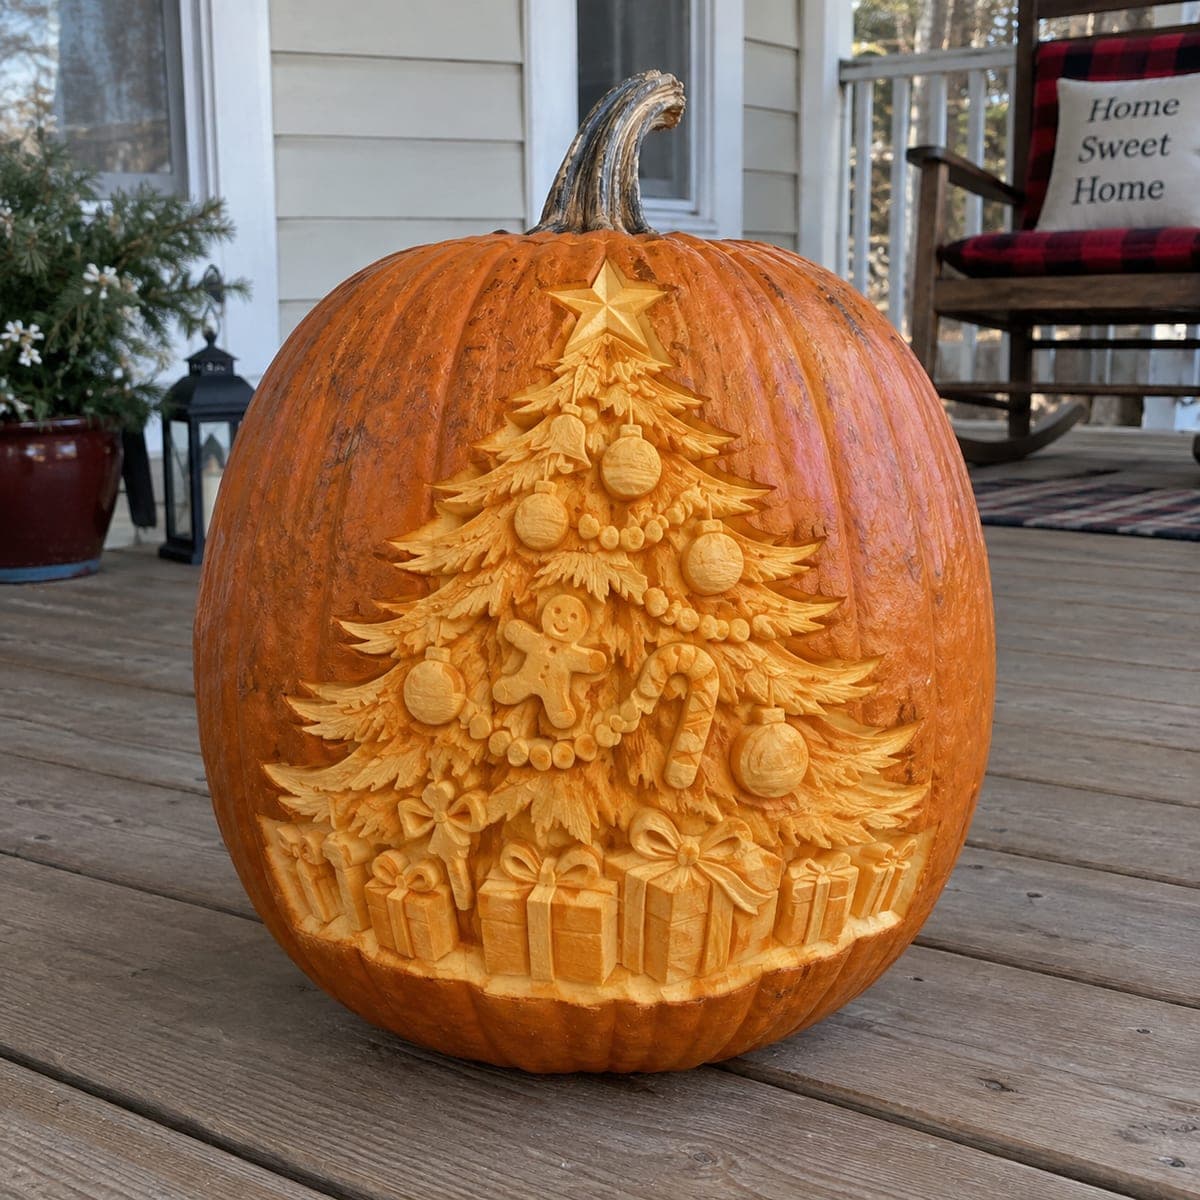
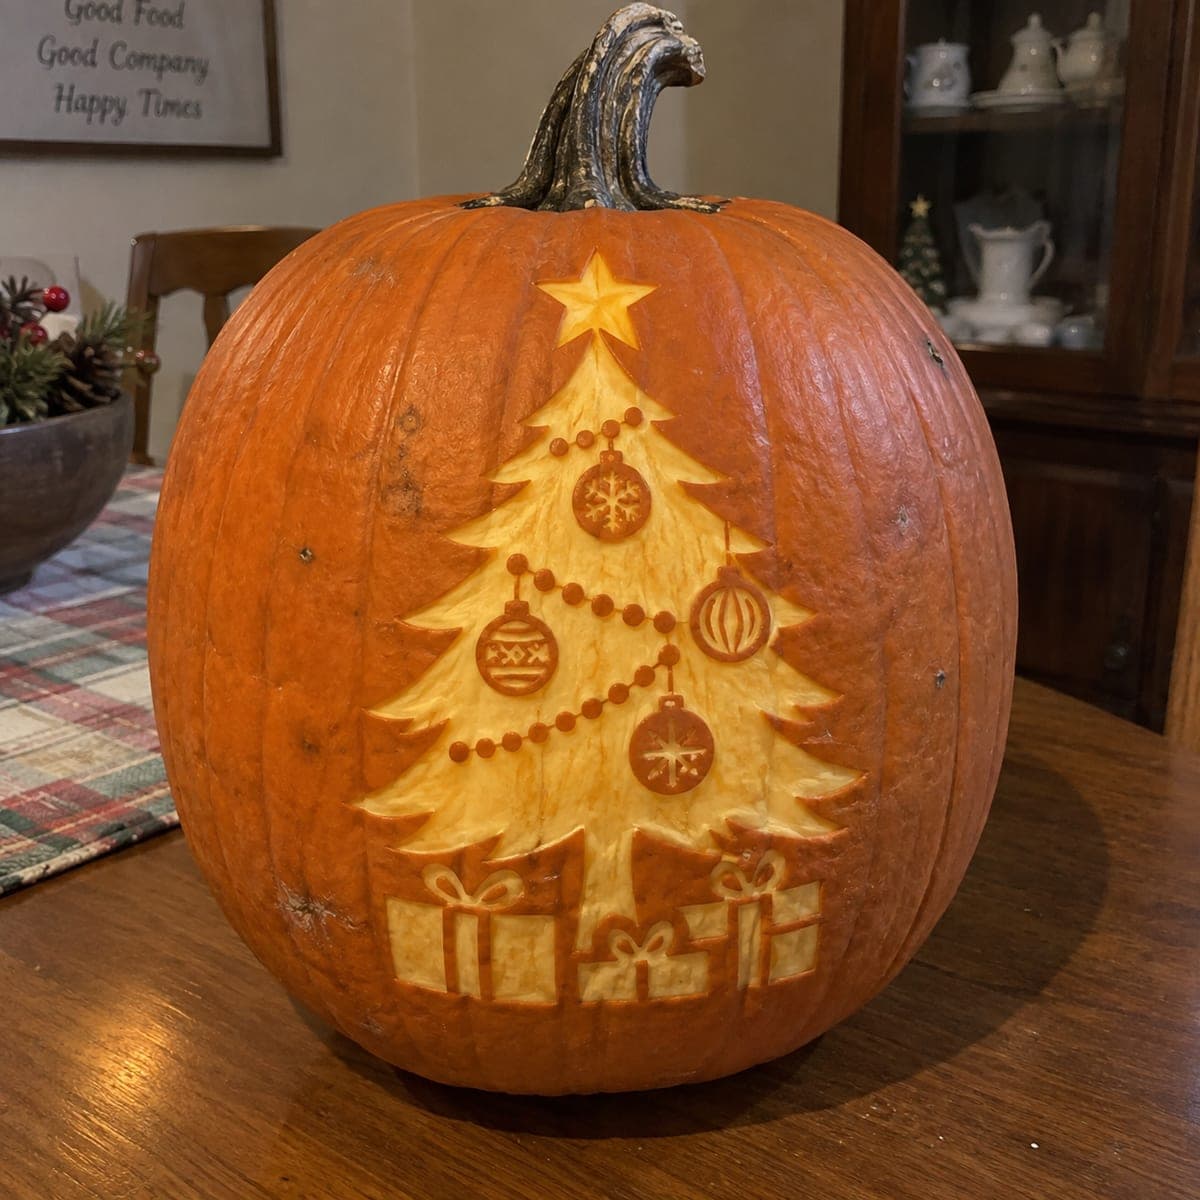
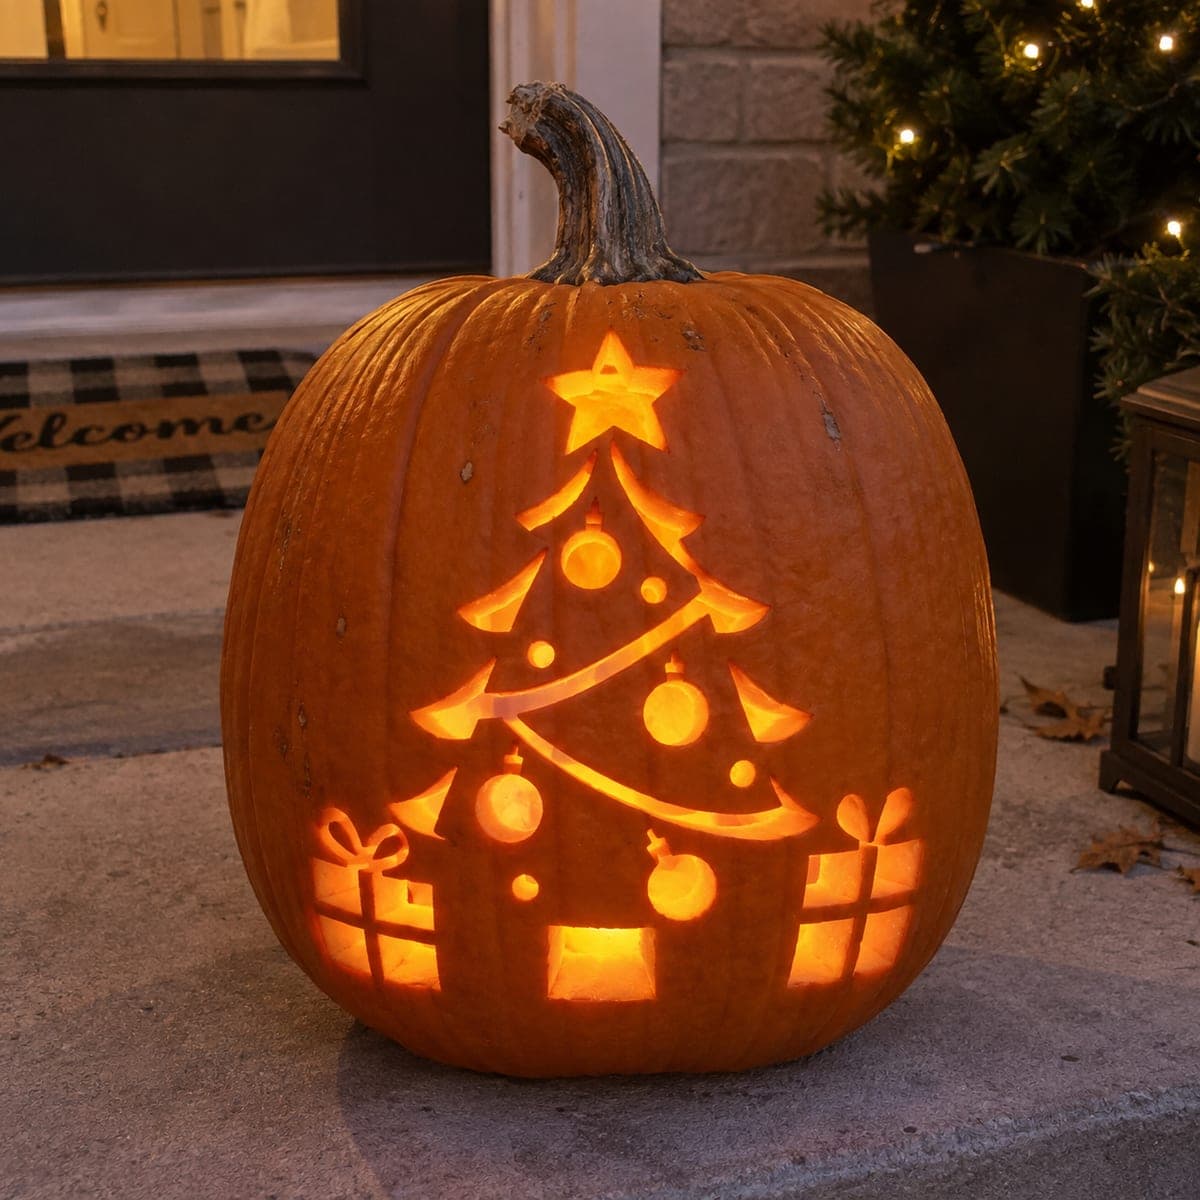
A decorated Christmas tree with garland, ornaments, a star topper, and wrapped presents underneath is etched into this out-of-season pumpkin. Every element is a skin peel at slightly different depths, which lets the ornaments and gift bows pop brighter than the branches. Carve the tree's triangular tiers first, then cut the garland swags and ornament circles back into them. A quirky idea for a Christmas-in-October party or anyone who just cannot wait for December.

This is an AI-generated concept image: a realistic, carvable design idea rather than a photo of a finished carve. AI concepts are always labeled and sit out the leaderboard and the contest.

No ratings yet · Sign in to rate
Comments (0)

  • No comments yet — be the first.

Save without an account. Sign in to like or comment.

Our tips for carving a similar design

The whole design lives in the skin, so nothing is cut all the way through except maybe the star. The core trick is varying the peel depth: shave the tree tiers to a medium glow, then carve the garland, ornaments, and gift bows a touch shallower so they read brighter against the branches. Plan your tiers first, then layer the decorations back on top.

Written by PumpkinCarvingIdeas.com, inspired by the image above. These are our suggestions, not instructions from the uploader. This approach to the AI concept has not been tested on a real pumpkin.

From pumpkin to porch

  1. Transfer the full pattern

    Tape your stencil flat against the front of the pumpkin and poke through all the outlines with a stylus or pin. Keep dots close together on the ornament circles and gift bows so the curves stay readable. Since this is a shading design, mark the tree outline, the garland swags, and each present as separate shapes. Peel the stencil off and connect any faint dots with a pencil before you start cutting.

  2. Peel the tree tiers first

    Using a ribbon or lino-style scoop, remove just the outer skin inside the triangular branch tiers down to a smooth medium layer. Work top to bottom and keep the depth even so the whole tree glows the same. Leave the pointed branch edges crisp so each tier stays distinct. Do not dig deep here; you want a warm mid glow, not a cutout.

  3. Carve the presents and their bows

    Shave the three gift boxes to the same medium depth as the tree so they blend into the scene. Then go a little shallower on the ribbons and bows, leaving them slightly thicker so they catch more light and pop forward. Keep the box edges straight with a small detail knife. Leave narrow strips of untouched skin between the boxes so they read as separate gifts.

  4. Cut the garland and ornaments brighter

    Trace the garland swags and the ornament circles back into the already-peeled tree, taking off a thin extra layer so they glow brighter than the branches. Keep the little bead dots along the garland evenly spaced and connected by a thin bridge of thinned skin. Shave the snowflake and pattern details on each ornament shallowest of all for the brightest accents. Take your time; these small shapes are where the design earns its detail.

  5. Open the star topper

    Save the star for last since it is the only spot you may cut fully through. Carve it cleanly for the brightest point of light, or leave it as a very thin peel if you want a softer twinkle. If you cut through, keep the five points slightly rounded at the inner angles so they do not tear. Clean up any stray strings from the back of the opening.

  6. Light it and photograph

    Drop in a battery LED, warm white or a soft amber, and set it toward the front so the peels light evenly. Rotate the pumpkin until the tree, garland, and gifts all glow at their different depths. Shoot in a dim room to capture the layered brightness. A thin coat of petroleum jelly on the cut edges slows drying if you want it to last through your party.

Gather your supplies

Check things off as you get ready.

Work on a stable surface, keep your free hand out of the cutting path, and have an adult handle sharp tools.

Three levels of light

  • Leave intact

    The untouched orange skin around the tree and the gaps between the gift boxes stay dark for contrast.

  • Peel & shade

    The tree tiers and the gift boxes get a medium peel for a steady mid glow.

  • Cut through

    The star topper is the brightest point, either a full cutout or the thinnest peel; the garland, ornaments, and bows sit just shallower than the branches for extra pop.

Learn the carving basics

Before you start cutting

Do I have to cut the star all the way through?

No. A full cutout gives you the single brightest point, which suits a star topper nicely. But you can also leave it as a very thin peel for a softer twinkle that matches the etched feel of the rest of the design. Either way, save it for last so the surrounding skin stays firm while you work.

How do I keep the ornaments brighter than the tree?

It is all about depth. Peel the tree tiers to a medium layer first, then remove just a thin extra sliver on the ornaments, garland beads, and bows. That shallower skin lets more light through, so those details read brighter than the branches behind them. Work in stages and hold the pumpkin up to a light to check as you go.

This is a concept image, so how realistic is it to carve?

The design is fully doable on a real pumpkin because almost everything is surface shading rather than deep cuts. Keep the thin garland beads connected with small bridges of thinned skin so they do not crumble. The only spot to cut through is the star, and rounding its inner angles keeps the points from tearing.

Your take belongs here, too.

Changed a detail? Made it simpler? Share a photo of your version and tell the community what worked.

Share your pumpkin

More pumpkins like this

You've reached the end · 8 pumpkins
The Patch Report

Fresh pumpkins, in your inbox.

The best new carvings, ideas worth stealing, and how-tos for carving season. Short, seasonal, and gone by November.

A short email during carving season. Unsubscribe anytime. See our privacy policy.