Halloween Pumpkin Carving Contest · Starts October 1st · $500 in prizes
← Back to ideas
@ai_concepts
Sep 25, 2026
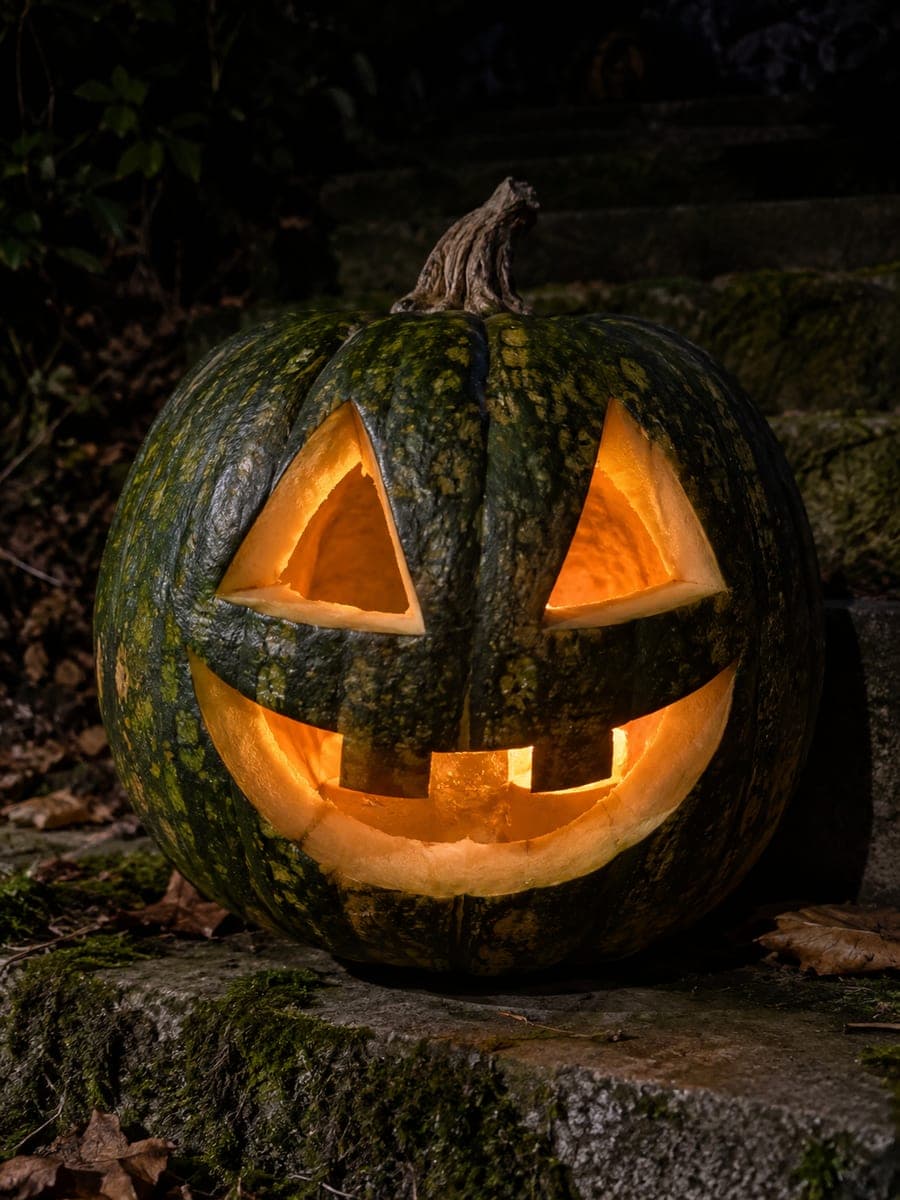
Classic Jack-O-Lantern With Triangle Eyes and Crescent GrinAI
0

Report this carving

Tell us what is wrong. Reports are private.

Classic Jack-O-Lantern With Triangle Eyes and Crescent Grin

Two empty triangle eyes, a triangle nose, and a broad crescent smile with two chunky upper-rooted square teeth make this the most recognizable traditional pumpkin face carving you can put on a doorstep. Cut the two triangular eyes first and use their spacing to center the nose below, then carve the crescent grin last. The two square teeth need full-width roots at the top lip so they survive the hollowing process intact. This classic design looks best when lit with a real wax candle that flickers in the breeze.

No ratings yet · Sign in to rate

Comments (0)

  • No comments yet — be the first.

Save without an account. Sign in to like or comment.

Our tips for carving a similar design

This design succeeds through correct sequence and proportions: the two triangular eyes set the spacing, the nose drops centered between them, and the crescent grin anchors the lower face. The two square teeth need full-width roots at the top lip so they hold when the large mouth area is removed last. Cut the smaller features first while the rind is stiffest.

From pumpkin to porch

  1. Hollow the pumpkin through a back or bottom lid

    Cut a wide lid from the back or bottom so the entry hole is hidden from the display side. Scoop out seeds and stringy fibers until the inner wall is about 25mm thick throughout. A consistent wall makes the triangle cuts cleaner and keeps the grin from flexing when the mouth section is removed.

  2. Transfer the face layout

    Tape a template to the front face and pierce the outline of both triangular eyes with an awl at 8mm intervals. Pierce the triangle nose and crescent grin outline the same way. Remove the template and connect the dots with a washable marker, confirming the nose sits centered and the grin arc is symmetrical.

  3. Cut the triangle eyes

    Start with the two triangle eyes since they are the face's landmark shapes and their spacing anchors everything else. Use a narrow pumpkin saw and cut each side of the triangle in one firm stroke. Pop out each triangle piece and clear any ragged edges with a detail knife.

  4. Cut the triangle nose

    The nose sits between and slightly below the eyes. Cut its three sides cleanly and pop out the small triangle. A nose that mirrors the eye triangle shape in style, if not size, gives the face a cohesive classic look.

  5. Carve the crescent grin with rooted teeth

    Score the top edge of each square tooth first so the root lines are clear before any gap material is removed. Cut the two gap sections beside and between the teeth, then remove the large curved sections of the grin. The crescent shape curves upward at both ends; cutting from one end through to the other in one arc keeps it symmetrical.

  6. Light and display on the doorstep

    A flickering amber LED best mimics the classic candle glow this design was made for. Set the pumpkin at doorstep height where the glowing triangle eyes are visible from the street. The crescent grin and triangle features glow warmly against the uncut orange rind.

Written with AI to match this design

Gather your supplies

Check things off as you get ready.

Work on a stable surface, keep your free hand out of the cutting path, and have an adult handle sharp tools.

Three levels of light

  • Leave intact

    The full orange rind areas between and around all features: cheeks, forehead, and chin

  • Peel & shade

    None, this design uses full cutouts

  • Cut through

    Both triangular eye holes, the triangular nose hole, the full crescent grin opening, and both gaps beside and between the two square teeth

Learn the carving basics

Before you start cutting

How do I get triangle eyes that look sharp rather than rounded at the corners?

Mark each corner of the triangle clearly with a dot before cutting. When you approach a corner, stop the saw, pivot the blade, and continue in the new direction. Trying to saw through a corner in one continuous stroke rounds it off. Three separate strokes meeting at three clear corner dots give the crispest triangle.

My crescent grin bows the wrong way and looks like a frown. What happened?

The crescent grin curves upward at both ends, meaning the center of the arc is the lowest point and both tips point up. If the tips point down it reads as a frown. Draw the arc carefully before cutting and check it from a few feet away in a mirror or photo to confirm the upward curve before the saw touches rind.

Is it safe to use a real wax candle inside this pumpkin?

A short pillar or taper candle in a stable holder is the traditional lighting for this design and works well if adults supervise it at all times. Keep the pumpkin away from dry leaves, fabric, or overhanging decorations. A battery-powered flickering LED is a safer alternative that gives a nearly identical visual effect and can be left unattended.

Your take belongs here, too.

Changed a detail? Made it simpler? Share a photo of your version and tell the community what worked.

Share your pumpkin

More pumpkins like this

You've reached the end · 8 pumpkins
The Patch Report

Fresh pumpkins, in your inbox.

The best new carvings, ideas worth stealing, and how-tos for carving season. Short, seasonal, and gone by November.

A short email during carving season. Unsubscribe anytime. See our privacy policy.