Halloween Pumpkin Carving Contest · Starts October 1st · $500 in prizes
← Back to ideas
@ai_concepts
Jul 17, 2026
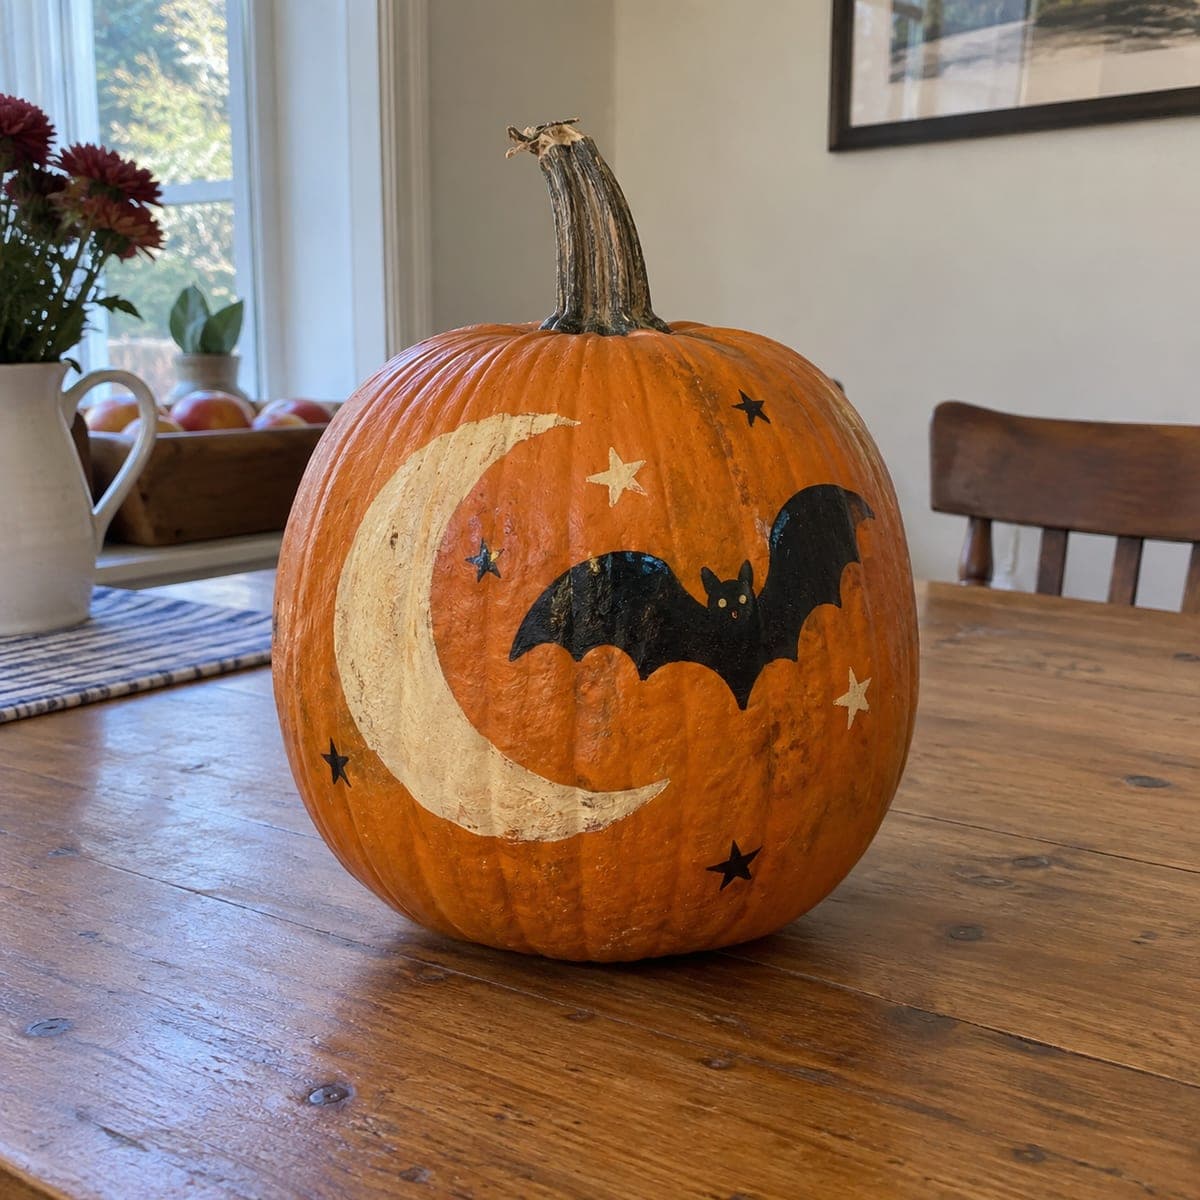
Crescent Moon and Bats Painted PumpkinAI
0

Crescent Moon and Bats Painted Pumpkin

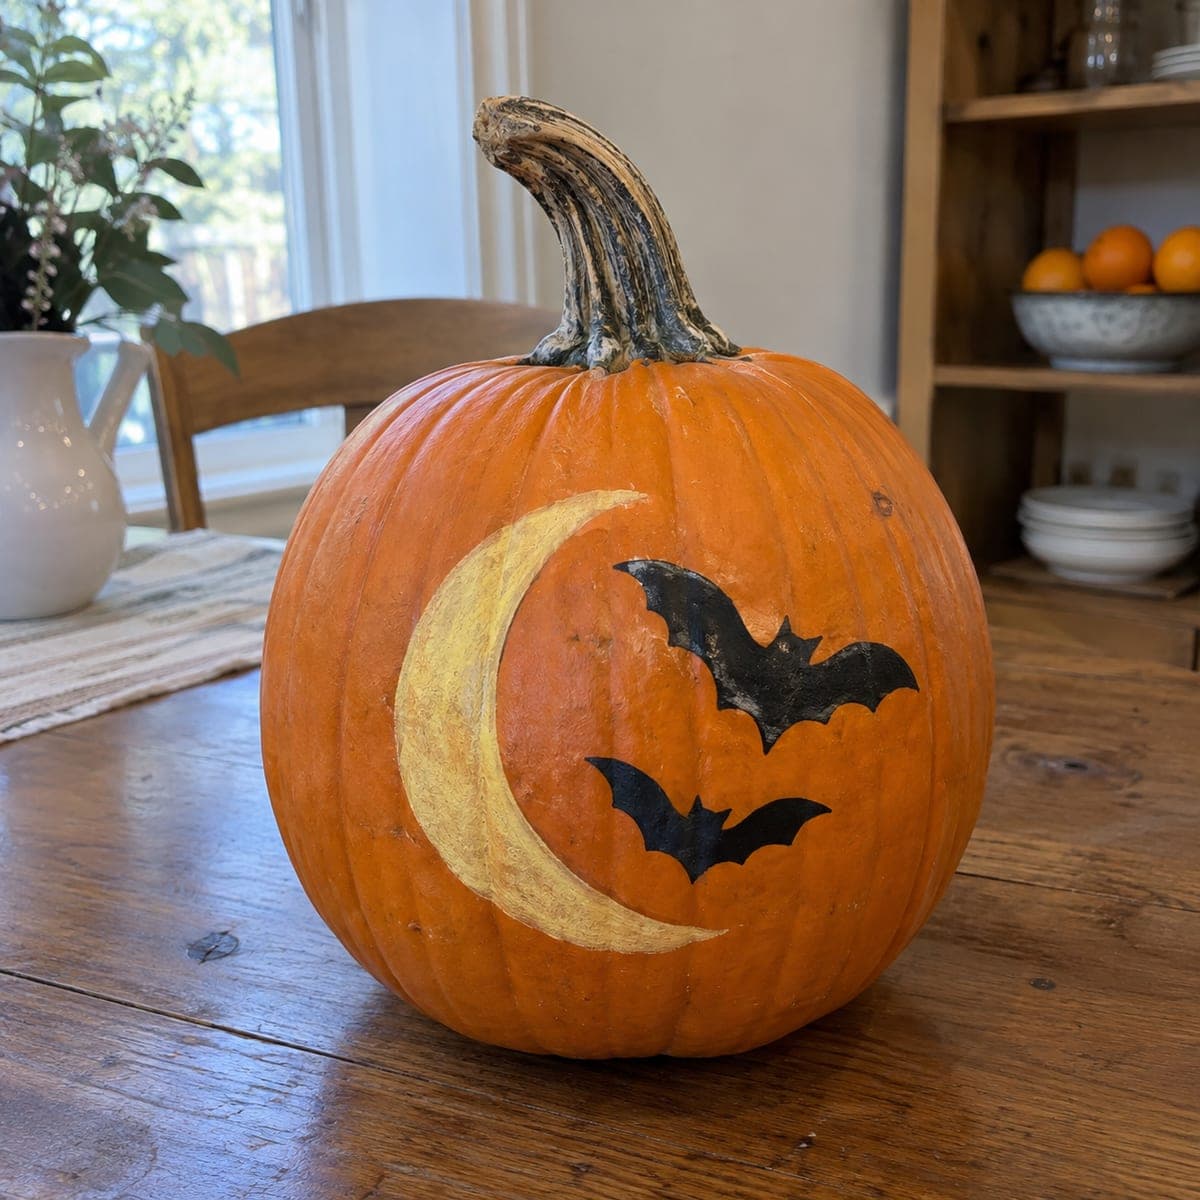
A golden crescent moon curves along one side of this pumpkin while two black bats swoop past, a simple no-carve design with real front-door impact. Metallic gold craft paint gives the moon a soft shimmer, and the bats are flat black silhouettes that anyone can manage freehand. Cut a paper bat template, trace it twice at different angles, and the composition instantly feels like motion.

This is an AI-generated concept image: a realistic, carvable design idea rather than a photo of a finished carve. AI concepts are always labeled and sit out the leaderboard and the contest.

No ratings yet · Sign in to rate
Comments (0)

  • No comments yet — be the first.

Save without an account. Sign in to like or comment.

Our tips for carving a similar design

The core trick here is contrast: a warm metallic gold crescent glowing against the orange skin, with two flat black bats angled to suggest flight. Since this is a no-carve concept, the whole look comes from paint and clean edges rather than cutting. Plan your layout first so the moon hugs one side and the bats sweep diagonally across the open space.

Written by PumpkinCarvingIdeas.com, inspired by the image above. These are our suggestions, not instructions from the uploader. This approach to the AI concept has not been tested on a real pumpkin.

From pumpkin to porch

  1. Wipe down and plan the layout

    Wash the pumpkin with plain water and dry it fully so paint grips the skin. Hold your moon and bat templates against the surface and shift them until the moon sits on one side and the bats angle across the middle. Mark rough positions with a washable marker or a few pencil dots. Standing back to check spacing now saves repainting later.

  2. Trace the crescent moon

    Cut a crescent shape from paper, tape it lightly in place, and trace around it with a pencil. Keep the inner curve smooth so the moon reads clearly from a distance. Pull the template away and clean up the outline freehand if any spot looks lumpy. A crescent is forgiving, so do not stress over perfect symmetry.

  3. Trace both bats at different angles

    Cut one bat from folded paper so the wings are even, then trace it twice, tilting it a little differently each time. Placing one bat higher and one lower with slightly different angles instantly suggests motion. Keep the wingtips a bit thick when you trace so the silhouettes stay bold and easy to fill. Leave a little space between the two bats so they do not blur together.

  4. Paint the gold moon

    Fill the crescent with metallic gold craft paint using a soft flat brush, working in thin coats. Let each coat dry before adding the next so the shimmer builds evenly without streaks. Two or three light layers give a richer glow than one thick pass. Steady the pumpkin against a towel roll so it does not roll while you work.

  5. Fill the bats in flat black

    Switch to a small round brush and fill each bat with flat black craft paint. Outline the wing edges first, then fill the middle so you keep crisp borders. A second coat deepens the black and hides any orange peeking through. Let everything dry completely before moving the pumpkin.

  6. Stage and photograph

    Set the finished pumpkin on a porch step or table with the moon and bats facing your main sightline. A small LED spotlight from the side makes the metallic gold catch the light beautifully at dusk. Never use a candle near painted skin. Snap your photo in soft evening light to show off the shimmer.

Gather your supplies

Check things off as you get ready.

Work on a stable surface, keep your free hand out of the cutting path, and have an adult handle sharp tools.

Three levels of light

  • Leave intact

    The orange body stays untouched as the night sky backdrop.

  • Peel & shade

    If you want a glow, lightly shave the skin inside the crescent so it reads as a dim golden moon when lit from behind.

  • Cut through

    For a hybrid version, cut fully through the two bat silhouettes so lamplight shines through them as the brightest accents.

Learn the carving basics

Before you start cutting

Do I have to cut anything for this design?

No, the pictured concept is fully no-carve, so paint alone does all the work. That makes it a safe, mess-free project for kids or first-timers. If you later want a glow, you can add a shallow peel or a small cutout as an optional step.

How do I get the two bats to look like they are flying?

Trace the same bat template twice but tilt it at different angles, placing one higher and one lower. Slightly different wing angles read as movement rather than a flat repeat. Leaving open space between them keeps each silhouette clear.

Will the metallic gold show up at night?

Metallic paint reflects light rather than glowing on its own, so it looks best with a side LED spotlight or porch light hitting it. Two or three thin coats give the strongest shimmer. Avoid candles, since open flame near paint is a fire risk.

Your take belongs here, too.

Changed a detail? Made it simpler? Share a photo of your version and tell the community what worked.

Share your pumpkin

More pumpkins like this

You've reached the end · 8 pumpkins
The Patch Report

Fresh pumpkins, in your inbox.

The best new carvings, ideas worth stealing, and how-tos for carving season. Short, seasonal, and gone by November.

A short email during carving season. Unsubscribe anytime. See our privacy policy.