Halloween Pumpkin Carving Contest · Starts October 1st · $500 in prizes
← Back to ideas
@ai_concepts
Sep 25, 2026
Crescent Moon Pumpkin with Teardrop Ray FanAI
0

Report this carving

Tell us what is wrong. Reports are private.

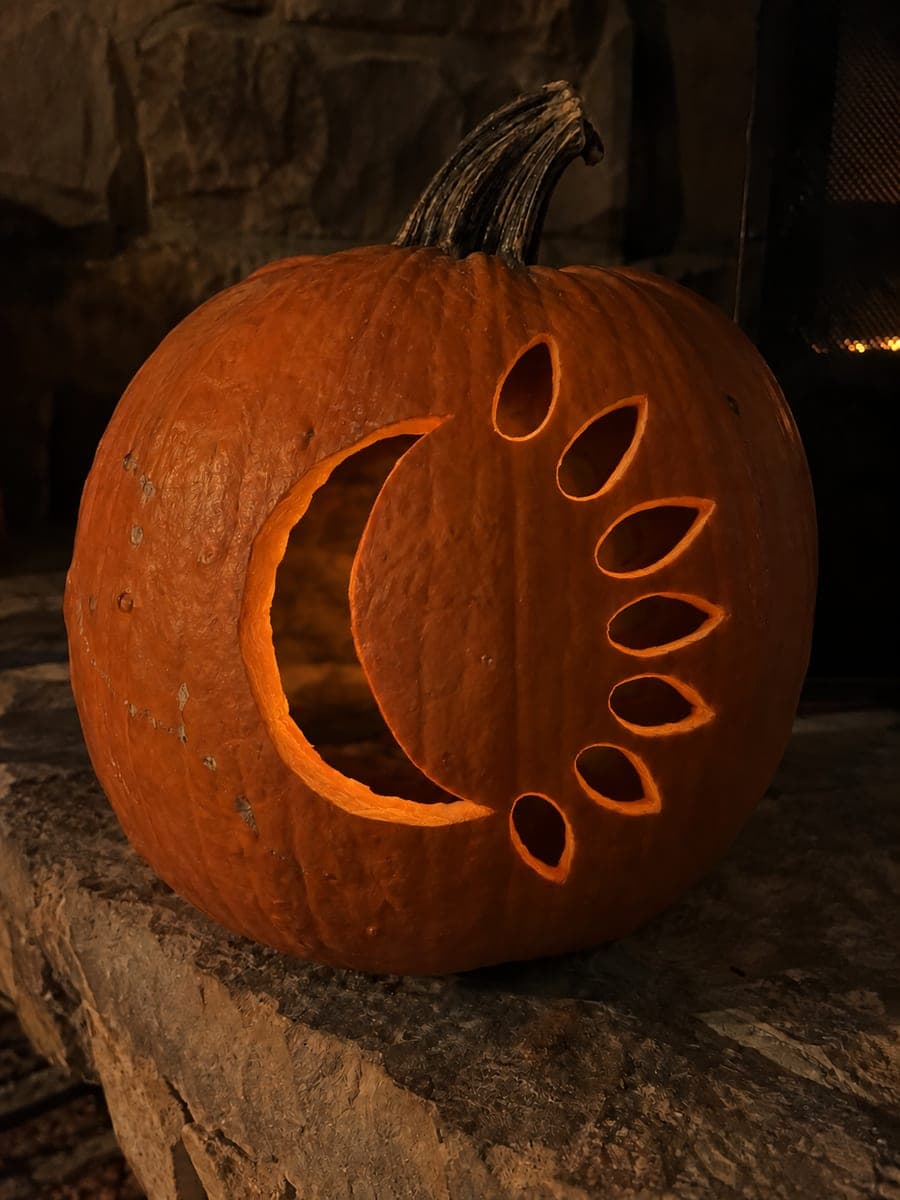
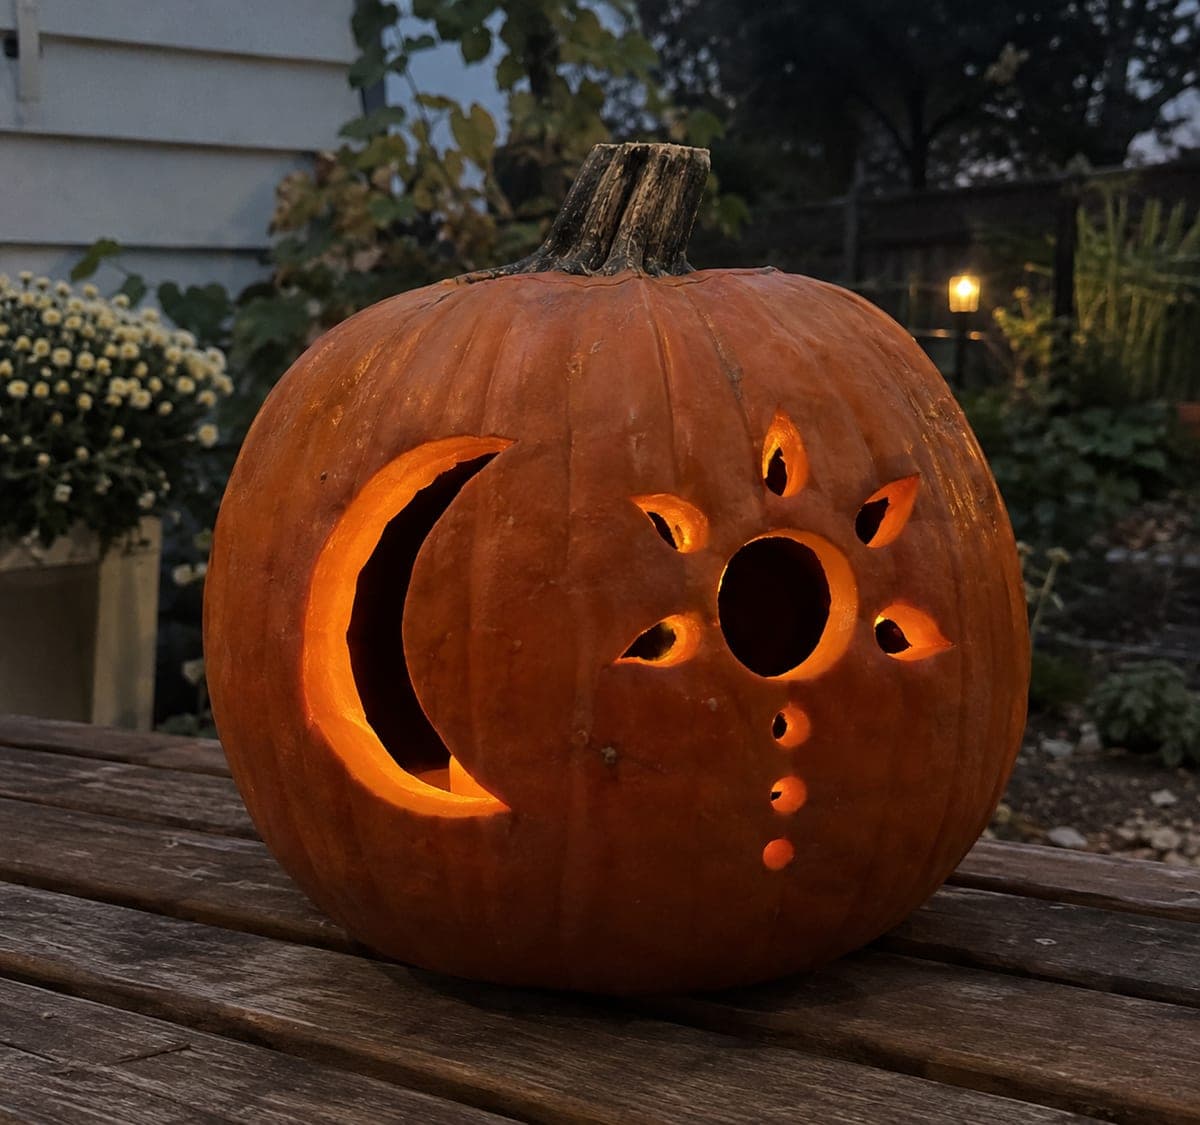
Crescent Moon Pumpkin with Teardrop Ray Fan

A large crescent moon sits at the center of a radiating fan of teardrop ray holes on this hard crescent moon pumpkin carving, glowing on a stone hearth. Cut the crescent first as an empty shape, then lay out the ray holes evenly around it with a light pencil mark before committing any cuts. Maintain strong shell strips between each ray hole and the main crescent so the overall structure does not flex. A flickering candle behind this design animates the ray tips beautifully.

No ratings yet · Sign in to rate
Comments (0)

  • No comments yet — be the first.

Save without an account. Sign in to like or comment.

Our tips for carving a similar design

The crescent sits at the center of the composition and the teardrop ray holes fan outward from it like a halo, so the rind strips between each ray and the central crescent are the structural skeleton of the whole piece. Cutting the crescent first and then mapping the rays around it ensures the spacing is even and the bridges remain at consistent width throughout the process. A flickering warm LED breathes life into the ray tips.

From pumpkin to porch

  1. Hollow and thickness-check

    Cut a back-side lid and scoop to a three-quarter-inch wall for this design. Thinner walls help the narrow rind strips between teardrop rays hold their shape without flexing. Confirm wall thickness with a measuring probe or pushpin before transferring the design.

  2. Transfer the design

    Print the crescent and ray layout as a single template so all spacings are locked in. Tape it to the pumpkin face and perforate every outline with a pushpin at quarter-inch intervals. Connect the dots with chalk marker before removing the template.

  3. Cut the crescent

    Remove the central crescent as a clean single aperture using the two-arc method: outer convex curve first, then the inner concave curve. Confirm the surrounding rind is firm and all crescent bridge connections are at least three-quarters of an inch wide before proceeding.

  4. Mark and verify ray spacing

    Before cutting any ray, hold the pumpkin at arm's length and check that all teardrop outlines are evenly distributed around the crescent. Adjust any marks that are off by more than a quarter-inch; symmetry matters more here than precision at individual shapes.

  5. Cut the ray holes from outer edge inward

    Cut the tip of each teardrop first, then follow the sides back toward the crescent. Work around the fan in order rather than jumping to opposite sides; this prevents uneven shell flex. Keep a strong rind strip between each ray hole and the main crescent aperture.

  6. Light on the stone hearth

    Place a flickering warm LED inside. Set the pumpkin on a stone hearth or flat stone surface and observe from a normal viewing distance. The teardrop ray tips should glow at the same intensity as the crescent; reposition the LED if any section looks dim.

Written with AI to match this design

Gather your supplies

Check things off as you get ready.

Work on a stable surface, keep your free hand out of the cutting path, and have an adult handle sharp tools.

Three levels of light

  • Leave intact

    All rind strips between adjacent teardrop rays and between the rays and the crescent stay solid and dark.

  • Peel & shade

    None; all shapes are full through cuts.

  • Cut through

    The central crescent moon and all teardrop ray holes are cut through completely for full glow.

Learn the carving basics

Before you start cutting

How many teardrop rays should I plan for this design?

Eight to twelve rays is a practical range. Fewer than eight leaves large gaps that look unintentional; more than twelve can narrow the rind strips between rays to the point of fragility on a medium pumpkin. Space them evenly using a protractor or printed template.

The rind strip between two adjacent rays cracked during cutting. What do I do?

Press the cracked strip back together gently and push a small toothpick through both sides of the crack from inside the pumpkin, then dab craft glue at the split. Allow it to set for an hour before continuing. For display, the crack will be nearly invisible once the pumpkin is lit from inside.

Why does a flickering LED work better here than a steady one?

The teardrop ray tips are narrow apertures; a flickering LED animates them with subtle pulse, making the whole ray fan appear to breathe. A steady LED also works fine but gives the piece a more static look.

Your take belongs here, too.

Changed a detail? Made it simpler? Share a photo of your version and tell the community what worked.

Share your pumpkin

More pumpkins like this

You've reached the end · 8 pumpkins
The Patch Report

Fresh pumpkins, in your inbox.

The best new carvings, ideas worth stealing, and how-tos for carving season. Short, seasonal, and gone by November.

A short email during carving season. Unsubscribe anytime. See our privacy policy.