Halloween Pumpkin Carving Contest · Starts October 1st · $500 in prizes
← Back to ideas
@ai_concepts
Sep 25, 2026
Swirling Crescent Moons Pumpkin with Decorative Ring CutoutsAI
0

Report this carving

Tell us what is wrong. Reports are private.

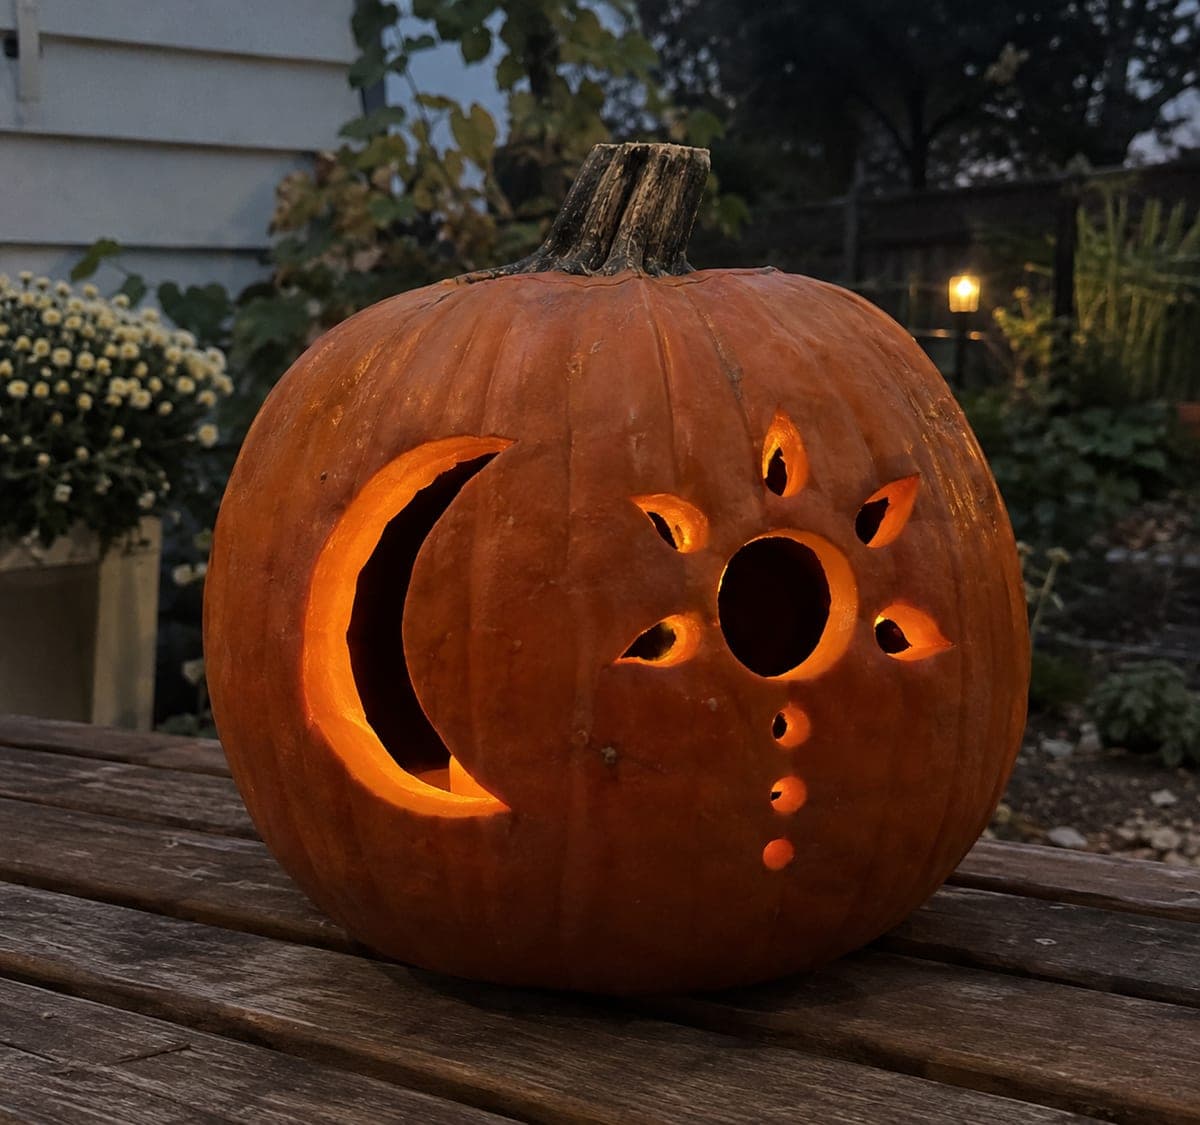
Swirling Crescent Moons Pumpkin with Decorative Ring Cutouts

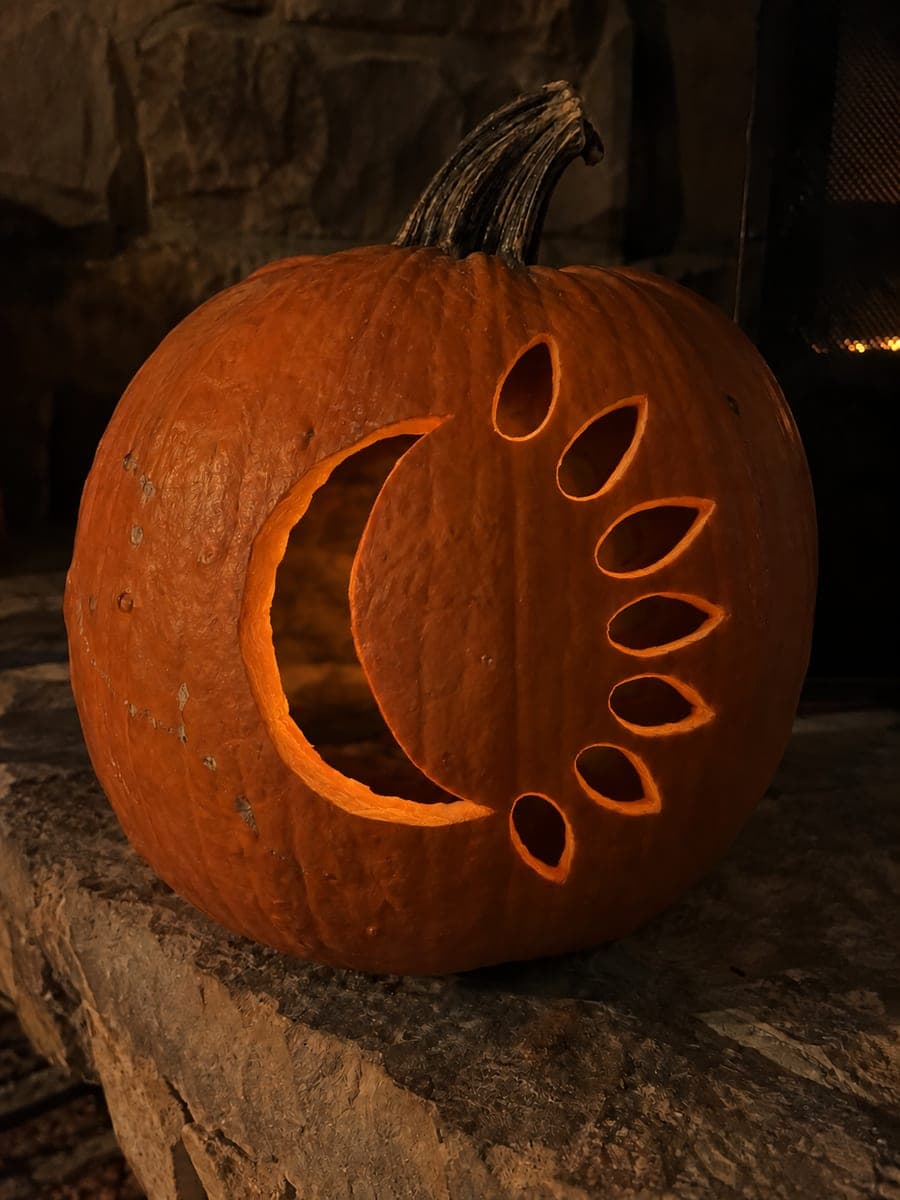
Multiple swirling crescent shapes and a ring of accent holes spiral across this expert crescent moon pumpkin carving, displayed on a dark deck. Every crescent and accent hole is a fully independent through cut with no isolated retained rind, so all bridges must connect back to the outer shell. Map the entire design on paper before transferring to the pumpkin, confirming every piece of rind has a path back to the frame. Placing it on a dark surface lets the full swirling composition read clearly at night.

No ratings yet · Sign in to rate
Comments (0)

  • No comments yet — be the first.

Save without an account. Sign in to like or comment.

Our tips for carving a similar design

Every crescent and accent hole in this design is a fully independent through cut with absolutely no isolated retained rind: every piece of rind must trace a connected path back to the outer shell frame. Mapping the complete design on paper and verifying every rind path before touching the pumpkin is not optional; it is the single most important step in a composition this complex. The swirling orientation of the crescents creates a dynamic spiral effect that rewards careful planning.

From pumpkin to porch

  1. Draft and verify the complete design on paper

    Draw the full swirling composition to scale on paper matching the pumpkin face dimensions. Shade all cut areas, then trace each remaining rind strip with a colored pen to confirm it connects continuously to the outer shell frame. Every strip must connect. Adjust the design until no disconnected islands remain.

  2. Hollow to precise wall thickness

    Cut a back-side lid and scoop to a consistent three-quarter-inch wall. Measure with a depth probe at multiple points across the face so no section is thicker or thinner than the others. Uniform wall thickness makes every cut behave predictably.

  3. Transfer the design with a pinprick template

    Tape the paper template firmly to the pumpkin face and perforate every outline at close intervals. Connect the perforations with chalk marker. Work section by section to avoid smudging guide lines before cutting.

  4. Cut crescents starting from the center outward

    Begin with whichever crescent is most central and structurally dominant. Remove it cleanly, confirm its surrounding bridges are solid, then work outward to adjacent crescents. Never jump to a non-adjacent shape; always complete the nearest uncut element first to keep the shell balanced.

  5. Add accent ring holes last

    Cut the smaller accent ring holes only after all crescent shapes are complete and the shell is confirmed stable. These are the finishing detail pass; adding them while main structural cuts are still incomplete risks cracking a bridge under saw pressure.

  6. Display on a dark surface

    Place a bright warm LED inside toward the center. Set the pumpkin on a dark deck or dark tablecloth so the surrounding surface does not compete with the glowing shapes. Step back to at least six feet to appreciate the full swirling composition.

Written with AI to match this design

Gather your supplies

Check things off as you get ready.

Work on a stable surface, keep your free hand out of the cutting path, and have an adult handle sharp tools.

Three levels of light

  • Leave intact

    The outer shell frame and every connecting rind strip between shapes stays solid and dark.

  • Peel & shade

    None; all shapes are full through cuts.

  • Cut through

    Every crescent moon shape and every accent hole in the ring is cut completely through for full-intensity glow.

Learn the carving basics

Before you start cutting

How do I know if I have planned enough bridge width before I start cutting?

On your paper draft, draw every rind strip at its actual planned width and check that no strip narrows below three-quarters of an inch at any point along its length. Then hold the paper up to a light and look for any strip that seems nearly invisible; those are danger zones that need widening before you transfer the design.

Partway through cutting I realized a crescent I just cut left a floating island of rind. Can I fix it?

If the isolated piece is small, you can remove it entirely rather than leaving it dangling. If it is a large section, push a toothpick through it into an adjacent connected rind area and glue both ends; this bridges the gap invisibly from inside. Prevention through the paper-verification step is always better than repair.

Why should I avoid placing this on a reflective surface?

A light-colored or reflective surface bounces internal glow outward and creates a visible halo around the pumpkin base that competes with the intricate composition on the face. A dark surface concentrates all attention on the swirling pattern.

Your take belongs here, too.

Changed a detail? Made it simpler? Share a photo of your version and tell the community what worked.

Share your pumpkin

More pumpkins like this

You've reached the end · 8 pumpkins
The Patch Report

Fresh pumpkins, in your inbox.

The best new carvings, ideas worth stealing, and how-tos for carving season. Short, seasonal, and gone by November.

A short email during carving season. Unsubscribe anytime. See our privacy policy.