Halloween Pumpkin Carving Contest · Starts October 1st · $500 in prizes
← Back to ideas
@ai_concepts
Sep 25, 2026
Deer and Pine Tree Campfire Pumpkin SceneAI
0

Report this carving

Tell us what is wrong. Reports are private.

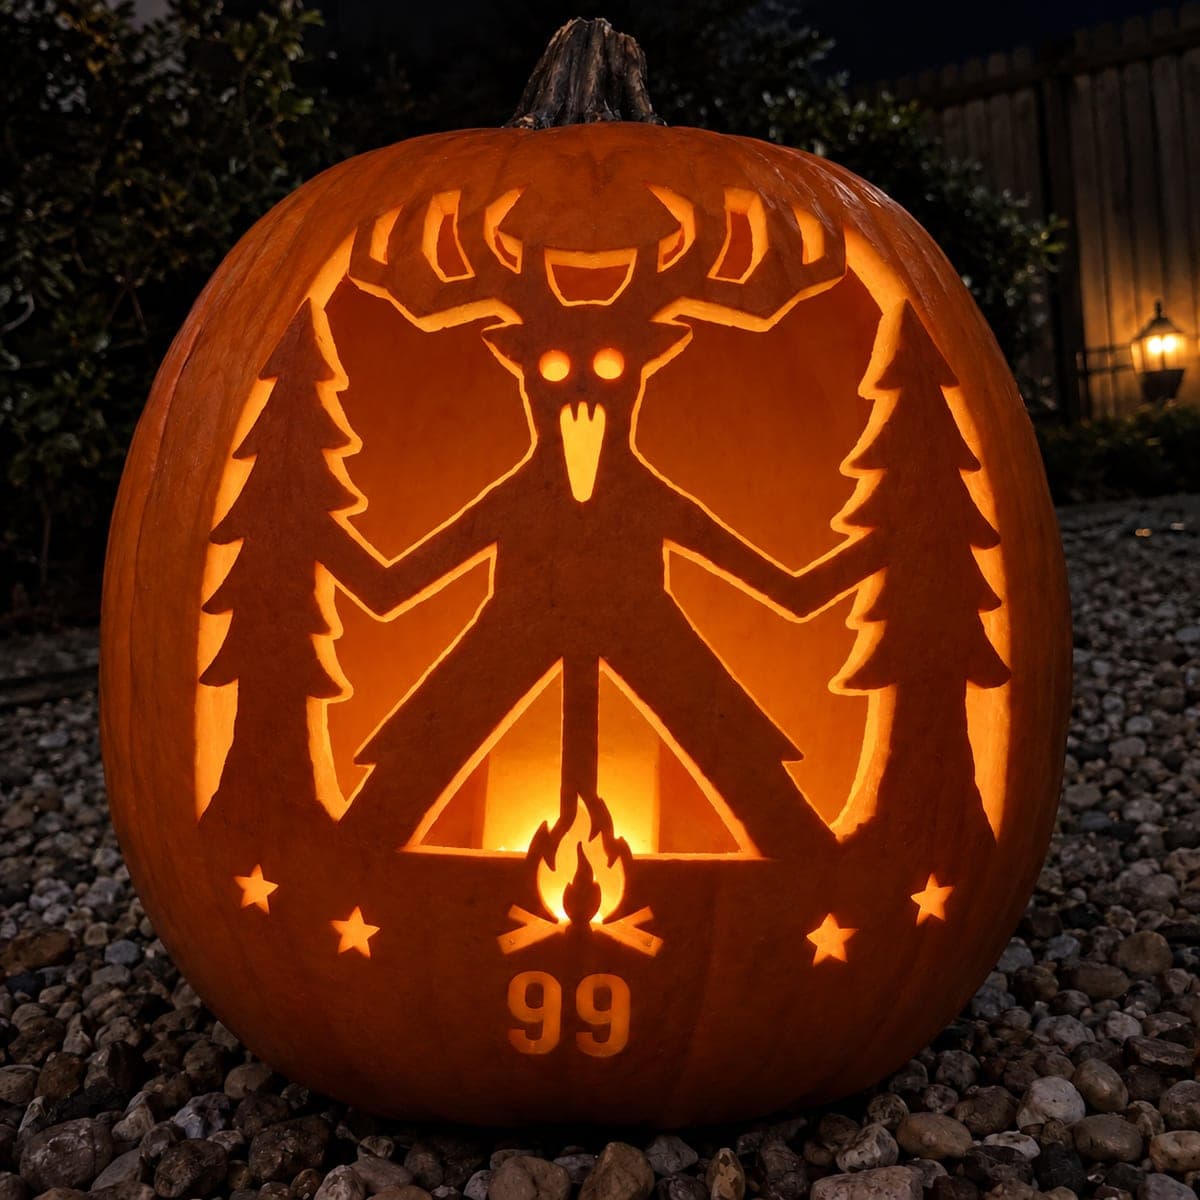
Deer and Pine Tree Campfire Pumpkin Scene

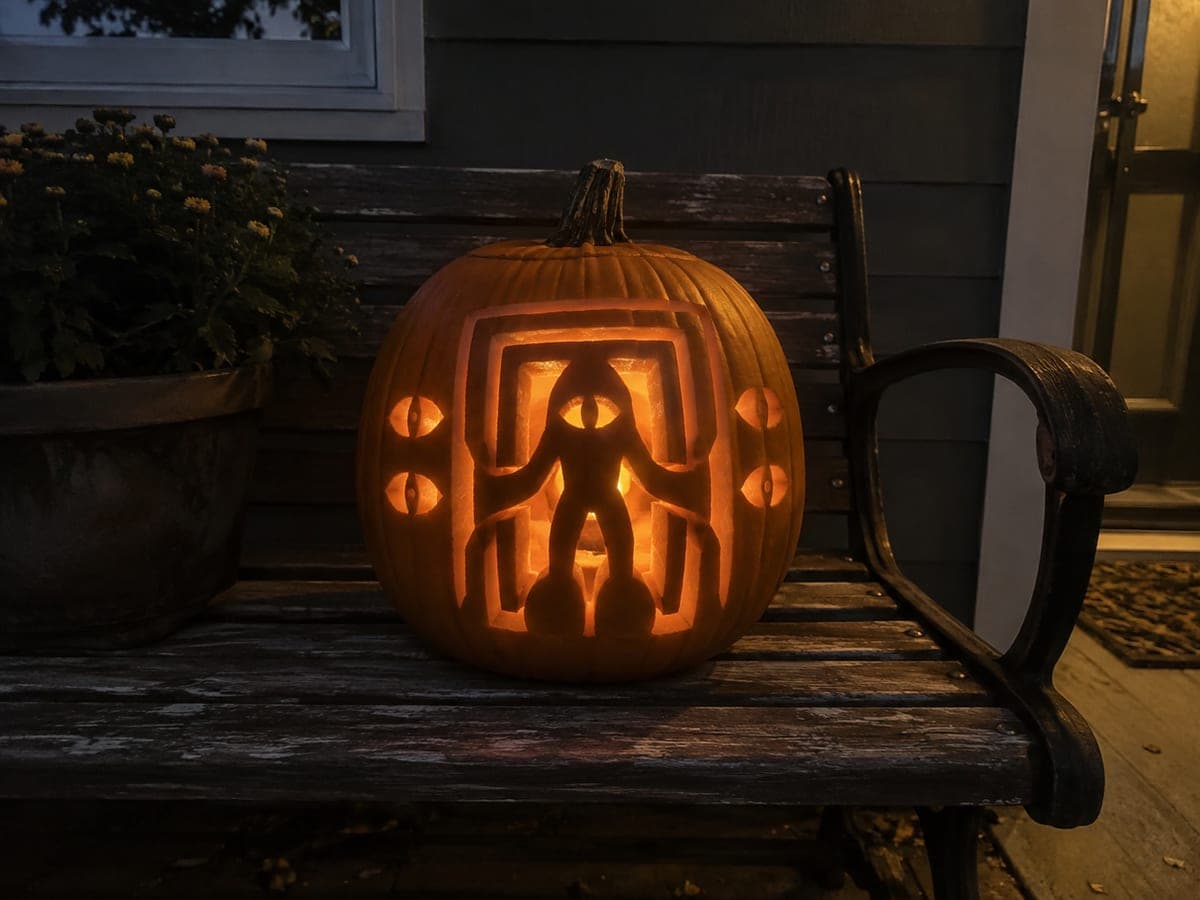
This hard 99 nights in the forest pumpkin carving builds a full forest scene with the deer figure connected through its legs, hands, antlers, and trees to the surrounding frame, while separate flame and log holes glow warmly from inside. Carve the connecting legs and hand points before opening the flame holes, so the deer stays structurally sound throughout the process. Placing this pumpkin indoors on a wooden surface with only candlelight around it sets an appropriately atmospheric forest mood.

No ratings yet · Sign in to rate
Comments (0)

  • No comments yet — be the first.

Save without an account. Sign in to like or comment.

Our tips for carving a similar design

This design builds a connected composition where the deer figure, pine trees, and campfire all link back to the surrounding rind frame through legs, hands, antlers, and tree trunks. Keeping those connection points intact is the whole structural game. Cutting the connecting legs and hand points before opening the larger flame and log holes ensures the deer never becomes a loose floating piece mid-process.

From pumpkin to porch

  1. Prep a large, stable pumpkin

    Choose a pumpkin with a wide, flat face and a relatively even wall thickness. Cut the lid from the bottom to keep the top clean. Scrape interior walls to about 2 cm, paying extra attention to the lower half where the flame and log holes will be cut.

  2. Transfer the full stencil

    Pin-transfer the complete scene stencil carefully, marking every connection bridge, the deer's legs, the tree trunks, and the campfire outline. Use different colored pencils to mark cut lines versus shallow-etch lines before picking up a blade, so you do not accidentally remove a bridge.

  3. Establish the structural connections first

    Cut along the deer's leg silhouettes and hand points first, leaving each one firmly attached to the frame where the stencil indicates. Do the same for the pine tree outlines, keeping the trunk bases connected to the lower rind. These cuts define the figure's edge without opening any holes yet.

  4. Open the flame and log holes

    Cut the separate campfire flame apertures as clean openings in the lower composition, followed by the log hole shapes beneath them. Because the deer is already structurally defined, you can apply steady cutting pressure here without worrying about the figure shifting.

  5. Complete background and detail cuts

    Remove the background sections between the deer and trees that should glow, working from the center outward toward each frame connection. Leave every bridge the stencil identifies as a connection point; removing even one can cause a section to sag. Keep cuts smooth and perpendicular to the rind.

  6. Light and photograph indoors

    Place two LED candles inside, one near the flame holes and one centrally for the upper scene, so both areas are evenly lit. Setting the pumpkin on a wooden surface indoors with low ambient lighting creates the atmospheric forest campsite mood the design is built around.

Written with AI to match this design

Gather your supplies

Check things off as you get ready.

Work on a stable surface, keep your free hand out of the cutting path, and have an adult handle sharp tools.

Three levels of light

  • Leave intact

    The deer's body, legs, hands, antlers, tree trunks, and frame borders stay fully dark as the structural silhouette.

  • Peel & shade

    No peeling on this design; contrast comes entirely from cut vs. uncut rind.

  • Cut through

    Background sections between figure and frame, separate campfire flame apertures, and log holes are all cut through for warm interior glow.

Learn the carving basics

Before you start cutting

How do I avoid snapping a deer leg connection when cutting close to it?

Cut toward a connection bridge from both sides and stop about 2 mm short before making the final joining cut. This prevents the blade from overshooting into the bridge. Use a detail knife for the last few millimeters near any connection point rather than a full saw.

What happens if a background section falls out before I expected it to?

It simply means a bridge was narrower than anticipated. If a nearby section is structurally stable, you can continue carving. If the fallen piece was load-bearing, use a toothpick and a dab of craft glue from behind to reattach it temporarily while you finish cutting, then remove it cleanly at the end.

Can I use a candle instead of an LED for the authentic campfire effect?

A real candle poses fire, burn, and decay risks that outweigh the aesthetic benefit. A warm-amber flickering LED candle produces nearly identical light quality, stays safe around children and pets, and keeps the pumpkin cooler so it lasts longer. Use LEDs throughout.

Your take belongs here, too.

Changed a detail? Made it simpler? Share a photo of your version and tell the community what worked.

Share your pumpkin

More pumpkins like this

You've reached the end · 8 pumpkins
The Patch Report

Fresh pumpkins, in your inbox.

The best new carvings, ideas worth stealing, and how-tos for carving season. Short, seasonal, and gone by November.

A short email during carving season. Unsubscribe anytime. See our privacy policy.