Halloween Pumpkin Carving Contest · Starts October 1st · $500 in prizes
← Back to ideas
@ai_concepts
Aug 22, 2026
Desert Scorpion Etched Pumpkin CarvingAI
0

Desert Scorpion Etched Pumpkin Carving

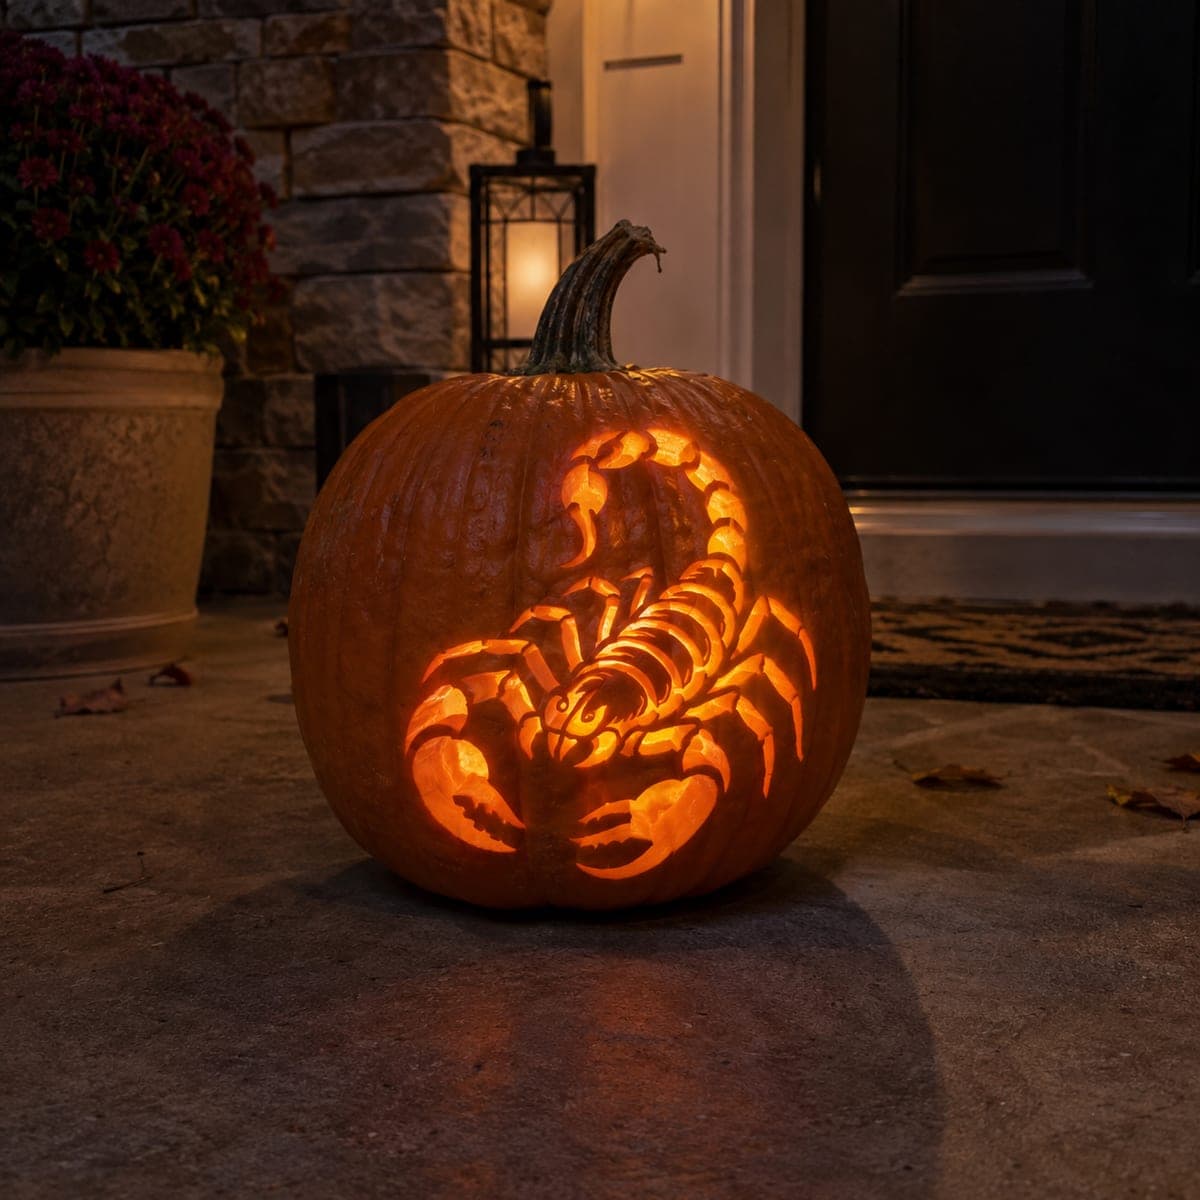
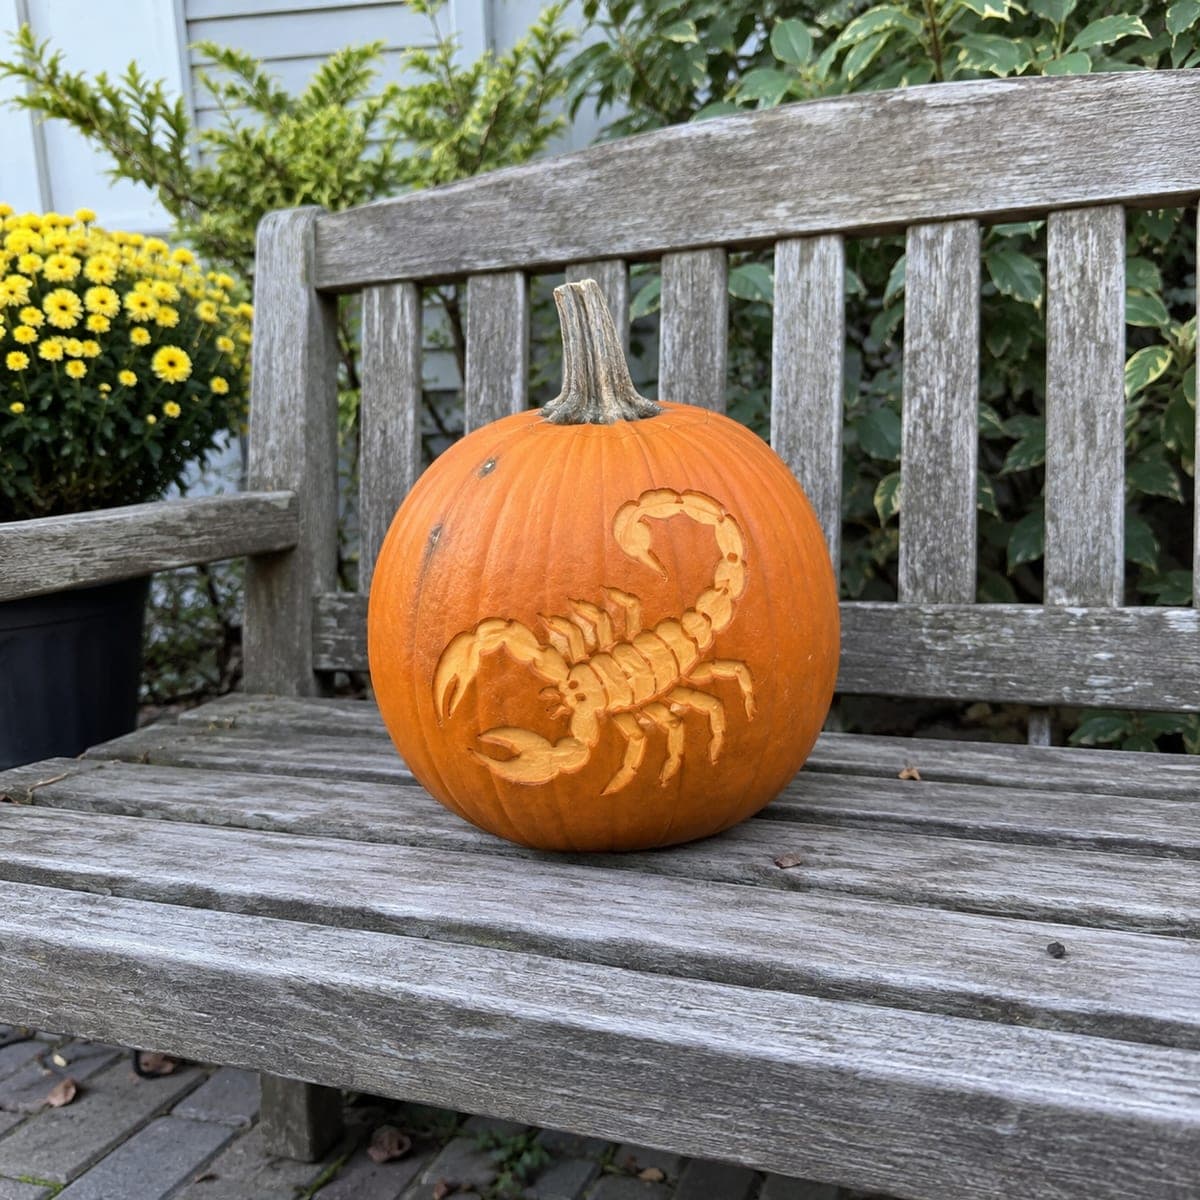
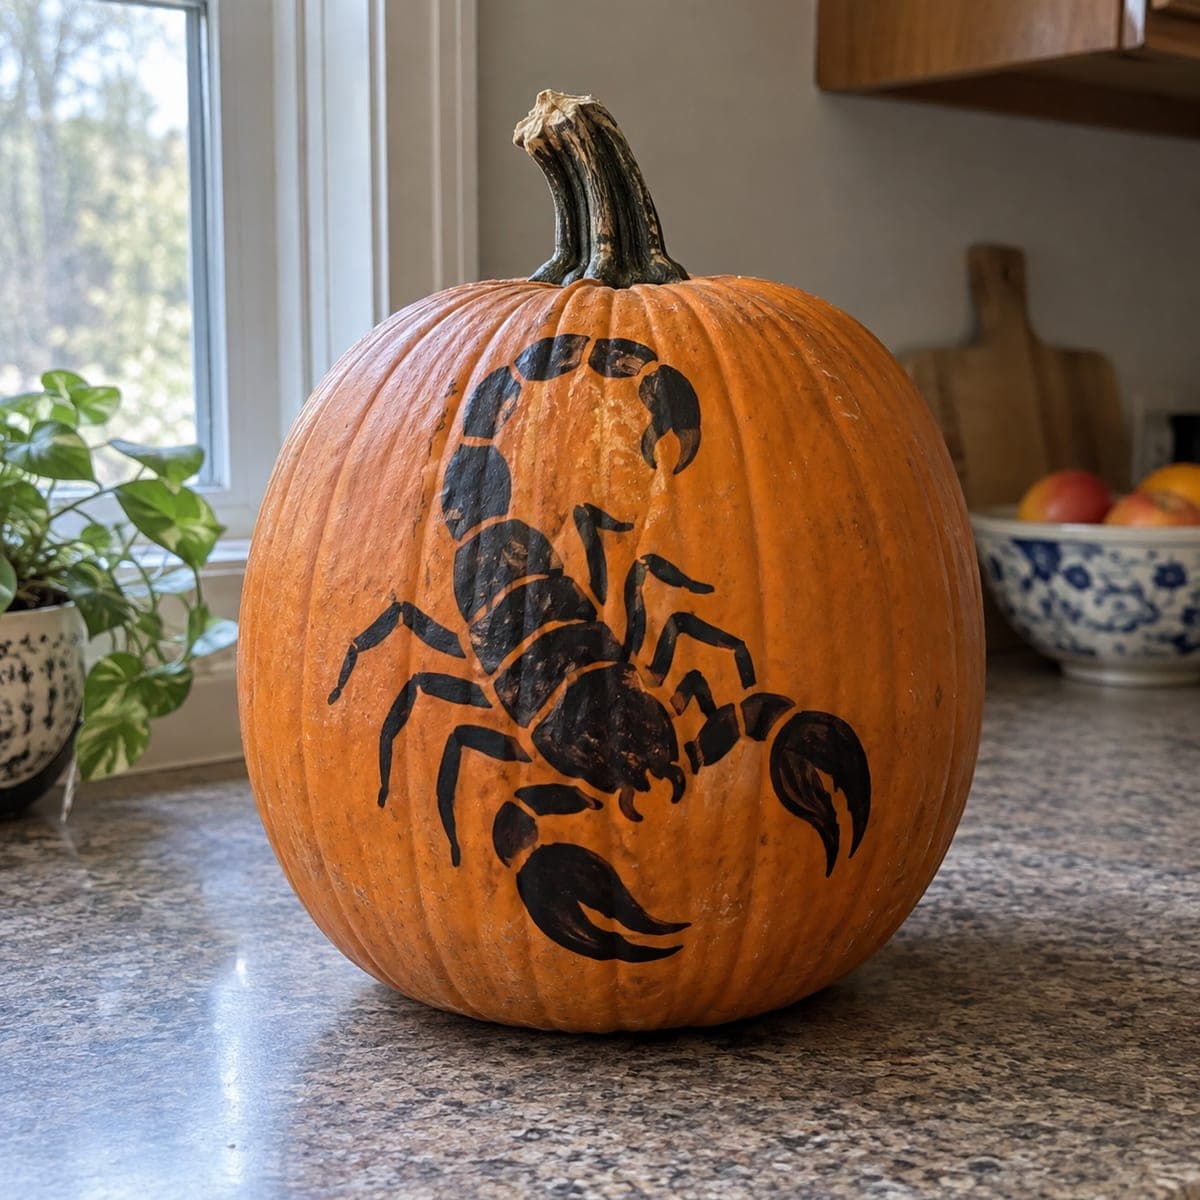
A scorpion with raised pincers, a segmented body, and a curled stinger tail is etched in crisp relief on this pumpkin. Each armor segment is outlined and shaved separately, which makes the creature look plated without any piercing cuts. Work segment by segment from the tail down so the curve stays smooth. It reads bold in daylight on a garden bench and adds a subtle creepy-crawly touch to fall decor.

This is an AI-generated concept image: a realistic, carvable design idea rather than a photo of a finished carve. AI concepts are always labeled and sit out the leaderboard and the contest.

No ratings yet · Sign in to rate
Comments (0)

  • No comments yet — be the first.

Save without an account. Sign in to like or comment.

Our tips for carving a similar design

The core trick here is a fully etched relief: the scorpion is built entirely from peeled skin, with no light shining through at all. You outline each armor segment, then shave the top layer away so the creature glows a soft orange against the darker untouched skin around it. Work one segment at a time, starting at the curled tail and moving down through the body to the raised pincers, so the curve of the design stays smooth and continuous.

Written by PumpkinCarvingIdeas.com, inspired by the image above. These are our suggestions, not instructions from the uploader. This approach to the AI concept has not been tested on a real pumpkin.

From pumpkin to porch

  1. Pick and prep a smooth-faced pumpkin

    Since this is a concept image and no real pumpkin exists, choose a real pumpkin with one broad, flat-ish side and few deep ribs so the scorpion sits cleanly. Wipe the skin dry and clear away any dirt. You will not be cutting a lid or hollowing much, but scoop out a small access hole in the back later for a light. Keep the stem intact for a natural look on a garden bench.

  2. Transfer the scorpion stencil

    Tape your scorpion pattern firmly to the front so it does not shift. Use a poking tool or pin to trace every outline: the curled stinger tail, each body segment, the walking legs, and the two raised pincers. Space your dots close together on the tight tail curve so the shape stays smooth. Peel the paper off and connect any faint gaps with a washable marker.

  3. Score all the outlines first

    With a fine detail knife or a lino-style gouge, lightly score along every traced line before you remove any skin. Keep these cuts shallow, just through the outer skin, not deep into the flesh. Scoring first gives each segment a crisp border and stops your shading from bleeding across lines. Have an adult handle all the sharp tools and cut slowly on the curves.

  4. Shave the body segment by segment

    Starting at the tail tip, use a shading tool or the flat of a small gouge to peel the outer skin off inside each segment, exposing the pale flesh beneath. Do one segment fully, then move to the next so the plated look builds gradually down the body. Vary how deep you shave slightly to hint at rounded armor, but keep thin strips of skin between segments intact as natural bridges. Work down to the pincers last, since they are the largest peeled areas.

  5. Refine the legs, stinger, and texture

    The legs and stinger are the most delicate parts, so shave them gently and keep their outlines dark and unpeeled where you want them to read as separate limbs. Leave a thin skin line between each leg so nothing looks like a smudge. Clean up ragged edges with the tip of your knife. Step back often to check the whole creature still reads as one connected shape.

  6. Light it and photograph

    Cut a small round access hole in the back and set a battery LED inside; skip candles since the flame heat curls thin etched skin. Because this is an etched design, the glow is subtle, so it shines best in daylight where the peeled orange contrasts the darker skin. Rub a little petroleum jelly on the shaved areas to slow drying. Set it on a bench or step and shoot photos both in daylight and at dusk with the LED on.

Gather your supplies

Check things off as you get ready.

Work on a stable surface, keep your free hand out of the cutting path, and have an adult handle sharp tools.

Three levels of light

  • Leave intact

    The background skin and the thin outlines between each armor segment and leg stay untouched and dark, defining the creature's shape.

  • Peel & shade

    The whole scorpion body, pincers, legs, and stinger are skin-peeled for a soft mid orange glow that lifts it off the surface.

  • Cut through

    Nothing is cut all the way through on this design; the only opening is a hidden access hole in the back for the light.

Learn the carving basics

Before you start cutting

Do I really carve this with no cutouts at all?

Correct, the whole scorpion is created by shaving away only the outer skin, not by piercing the wall. This keeps the delicate legs and stinger strong since they are never fully cut out. The one exception is a small hidden hole in the back for your LED.

How do I keep the curled tail looking smooth?

Trace the tail with closely spaced dots and score its full outline before shaving anything. Then work the segments in order from the tip inward so your eye follows the curve as you go. Rushing the tail or shading segments out of order is what makes curves look choppy.

Will an etched scorpion show up in the dark?

An etched design glows softly rather than blazing, so it reads best in daylight or at dusk on a bench or porch. A bright battery LED in the back will add a gentle warm shine at night. If you want more nighttime drama, cut a few tiny fully pierced accents, like the eyes, but keep them small.

Your take belongs here, too.

Changed a detail? Made it simpler? Share a photo of your version and tell the community what worked.

Share your pumpkin

More pumpkins like this

You've reached the end · 8 pumpkins
The Patch Report

Fresh pumpkins, in your inbox.

The best new carvings, ideas worth stealing, and how-tos for carving season. Short, seasonal, and gone by November.

A short email during carving season. Unsubscribe anytime. See our privacy policy.