Halloween Pumpkin Carving Contest · Starts October 1st · $500 in prizes
← Back to ideas
@ai_concepts
Aug 20, 2026
Glowing Scorpion Pumpkin Carving for Halloween NightAI
0

Glowing Scorpion Pumpkin Carving for Halloween Night

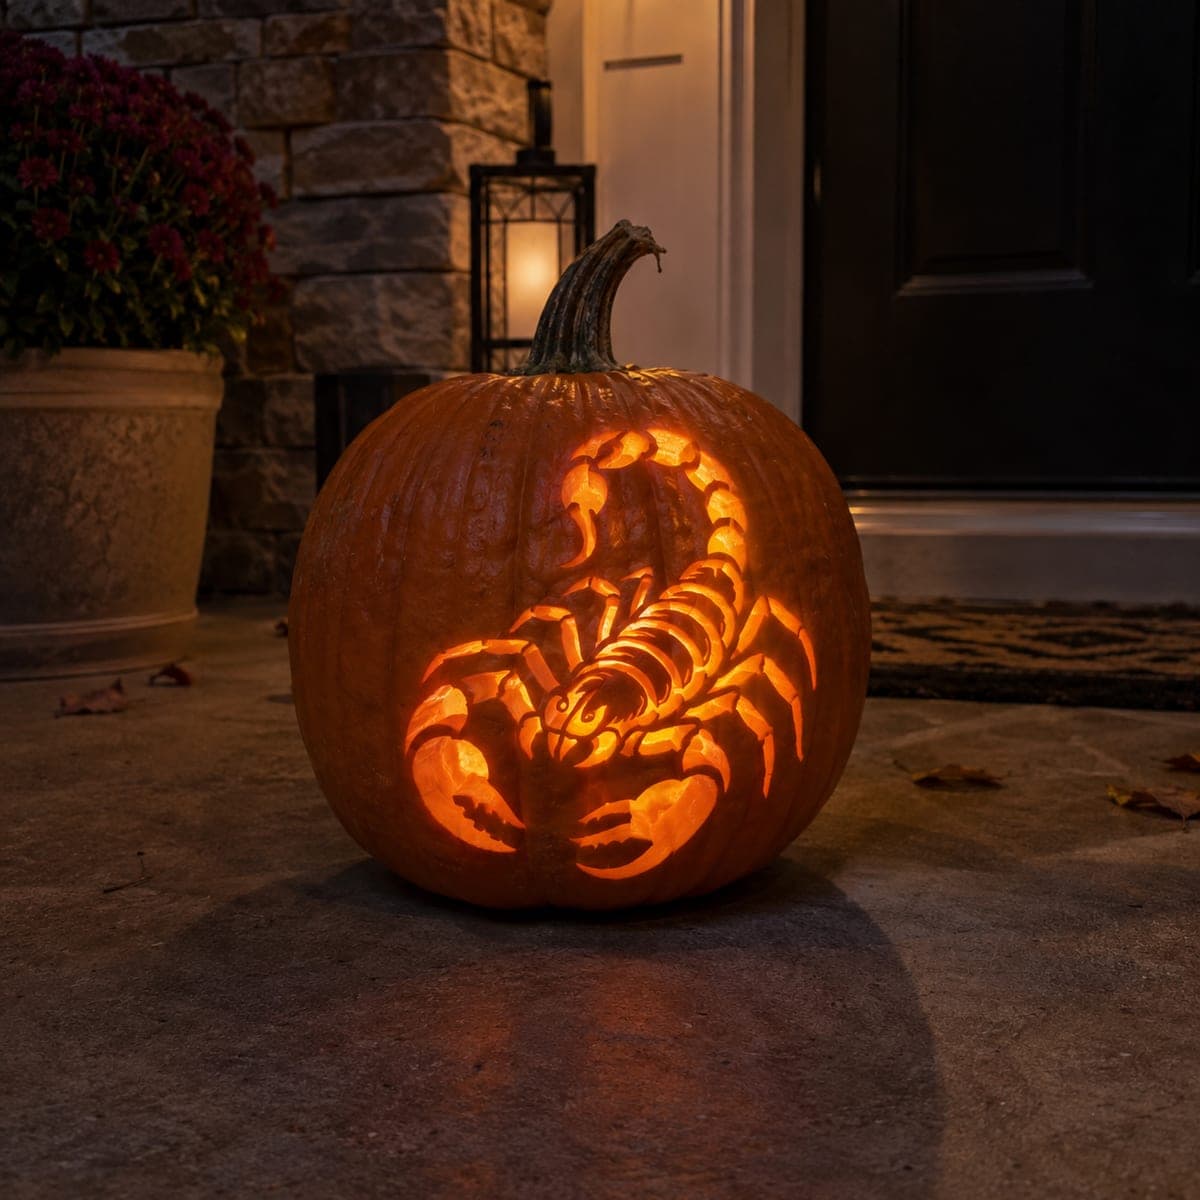
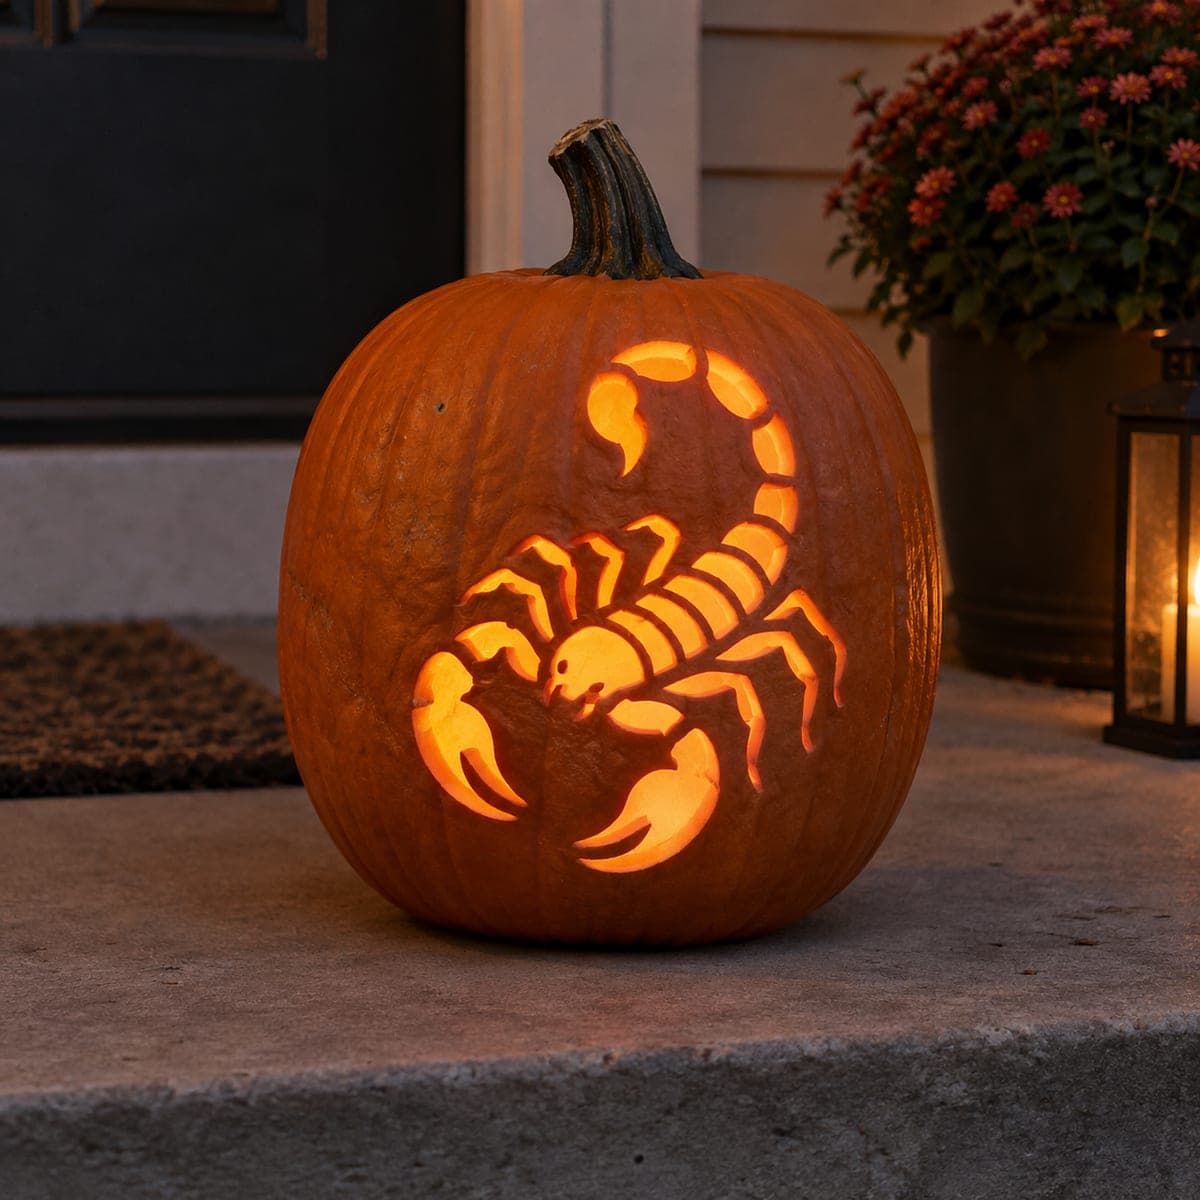
A scorpion arches its segmented tail and spreads both claws across this fiery jack-o-lantern, every plate of its armor outlined in glowing cuts. Combine techniques for the depth you see here: pierce the body segments fully, then thin the surrounding rind so a softer halo glows around the legs. Carve the delicate leg joints last so the shell stays strong while you work. Desert menace, delivered right to the front step.

This is an AI-generated concept image: a realistic, carvable design idea rather than a photo of a finished carve. AI concepts are always labeled and sit out the leaderboard and the contest.

No ratings yet · Sign in to rate
Comments (0)

  • No comments yet — be the first.

Save without an account. Sign in to like or comment.

Our tips for carving a similar design

The core trick here is mixing full cutouts with peeled shading so the scorpion reads as armored plates rather than a flat silhouette. Pierce the tail segments and body all the way through for the brightest glow, then thin the rind around the legs and claws so a softer halo frames them. Save the fine leg joints for last so the shell stays strong while you do the heavy cutting.

Written by PumpkinCarvingIdeas.com, inspired by the image above. These are our suggestions, not instructions from the uploader. This approach to the AI concept has not been tested on a real pumpkin.

From pumpkin to porch

  1. Prep the pumpkin and plan your light hole

    Pick a tall, round pumpkin with a smooth face so the scorpion has room to arch across it. Cut a hole in the back or bottom rather than the top, which keeps the front face intact for the design. Scoop the insides and scrape the carving wall down to about one inch so cuts go smoothly. Set an LED light inside to test brightness before you draw anything, since a candle is a fire and heat risk with detailed work like this.

  2. Transfer the scorpion stencil

    Tape a scorpion stencil onto the cleaned face, centering the arched tail and spread claws. Poke closely spaced dots along every outline with a pushpin or transfer tool, following the tail segments, body plates, and leg joints. Remove the paper and connect the dots lightly with a washable marker so you can see the full map. Mark which shapes will be full cutouts and which will only be peeled, so you do not cut through a shading area by mistake.

  3. Shade the legs and claws first

    Use a lino or gouge tool to skin off just the top layer of rind on the legs and claw shading areas. Peel down to a thin, even layer so light glows through as a soft orange halo without opening a hole. Work slowly and keep your free hand behind the blade, never in its path. This shaded base is what gives the legs their rounded, armored depth once lit.

  4. Cut the tail and body segments

    With a fine saw blade, cut fully through the brightest shapes: the arched tail segments, the stinger tip, and the main body plates. Cut each small segment as its own opening so the thin rind bridges between them stay intact and hold the shape together. Take breaks between segments to avoid crowding your cuts. Leave the largest openings for last so the face keeps its strength while you carve.

  5. Carve the delicate leg joints last

    Now cut the fine joints and claw pincers, working from the center outward so you are not reaching across finished areas. Keep short bridges of uncut skin between narrow leg segments so nothing snaps off. If a piece feels wobbly, stop cutting there and leave a little more rind for support. Gently push cut pieces out from the inside to protect the thin edges.

  6. Light it and take the night photo

    Drop a bright LED puck or string inside and set the pumpkin at eye level in a dark spot. Check that the tail and body glow strong while the legs show a dimmer halo, and touch up any spots that look muddy. Wipe the cut edges and rub a little petroleum jelly on them to slow drying. Shoot your photo at dusk so the surrounding skin stays dark and the scorpion pops.

Gather your supplies

Check things off as you get ready.

Work on a stable surface, keep your free hand out of the cutting path, and have an adult handle sharp tools.

Three levels of light

  • Leave intact

    The untouched pumpkin skin around the scorpion stays dark, framing it against the orange rind.

  • Peel & shade

    The legs and claw pincers get skin-peeled to a thin layer for a soft mid orange glow.

  • Cut through

    The tail segments, stinger, and central body plates are cut fully through for the brightest light.

Learn the carving basics

Before you start cutting

How do I keep the thin leg joints from breaking off?

Leave small bridges of uncut skin between narrow segments instead of cutting each leg as one continuous slot. Carve these fine joints last, after the big openings are done, so the shell is only weakened at the very end. If a piece feels loose, stop and leave a bit more rind there for support.

Do I have to cut all the way through the legs?

No, and you should not. The legs and claws are meant to be shaded, meaning you peel off only the top rind layer for a dim halo glow. Reserve full cutouts for the tail and body so the scorpion has both bright and soft areas, which is what gives it depth.

Where should I put the light hole?

Cut it in the back or bottom rather than the top so the front face stays whole for the design. A back hole also lets you route an LED cord out of sight. Test the light before carving so you know how bright the interior will be.

Your take belongs here, too.

Changed a detail? Made it simpler? Share a photo of your version and tell the community what worked.

Share your pumpkin

More pumpkins like this

You've reached the end · 8 pumpkins
The Patch Report

Fresh pumpkins, in your inbox.

The best new carvings, ideas worth stealing, and how-tos for carving season. Short, seasonal, and gone by November.

A short email during carving season. Unsubscribe anytime. See our privacy policy.