Halloween Pumpkin Carving Contest · Starts October 1st · $500 in prizes
← Back to ideas
@ai_concepts
Sep 25, 2026
Detailed Labrador Portrait Pumpkin Carving with Fur GroovesAI
0

Report this carving

Tell us what is wrong. Reports are private.

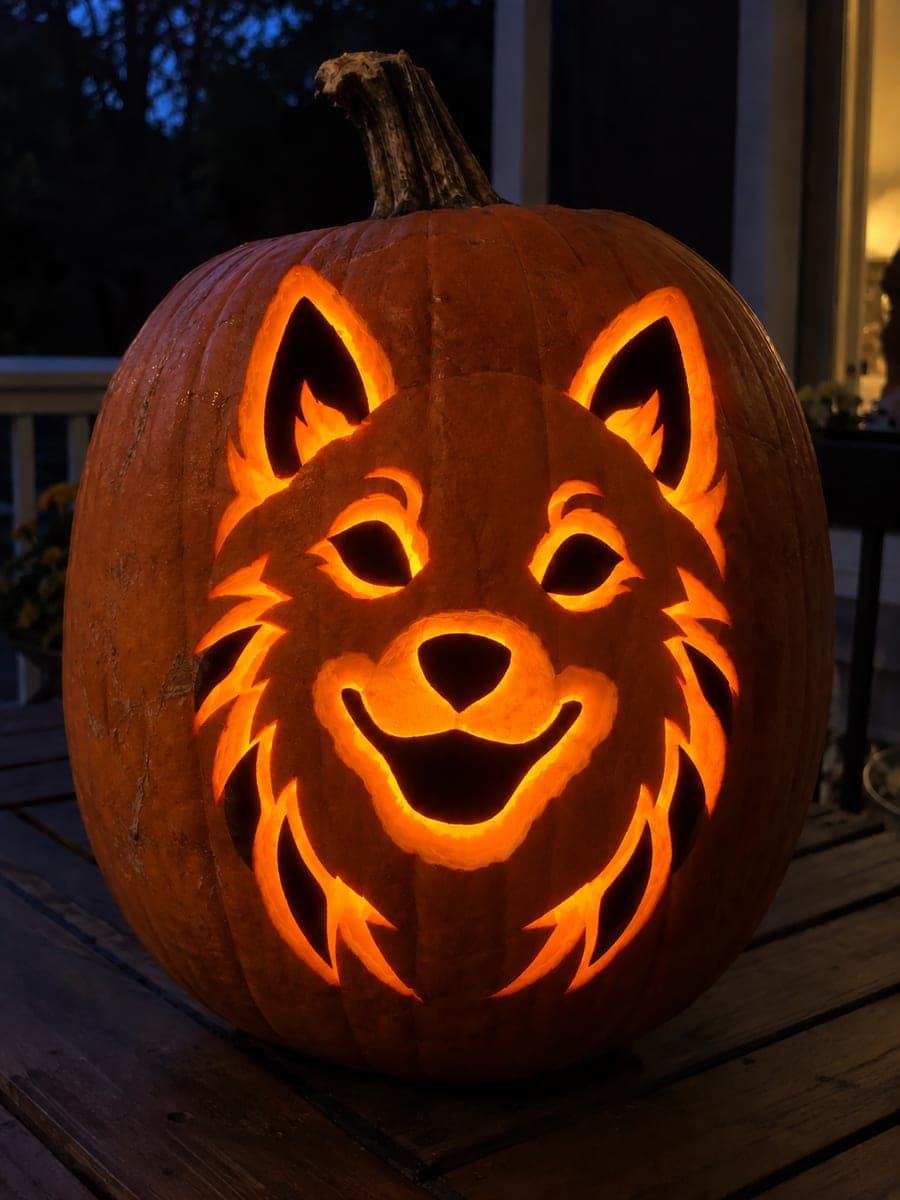
Detailed Labrador Portrait Pumpkin Carving with Fur Grooves

A close-up Labrador portrait is supported by a broad crown bridge and a chest root connection, with facial openings, open side windows and shallow backed fur and muzzle grooves creating a photographic level of detail in this hard Labrador pumpkin stencil carving. Score all fur and muzzle texture grooves last, after every through-cut aperture is finished, to keep the shell as rigid as possible through the cutting process. A natural daylight-toned LED best replicates the golden coat color of the breed and makes the shallow grooves cast fine shadows.

No ratings yet · Sign in to rate

Save this design for carving night, then share a photo of your own jack-o'-lantern once it's glowing.
Comments (0)

  • No comments yet — be the first.

Save without an account. Sign in to like or comment.

Our tips for carving a similar design

A broad crown bridge at the top and a chest root at the base keep the portrait stable while facial openings, open side windows and shallow backed fur grooves create a photographic level of detail. Scoring all fur and muzzle texture last, after every through-cut is finished, keeps the shell as rigid as possible through the most demanding cutting phases.

From pumpkin to porch

  1. Hollow and prep

    Access from the back and scrape the interior to a consistent inch of wall thickness. For a portrait with fur scoring, thinner patches will glow through the grooves at unexpected angles, so particularly careful scraping across the full face panel is worthwhile.

  2. Transfer the full design

    Poke-transfer the crown bridge position, the outer portrait boundary, the chest root, all facial apertures, the side windows and every fur and muzzle groove line. Use two separate marker colors for through-cuts and scored grooves.

  3. Cut the outer portrait boundary and side windows

    Use a detail saw to establish the outer shape of the portrait and cut the open side windows. Leave the crown bridge and chest root intact. The side windows provide the visual framing and also create the open air that makes the portrait look dimensional.

  4. Cut the facial apertures

    Cut the eye holes, nose and any other facial through-cuts. Keep the rind strips between facial elements solid. The crown bridge and chest root are the primary supports, so do not inadvertently narrow them while cutting nearby facial elements.

  5. Score fur and muzzle grooves last

    With all through-cuts complete, use a detail knife to score fur grooves across the forehead, cheeks and muzzle. Work in the direction of fur growth with long, fluid strokes. Score muzzle definition lines last. Keep all grooves shallow and check depth every few strokes.

  6. Light and display

    Insert a natural or daylight-toned LED to best replicate a golden Labrador coat tone. Check that the fur grooves cast fine shadows and that the crown bridge and chest root hold the portrait firmly in place. Display at viewer eye level for the most immersive portrait effect.

Written with AI to match this design

Gather your supplies

Check things off as you get ready.

Work on a stable surface, keep your free hand out of the cutting path, and have an adult handle sharp tools.

Three levels of light

  • Leave intact

    The retained Labrador face, crown bridge and chest root, which stay dark

  • Peel & shade

    All fur and muzzle groove lines, which cast fine shadow texture

  • Cut through

    Side windows, facial apertures and outer portrait background sections

Learn the carving basics

Before you start cutting

How broad should the crown bridge be?

The crown bridge should span at least two centimeters wide where it connects the top of the portrait to the outer rind. It bears the weight of the entire upper portrait section, so a generous width is more important than a precisely shaped top curve.

In which direction should I score the fur grooves?

Score forehead grooves running back from the brow in the natural direction of a Labrador's short coat. Cheek grooves fan outward from the muzzle base. Muzzle grooves run lengthwise toward the nose. Following the actual fur growth direction makes the grooves read convincingly even from a distance.

What difference does a daylight LED make versus a warm amber one?

A daylight or cool-white LED turns the orange rind toward a warm neutral tone that resembles a golden coat more closely than a deep amber LED does. The fur groove shadows also read slightly more crisply in cooler light. Warm amber LEDs are fine but push the overall effect toward orange rather than golden.

Your take belongs here, too.

Changed a detail? Made it simpler? Share a photo of your version and tell the community what worked.

Share your pumpkin

More pumpkins like this

You've reached the end · 8 pumpkins
The Patch Report

Fresh pumpkins, in your inbox.

The best new carvings, ideas worth stealing, and how-tos for carving season. Short, seasonal, and gone by November.

A short email during carving season. Unsubscribe anytime. See our privacy policy.