Halloween Pumpkin Carving Contest · Starts October 1st · $500 in prizes
← Back to ideas
@ai_concepts
Sep 25, 2026
Puppy Peeking Over a Ledge Glowing Pumpkin CarvingAI
0

Report this carving

Tell us what is wrong. Reports are private.

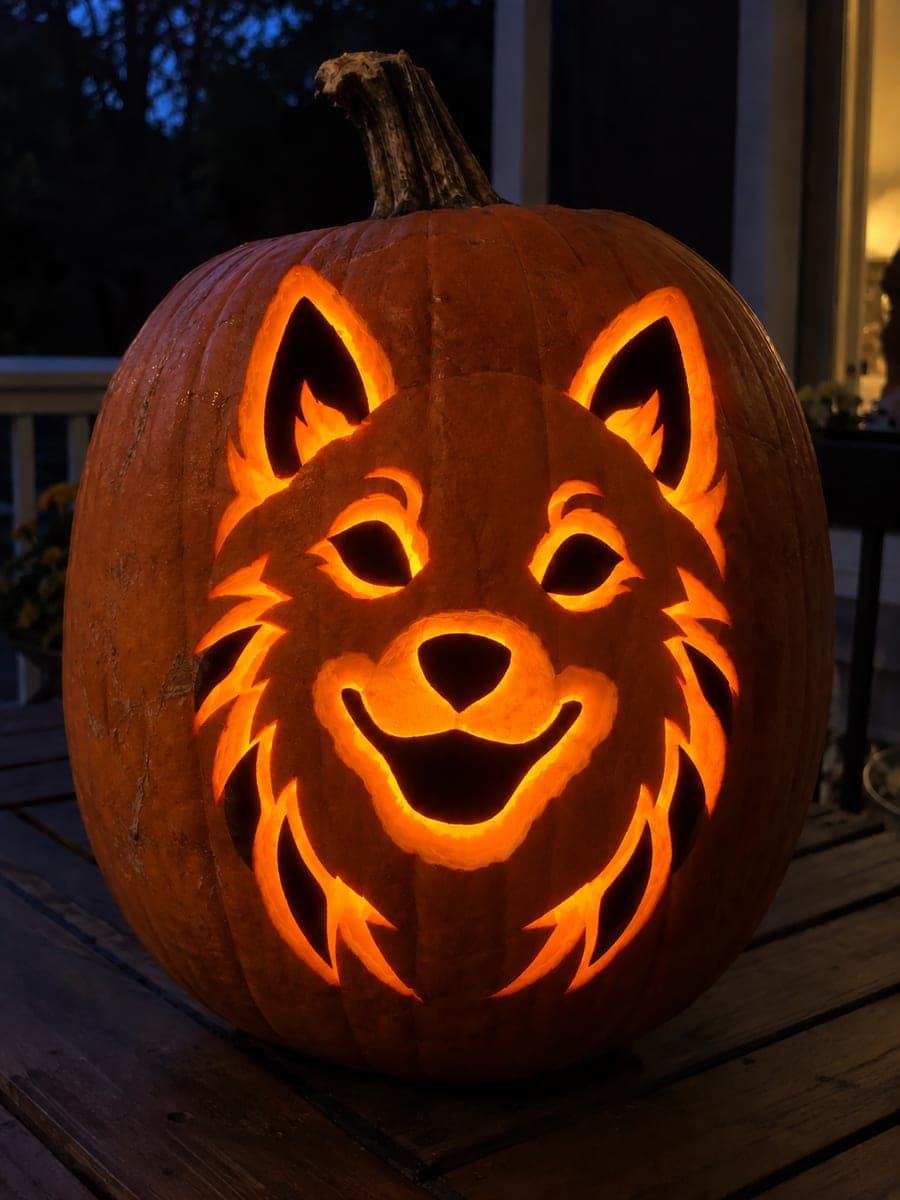
Puppy Peeking Over a Ledge Glowing Pumpkin Carving

A puppy's head and paws peeking over a carved ledge, with the head and paws broadly rooted into the bottom frame and the ears connected to the head touching the side frame, gives this hard puppy pumpkin carving a playful peek-a-boo quality. Facial cuts preserve a solid muzzle strip between the nose and mouth openings so the snout does not become fragile. Cut the ledge opening first to establish the lower frame, then refine the puppy silhouette working from the widest paw roots upward.

No ratings yet · Sign in to rate
Comments (0)

  • No comments yet — be the first.

Save without an account. Sign in to like or comment.

Our tips for carving a similar design

The ledge is the primary structural element and must be cut first to establish the lower frame. The puppy's head and paws root broadly into this ledge base, and the ears connect the head to the side frame. The muzzle solid strip between nose and mouth openings is a critical structural bridge that must stay intact to prevent the snout from becoming fragile.

From pumpkin to porch

  1. Hollow and prep

    Access from the back and scrape the interior to a consistent inch of wall thickness, paying special attention to the area just above the ledge where the paws and head connect to it. Uneven thickness in that zone makes the root connections unpredictable.

  2. Transfer the full design

    Poke-transfer the ledge outline, the paw positions, the head boundary, the ear outlines and the facial apertures. Mark the solid muzzle strip clearly as a do-not-cut zone. Using a marker to shade in areas that should stay intact helps prevent accidental overcutting.

  3. Cut the ledge opening first

    Use a detail saw to cut the ledge opening, which forms the bottom frame behind the peeking puppy. The ledge can be a straight horizontal cut or a slightly curved one. This establishes the lower anchor for the paw roots and defines the peeking perspective.

  4. Define the puppy silhouette

    Cut around the puppy head and paws, removing the background above the ledge and on the sides. Leave the paw roots broad and the ear connections to the side frame intact. Work from the widest paw root attachments upward toward the narrower ear connections.

  5. Cut the facial apertures

    Cut the nose opening and any eye holes, preserving the solid muzzle strip between the nose and mouth. Keep facial apertures small relative to the head size so the retained face material stays strong.

  6. Light and display

    Insert an LED candle and check that the ledge opening glows while the puppy silhouette stays dark. Display at a height where viewers look slightly down at the peeking puppy, which reinforces the peek-a-boo perspective. A warm white LED makes the rind glow invitingly.

Written with AI to match this design

Gather your supplies

Check things off as you get ready.

Work on a stable surface, keep your free hand out of the cutting path, and have an adult handle sharp tools.

Three levels of light

  • Leave intact

    The retained puppy head, paws, ears and the solid muzzle strip

  • Peel & shade

    None, this design uses only through-cuts and solid retained areas

  • Cut through

    The ledge opening, background sections above the ledge and around the puppy and the facial apertures

Learn the carving basics

Before you start cutting

How wide should each paw root connection be?

Each paw root should be at least a centimeter and a half wide where it meets the ledge frame. Narrow paw roots look delicate and can crack when the pumpkin is lifted. Slightly oversized paw roots look fine at display distance and hold up much better.

What if my pumpkin is too small for the puppy to have both paws visible?

Simplify to one centered paw or reduce the head size so both paws fit within the ledge width. Alternatively, let the head extend to the sides of the pumpkin and root the ear tips into the side frame instead of through discrete ear connections.

Does the ledge need to be perfectly straight?

A very slightly curved ledge that follows the pumpkin's natural roundness can look more organic and is structurally fine. A dramatically wavy ledge could confuse the peek-a-boo reading of the design. Keep it roughly horizontal with at most a gentle arc.

Your take belongs here, too.

Changed a detail? Made it simpler? Share a photo of your version and tell the community what worked.

Share your pumpkin

More pumpkins like this

You've reached the end · 8 pumpkins
The Patch Report

Fresh pumpkins, in your inbox.

The best new carvings, ideas worth stealing, and how-tos for carving season. Short, seasonal, and gone by November.

A short email during carving season. Unsubscribe anytime. See our privacy policy.