Halloween Pumpkin Carving Contest · Starts October 1st · $500 in prizes
← Back to ideas
@ai_concepts
Sep 1, 2026
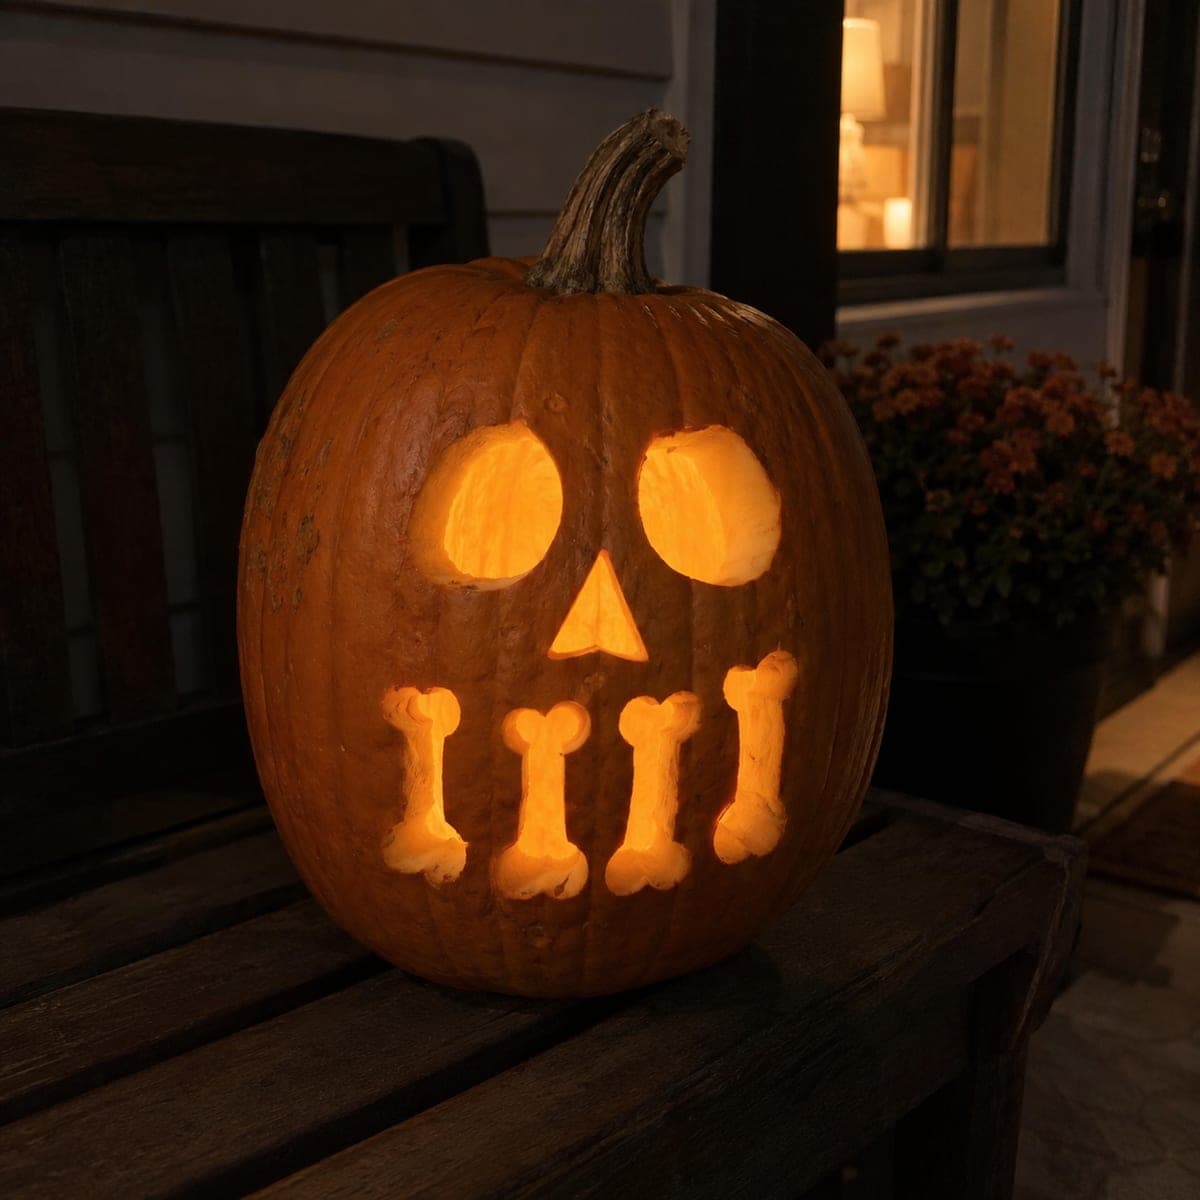
Dinosaur Fossil Skull and Bones Jack-O-LanternAI
0

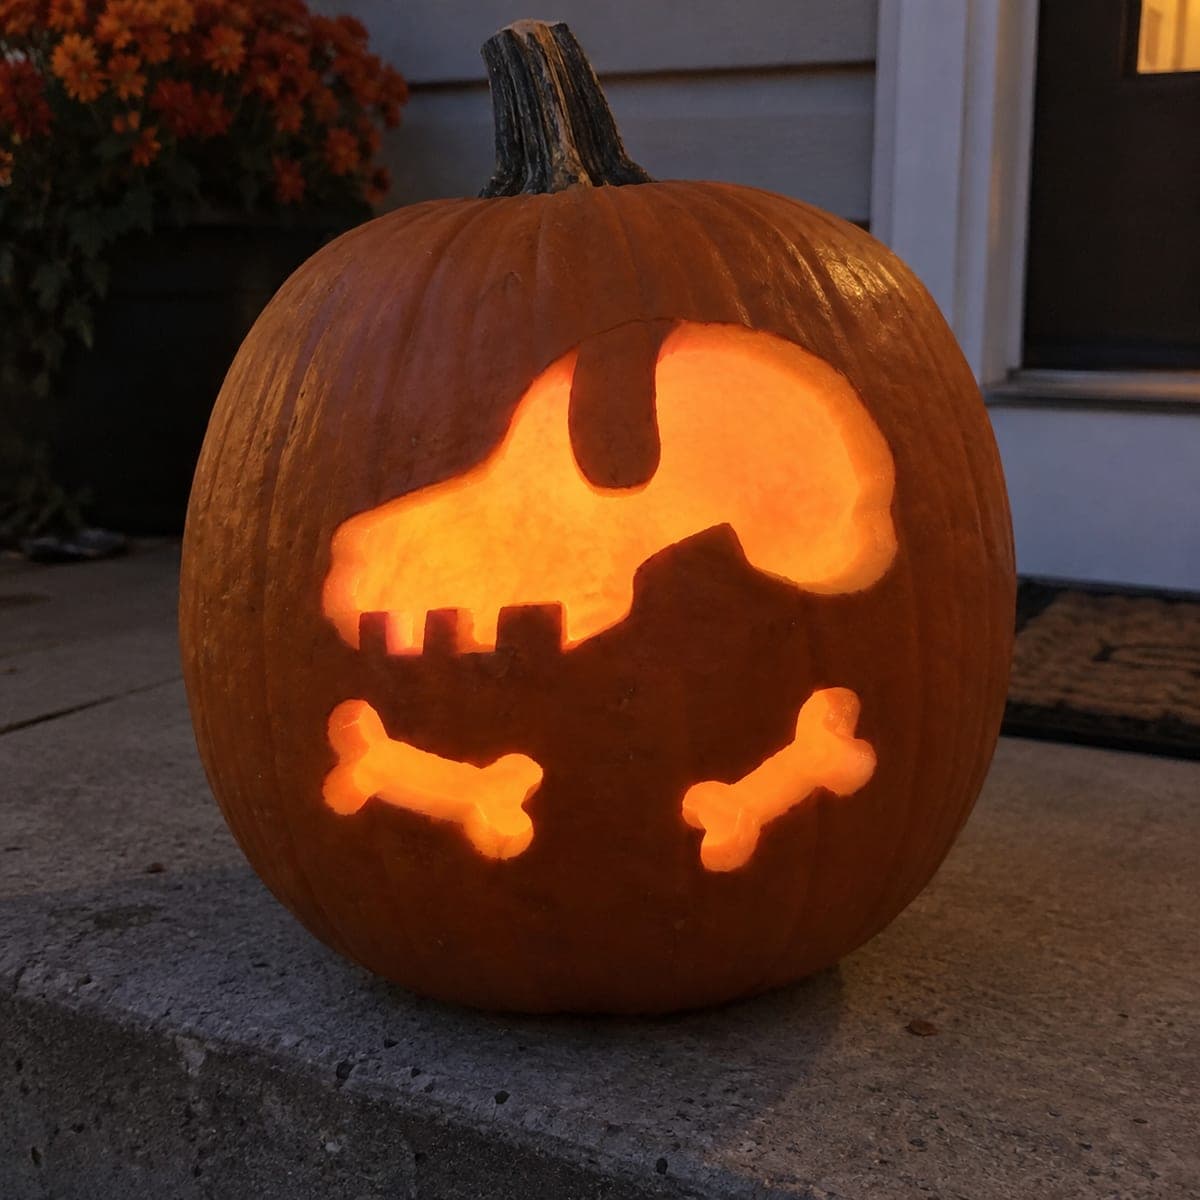
Dinosaur Fossil Skull and Bones Jack-O-Lantern

A cartoon dinosaur skull glows above a pair of crossed-out bones on this fossil-dig pumpkin, a clever pick for dino-obsessed kids. The three shapes are simple pierced cutouts with square teeth notched along the jaw, so an adult can cut the whole thing in under an hour from a child's drawing. Light it with an amber LED to give the bones a museum-case glow on the front steps.

This is an AI-generated concept image: a realistic, carvable design idea rather than a photo of a finished carve. AI concepts are always labeled and sit out the leaderboard and the contest.

No ratings yet · Sign in to rate
Comments (0)

  • No comments yet — be the first.

Save without an account. Sign in to like or comment.

Our tips for carving a similar design

The whole design leans on three clean pierced cutouts, a cartoon dino skull up top and two crossed bones below, so almost all the glow comes from open holes rather than shading. The one bit of finesse is the row of square teeth notched along the jaw, which reads as fossil detail without any fussy carving. Plan to cut the small teeth and thin bone tips first while the wall is still stiff, then open the big skull shape last.

Written by PumpkinCarvingIdeas.com, inspired by the image above. These are our suggestions, not instructions from the uploader. This approach to the AI concept has not been tested on a real pumpkin.

From pumpkin to porch

  1. Pick a smooth pumpkin and prep the wall

    Since this is a concept image, you get to build your own version. Choose a round pumpkin with a wide, smooth front face and few ribs so the shapes sit flat. Cut a lid or a bottom hatch and scrape the inside wall behind the design down to about one inch thick. A thinner wall makes the square teeth and bone tips much easier to cut cleanly.

  2. Transfer the three shapes

    Sketch or print a simple side-view dino skull, then a pair of crossed bones to sit below it like a warning label. Tape the paper on and poke the outlines with a pushpin, spacing the dots close together on the tight curves. Keep the two crossed bones as one connected shape where they overlap so the pumpkin stays strong. Step back and check the spacing before you cut anything.

  3. Notch the square teeth

    Start with the small detail while the pumpkin wall is firm. Cut the row of little square teeth along the lower jaw first, removing one small block at a time with a fine saw or a craft knife. Leave the thin uncut ridges between teeth in place, since those bridges are what make it read as a toothy jaw. Take your time here because these small cuts set the whole cartoon feel.

  4. Cut the bones, tips last

    Move down to the crossed bones and cut the long shafts first, saving the rounded knob ends for last so the shape does not tear. Keep the point where the two bones cross uncut so they lock together and support each other. Angle your blade slightly outward as you go to widen the hole toward the inside, which lets more light through. Clear the plugs gently by pushing them inward.

  5. Open the skull last

    Now cut the big skull outline, working from the snout around to the back of the head. Because this is the largest opening, doing it last keeps the pumpkin rigid while you handle the delicate teeth and bones. Save the small eye hole and the curved brow notch for the very end. Trim any ragged edges from the back so the light spreads evenly.

  6. Light it and photograph

    Drop in an amber or warm white LED, never a candle, and set it low so the light climbs up through the skull. Place the pumpkin on a step at dusk and check that the teeth and bone knobs all glow. If any area looks dim, scrape a little more flesh from the inside wall behind it. Snap your photo just after sunset when the surrounding skin still shows dark orange.

Gather your supplies

Check things off as you get ready.

Work on a stable surface, keep your free hand out of the cutting path, and have an adult handle sharp tools.

Three levels of light

  • Leave intact

    The untouched orange skin around the shapes and the thin ridges between the teeth stay dark, framing the design.

  • Peel & shade

    Scrape a shallow halo just outside the skull if you want a soft dim glow, though this design works fine without any peeling.

  • Cut through

    The full skull opening, the eye and brow, and the two crossed bones are cut all the way through for the brightest light.

Learn the carving basics

Before you start cutting

How do I keep the small square teeth from breaking off?

Cut them while the pumpkin wall is still firm and fresh, and leave the thin uncut sections between each tooth as built-in bridges. Use a fine detail knife rather than a big saw for these tiny blocks. If one does crack, a toothpick pushed through from behind can hold it in place.

Should the two crossed bones be one shape or four separate holes?

Carve them as one connected opening where the shafts overlap in the middle. Leaving that crossing point uncut keeps the pieces supporting each other and stops the center from collapsing. Only round off the four knob ends after the main shafts are open.

What color light makes the fossil look best?

An amber or warm white LED gives the bones that soft museum-case glow the caption describes. Skip real candles since the thin teeth and bone edges can scorch and the heat dries the pumpkin out fast. A flickering LED adds a little movement if you want it.

Your take belongs here, too.

Changed a detail? Made it simpler? Share a photo of your version and tell the community what worked.

Share your pumpkin

More pumpkins like this

You've reached the end · 8 pumpkins
The Patch Report

Fresh pumpkins, in your inbox.

The best new carvings, ideas worth stealing, and how-tos for carving season. Short, seasonal, and gone by November.

A short email during carving season. Unsubscribe anytime. See our privacy policy.