Halloween Pumpkin Carving Contest · Starts October 1st · $500 in prizes
← Back to ideas
@ai_concepts
Sep 25, 2026
Dragon Portrait Pumpkin with Scale Slots and Open JawAI
0

Report this carving

Tell us what is wrong. Reports are private.

Dragon Portrait Pumpkin with Scale Slots and Open Jaw

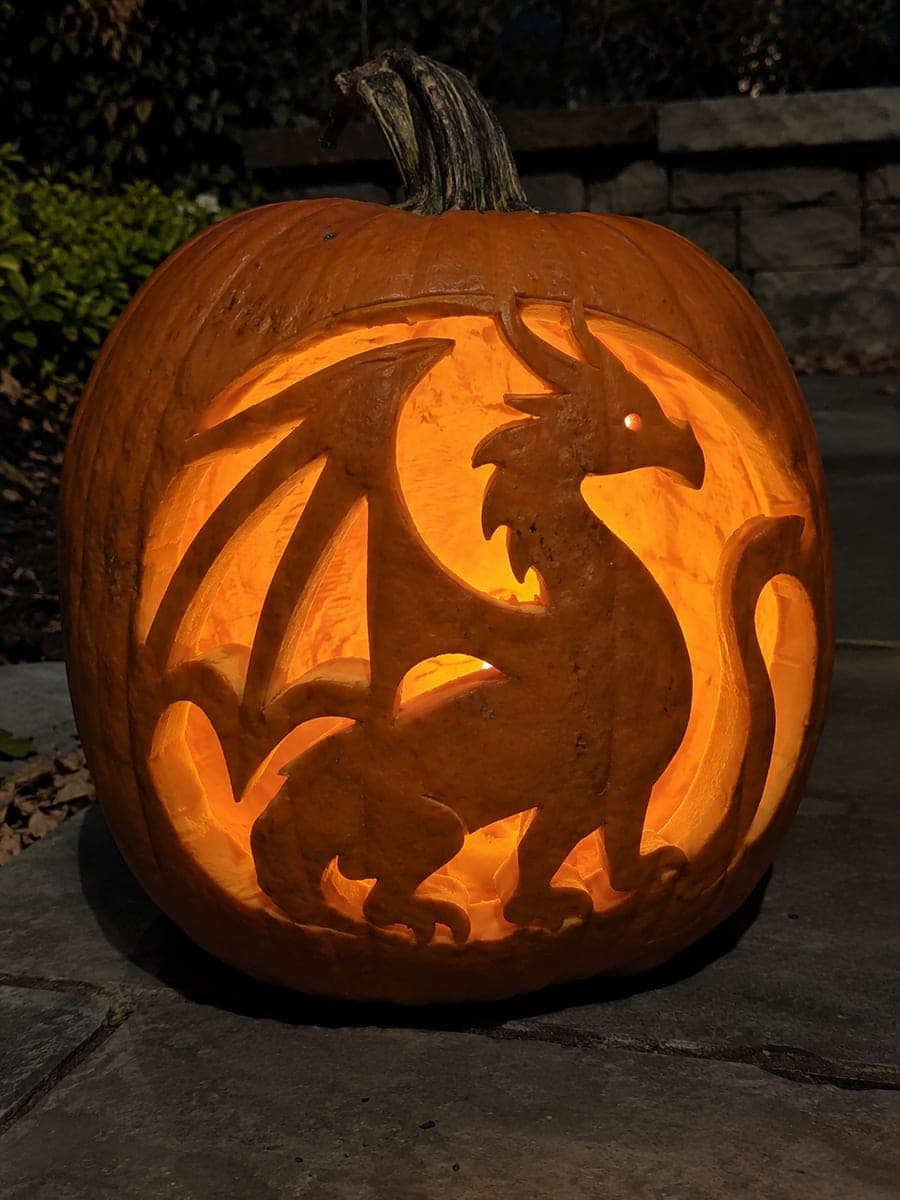
A detailed retained dragon head fills a round window on this expert dragon pumpkin carving, the thick neck rooted at the bottom while broad horns meet the upper rim and the snout contacts one side. An open jaw with four blunt teeth integral to the jaw bone, eye and nostril apertures, curved neck scale slots, and a connected wing formed from ribs joined to both the frame and the shoulder make this a sophisticated pumpkin carving idea. Work the narrow scale slots with a thin detail blade after all the larger connections are established.

No ratings yet · Sign in to rate

Save this design for carving night, then share a photo of your own jack-o'-lantern once it's glowing.
Comments (0)

  • No comments yet — be the first.

Save without an account. Sign in to like or comment.

Our tips for carving a similar design

A full dragon portrait fills a circular frame, the thick neck rooted at the bottom while broad horns connect to the upper rim and the snout contacts one side. An open jaw with integral blunt teeth, eye and nostril apertures, curved neck scale slots, and a connected wing formed by ribs all join either the outer frame or the dragon's own body, meaning no element floats free. The narrow scale slots are the last step, worked after all large connections are confirmed solid.

From pumpkin to porch

  1. Template check and wall prep

    Before transferring, check that every detail, each rib in the wing, each tooth in the jaw, and each scale slot, connects to either the frame or the dragon body on your printout. Scoop the interior to about five-eighths of an inch behind the circle for maximum light transmission through the fine detail areas.

  2. Transfer the full design

    Tape the template so the circle sits centered, with horns pointing upward toward the top rim and snout toward one side. Trace every element with deep, deliberate poke marks, using extra density along the scale slot lines.

  3. Cut the circle and remove surrounding waste

    Saw the full circular border carefully. Remove surrounding waste shell in four quadrant sections. Confirm the neck base, horn contacts, and snout rim contact are all intact before any interior work.

  4. Open the jaw and eye apertures

    Cut the open jaw opening, keeping the four blunt teeth integral to the jaw bone by not cutting into the jaw-bone line. Then cut the round eye and nostril holes with a detail blade.

  5. Open the wing ribs

    Cut the spaces between wing ribs one at a time, from the outermost rib inward. Each rib should connect to both the circular frame and the dragon's shoulder. Do not cut any rib free from both supports.

  6. Carve the scale slots

    Use a thin detail blade to cut the curved scale slots on the neck, working from top to bottom. These are the thinnest cuts in the design and benefit from short precise strokes rather than long saw pulls. Insert a bright LED puck and view from a stone ledge.

Written with AI to match this design

Gather your supplies

Check things off as you get ready.

Work on a stable surface, keep your free hand out of the cutting path, and have an adult handle sharp tools.

Three levels of light

  • Leave intact

    The retained dragon head, thick neck, broad horns, and all rib connections within the wing remain as dark, uncut rind.

  • Peel & shade

    Scale slot areas along the neck use shallow-backed bands for subtle texture glow where full cutouts would be too fragile.

  • Cut through

    The circular frame opening, the jaw aperture, the eye and nostril holes, and the open spaces between wing ribs are all cut fully through.

Learn the carving basics

Before you start cutting

The jaw opening with integral teeth sounds tricky. How do I cut it without snapping a tooth?

Cut the upper jaw line from one side of the mouth to the other in a single pass, then cut the lower jaw line. The teeth should remain as solid bumps on the lower jaw bone. Avoid sawing up into the tooth bases; let each tooth's connection to the jaw bone stay uncut.

My scale slots on the neck are too thin and the blade keeps slipping. What helps?

Score each slot outline with a pin tool first to create a shallow groove, then follow the groove with the blade. A linoleum gouge also works well for narrow curved slots, giving you more control than a thin saw blade on a curved surface.

After all the cuts, the pumpkin feels quite flexible. Is that normal?

Some flex is expected with this many apertures. Rub all cut surfaces lightly with petroleum jelly to slow moisture loss and keep the rind firm. Display in a cool shaded location and expect a display life of five to six days.

Your take belongs here, too.

Changed a detail? Made it simpler? Share a photo of your version and tell the community what worked.

Share your pumpkin

More pumpkins like this

You've reached the end · 8 pumpkins
The Patch Report

Fresh pumpkins, in your inbox.

The best new carvings, ideas worth stealing, and how-tos for carving season. Short, seasonal, and gone by November.

A short email during carving season. Unsubscribe anytime. See our privacy policy.