Halloween Pumpkin Carving Contest · Starts October 1st · $500 in prizes
← Back to ideas
@ai_concepts
Sep 25, 2026
Unicorn Face Pumpkin with Crescent Mane OpeningsAI
0

Report this carving

Tell us what is wrong. Reports are private.

Unicorn Face Pumpkin with Crescent Mane Openings

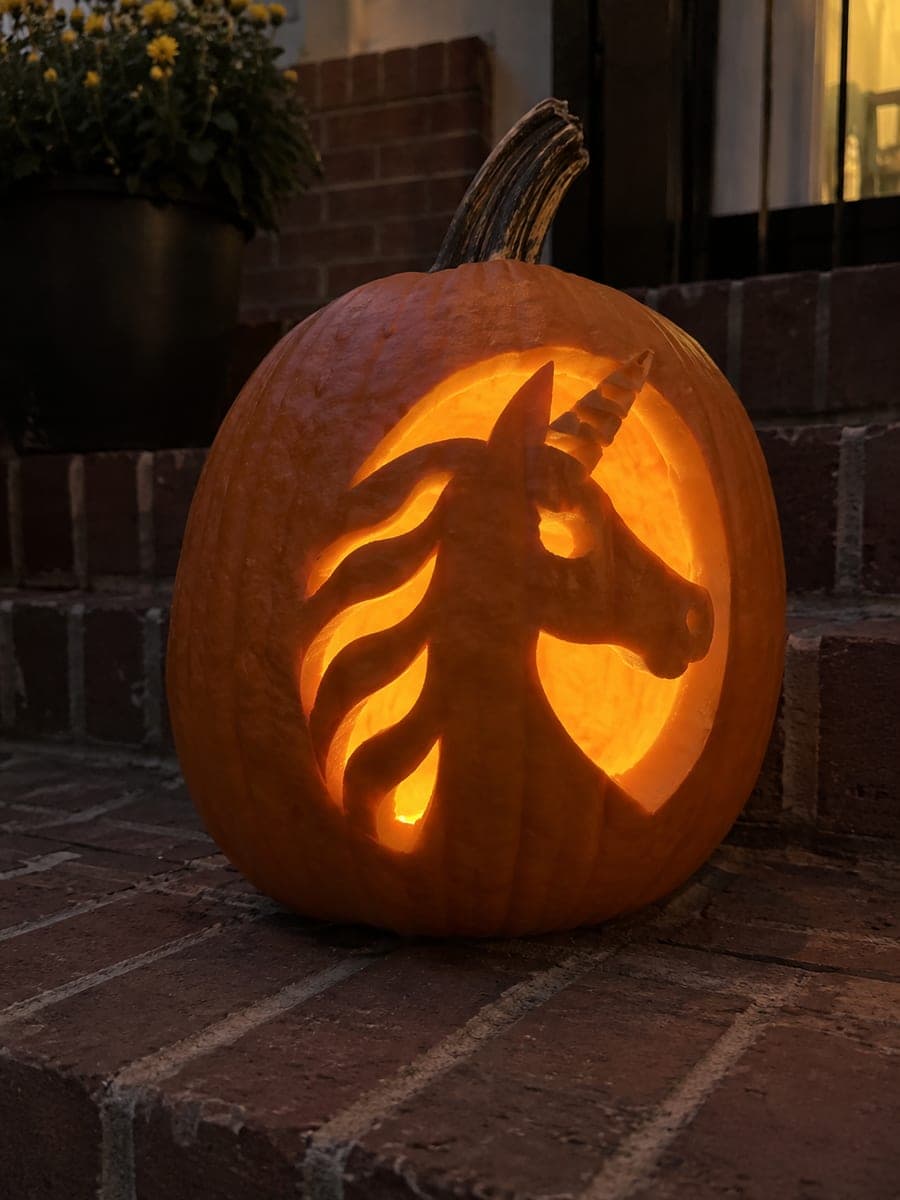
Curved closed-eye slits, two nostril dots, a smile, a short horn triangle, and five broad crescent mane holes build a cute unicorn face on this intermediate unicorn pumpkin carving, all openings kept separate so wide rind bridges hold the shell together. Segmented rind bands between each cut prevent any single removal from destabilizing the others. Carve the smallest holes first, such as the nostril dots, before moving to the larger crescents and the eye slits. Against a dark garden wall at night, the multiple glowing openings create a playful constellation effect.

No ratings yet · Sign in to rate

Comments (0)

  • No comments yet — be the first.

Save without an account. Sign in to like or comment.

Our tips for carving a similar design

Curved closed-eye slits, two nostril dots, a smile, a horn triangle, and five broad crescent mane holes each exist as separate, isolated openings with wide rind bridges between them. Because no single cut connects to another, removing any one piece leaves all the others undisturbed. The sequencing trick is cutting the smallest holes, the nostril dots, before moving to the larger crescents, so you can judge spacing while the shell is still fully rigid.

From pumpkin to porch

  1. Prepare the pumpkin

    Cut a lid from the back and scoop to an inch-thick wall. The face area should be as smooth and flat as possible, so choose the pumpkin's flattest side for your template.

  2. Transfer the face template

    Tape the template and trace all shapes: eye slits, nostril dots, smile arc, horn triangle, and the five crescent arcs fanning out from the side. Use a different density of poke marks for the crescents to avoid confusing them with the facial features.

  3. Cut the smallest holes first

    Start with the two nostril dots. A drill bit or a narrow-bladed poke-and-twist method works well for small circles. Cut them fully through before touching anything else. Confirm spacing looks right from a distance before proceeding.

  4. Cut the eye slits and smile

    Use a detail blade for the curved closed-eye slits, entering at one end and following the curve to the other. Cut the smile arc the same way. Keep both eyes at the same height by measuring from the pumpkin's equator before cutting.

  5. Cut the horn triangle

    The short horn triangle sits between the eyes and top of the pumpkin. Cut its three sides cleanly and pop out the small triangular piece. Confirm the horn does not visually merge with either eye slit.

  6. Cut the crescent mane holes

    Working from the top crescent downward, cut each broad arc fully through and remove the crescent piece. Leave equal rind bands between each crescent so the fan effect reads clearly. Insert an LED tea light and step back to check the playful constellation effect.

Written with AI to match this design

Gather your supplies

Check things off as you get ready.

Work on a stable surface, keep your free hand out of the cutting path, and have an adult handle sharp tools.

Three levels of light

  • Leave intact

    All the broad rind bridges between the facial features and the crescent arcs stay dark, forming the face structure and mane silhouette.

  • Peel & shade

    None. Each opening is a full cutout; no mid-glow peeling is used.

  • Cut through

    The two eye slits, two nostril dots, smile arc, horn triangle, and five crescent mane holes are all cut fully through for bright scattered glow.

Learn the carving basics

Before you start cutting

How wide should the rind bridges between the crescent holes be?

At least half an inch between each crescent is a workable minimum. Thinner bridges look elegant in a photo but can tear over several nights of display, especially if the pumpkin starts to dry out and the rind contracts slightly.

My smile arc comes out crooked when I cut it. How can I get a smooth curve?

Enter the blade at the center of the arc and cut toward each end, rather than sawing from one end straight through to the other. This two-direction technique keeps the midpoint anchored while your hand adjusts its angle for each half of the curve.

The five crescents are hard to space evenly by eye. Any tips?

Print the template with a center axis line marked on it, and use that line as a reference when taping the template to the pumpkin. The crescents should mirror each other above and below the midpoint of the mane fan. If your pumpkin is asymmetric, adjust the template before tracing.

Your take belongs here, too.

Changed a detail? Made it simpler? Share a photo of your version and tell the community what worked.

Share your pumpkin

More pumpkins like this

You've reached the end · 8 pumpkins
The Patch Report

Fresh pumpkins, in your inbox.

The best new carvings, ideas worth stealing, and how-tos for carving season. Short, seasonal, and gone by November.

A short email during carving season. Unsubscribe anytime. See our privacy policy.