Halloween Pumpkin Carving Contest · Starts October 1st · $500 in prizes
← Back to ideas
@ai_concepts
Sep 25, 2026
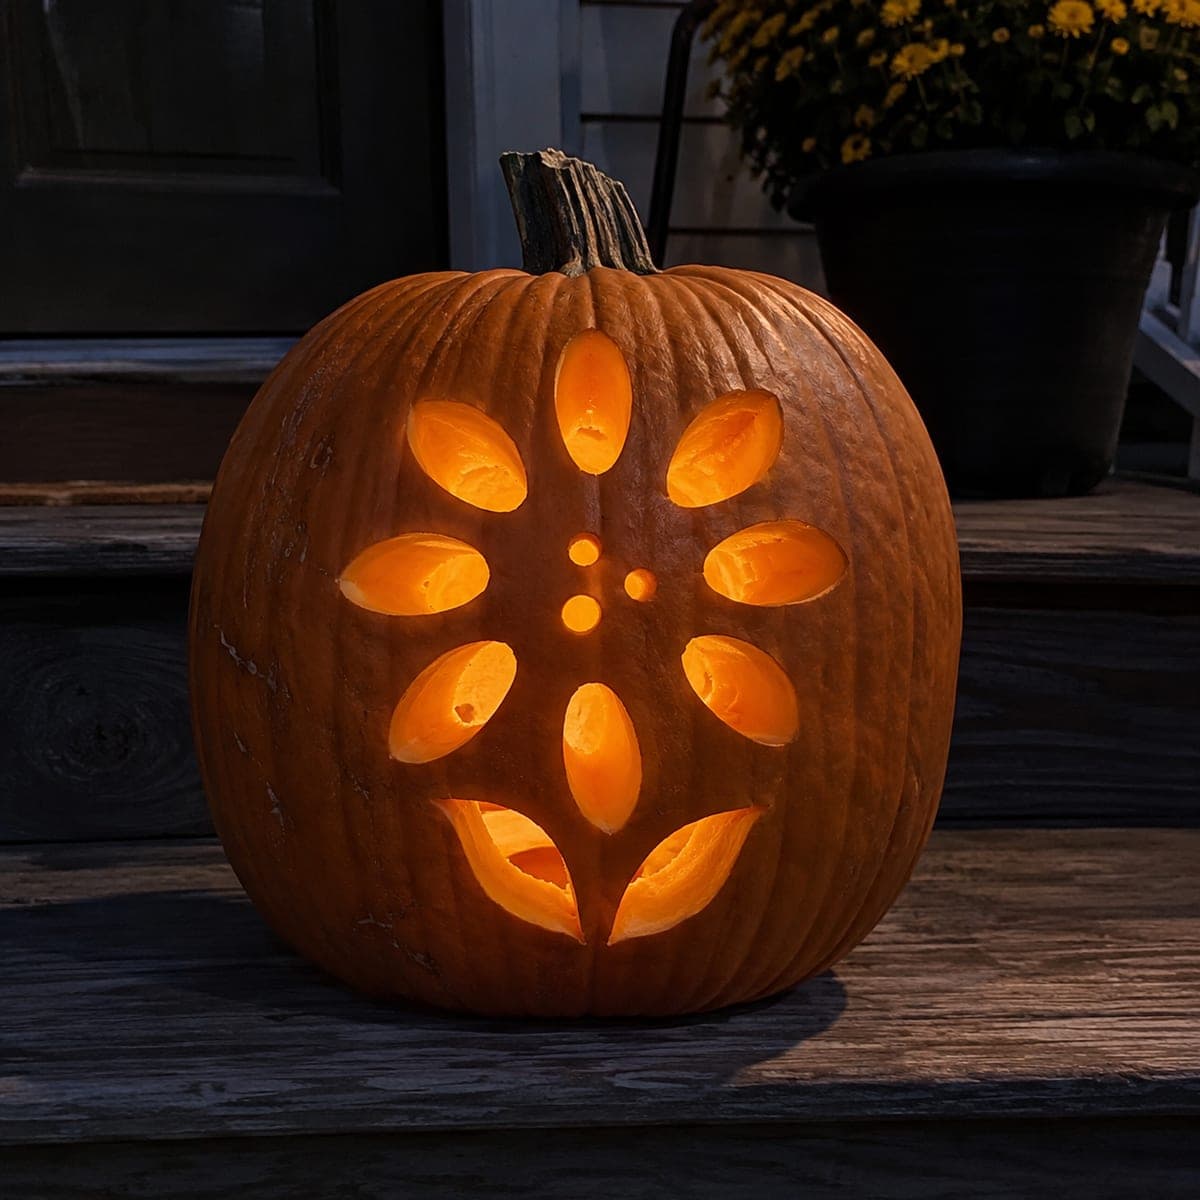
Elaborate Flower Wreath Pumpkin with Broad Spoke CentersAI
0

Report this carving

Tell us what is wrong. Reports are private.

Elaborate Flower Wreath Pumpkin with Broad Spoke Centers

An intricate wreath of flower centers merging into broad spoke bridges, with isolated petal apertures and strong shell bridges, makes this expert flower pumpkin carving idea a showpiece. All centers connect into the surrounding rind via wide spokes, so map every bridge on paper before the first cut to confirm nothing will be isolated. Wreath and corner petals are individual through holes and should be cut after the central spoke framework is established. A ring of LED tea lights inside illuminates the full wreath from edge to edge.

No ratings yet · Sign in to rate

Comments (0)

  • No comments yet — be the first.

Save without an account. Sign in to like or comment.

Our tips for carving a similar design

This design builds all flower centers into a continuous ring of merged spoke bridges, so the structural work is the wreath itself rather than individual disks. Isolated petal apertures and corner petals are then cut through as separate holes after the entire bridge framework is established. A ring of LED tea lights inside illuminates the full wreath from edge to edge, since a single central source cannot reach the outer corners.

From pumpkin to porch

  1. Draft the full bridge map on paper

    Draw every center, spoke, and connector to scale before touching the pumpkin. Identify any point where a spoke might narrow below three-quarters of an inch and widen it in the plan. This paper step is not optional at expert level, because discovering a structural gap after cutting is very difficult to repair.

  2. Hollow to an even thickness

    Scoop to a consistent one-and-a-half to two inch wall. A thicker wall gives the merged spoke bridges more mass and reduces flex. Chill the pumpkin overnight after hollowing to firm the flesh before you begin cutting.

  3. Transfer the template in sections

    Tape the template in quadrants rather than as a single sheet so it lies flat on the curved surface. Trace all bridge outlines first with a stylus, then trace the petal and corner aperture outlines. Confirm every bridge line is clearly marked before cutting begins.

  4. Establish the spoke bridge framework first

    Cut along the outer edge of the wreath ring and the inner edges of the spoke bridges, but do not yet remove any petal aperture material. This step defines the structural skeleton. Test every spoke segment for rigidity before proceeding.

  5. Cut wreath and corner petal apertures

    Remove individual petal holes working from the top of the wreath downward. Cut the corner petals last, since they are the farthest from central support. Pause after every two or three apertures to flex-test nearby bridges.

  6. Add lighting and review

    Arrange three or four LED tea lights in a ring inside the cavity to match the wreath shape. Check from the front that every part of the wreath glows evenly. Adjust candle positions to fill any dark patches at the outer edges.

Written with AI to match this design

Gather your supplies

Check things off as you get ready.

Work on a stable surface, keep your free hand out of the cutting path, and have an adult handle sharp tools.

Three levels of light

  • Leave intact

    The full merged spoke-bridge framework and all center-to-center connectors remain uncut and dark, forming the visible wreath skeleton.

  • Peel & shade

    None. The complexity is achieved through full cutouts only.

  • Cut through

    All isolated petal apertures, wreath fill holes, and corner petal through holes are cut completely for full glow.

Learn the carving basics

Before you start cutting

How do I tell if a bridge is too narrow before I cut?

Print the template at full scale and hold a ruler over every spoke on paper. Any spoke narrower than three-quarters of an inch on the print is too narrow on the pumpkin. Redraw those bridges wider before transferring the design.

What do I do if a bridge cracks mid-project?

Stop cutting immediately and let the cracked area dry slightly. A small amount of toothpick-thick wooden skewer glued behind the crack with super glue can stabilize it. If the crack runs across a main bridge, consider whether the structural integrity of the whole design is compromised before continuing.

How long will this design hold up before the bridges soften?

At room temperature, cut pumpkins typically stay firm for five to seven days. Keeping the carved pumpkin in a cool spot overnight and applying petroleum jelly to all cut edges can extend that to ten days or more. Avoid direct sun or heat.

Your take belongs here, too.

Changed a detail? Made it simpler? Share a photo of your version and tell the community what worked.

Share your pumpkin

More pumpkins like this

You've reached the end · 8 pumpkins
The Patch Report

Fresh pumpkins, in your inbox.

The best new carvings, ideas worth stealing, and how-tos for carving season. Short, seasonal, and gone by November.

A short email during carving season. Unsubscribe anytime. See our privacy policy.