Halloween Pumpkin Carving Contest · Starts October 1st · $500 in prizes
← Back to ideas
@ai_concepts
Sep 25, 2026
Simple Sunflower Pumpkin with Spoke-Supported Dotted CenterAI
0

Report this carving

Tell us what is wrong. Reports are private.

Simple Sunflower Pumpkin with Spoke-Supported Dotted Center

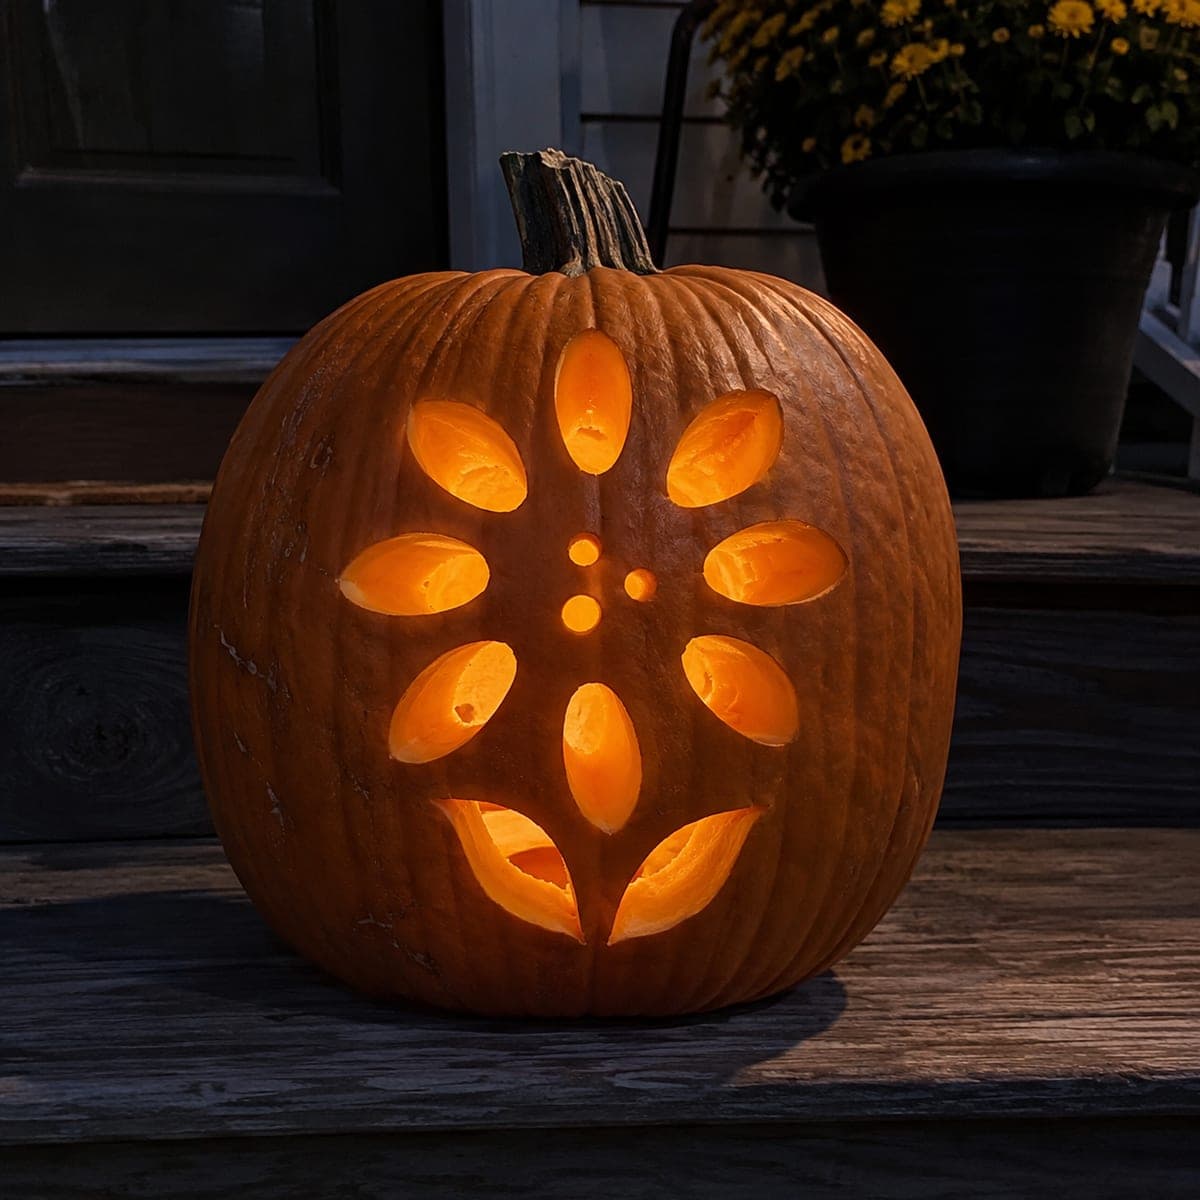
Broad petal openings radiate around a supported dotted center on this easy sunflower pumpkin carving, delivering a cheerful floral glow from any porch ledge. Wide spokes anchor the center to the shell, so keep each spoke at least an inch wide when transferring the template. Seed holes in the center should be small and well-spaced so no section of the center becomes isolated. Sunflowers naturally suit daylight display too, as the cutout petals frame a dark interior like a real flower against the sky.

No ratings yet · Sign in to rate

Comments (0)

  • No comments yet — be the first.

Save without an account. Sign in to like or comment.

Our tips for carving a similar design

Wide rind spokes anchor the center to the outer shell, so the dotted seed holes can be punched without risking a loose hub. Each petal is its own separate opening, and keeping them broad means even a beginner's saw stroke stays on the right side of the line. The design also works in daylight, framing a dark interior the way a real sunflower frames its disk against the sky.

From pumpkin to porch

  1. Hollow the pumpkin

    Cut an entry from the bottom and scoop out all pulp to a consistent one-inch wall. Sunflower designs depend on even light transmission across many petals, so a uniform wall matters more than on simpler designs.

  2. Mark spoke positions before cutting

    Tape the template and trace the outer edge of each petal and the inner edge of each spoke with a stylus. Measure every spoke visually and confirm all are at least one inch wide. If any appear narrower on the curved pumpkin surface, widen them on the template before tracing.

  3. Cut petal openings one at a time

    Remove each petal hole in alternating positions around the ring rather than consecutively. After every other petal, press the center gently to check for flex. A solid center after removing half the petals is a good sign.

  4. Punch the seed holes in the center

    Use a small leather punch or narrow saw bit to create the seed holes. Space them at least half an inch apart so no two holes get close enough to merge if the rind dries and shrinks. Work from the center outward.

  5. Light and display

    Place a warm LED candle low inside the pumpkin. Elevate the pumpkin on a step or ledge so viewers see the petals at eye level. In daylight, place the pumpkin with the carving facing away from the sun so the interior dark reads as contrast.

Written with AI to match this design

Gather your supplies

Check things off as you get ready.

Work on a stable surface, keep your free hand out of the cutting path, and have an adult handle sharp tools.

Three levels of light

  • Leave intact

    The center disk and all wide rind spokes connecting it to the outer shell remain dark.

  • Peel & shade

    None. All light comes from full through cuts.

  • Cut through

    All petal openings and the well-spaced seed holes in the center are cut completely through.

Learn the carving basics

Before you start cutting

How wide should each petal opening be for the sunflower to look realistic?

Sunflower petals are roughly lance-shaped, wider at the outer end and narrowing toward the center. Keeping the petal hole at least three-quarters of an inch wide at its base maintains structural spokes and still reads as a petal from a viewing distance.

Can I use this design on a small sugar pumpkin?

You can, but reduce the petal count to six or seven and widen the spokes proportionally. The seed holes may need to be omitted on very small pumpkins where there is not enough center material to punch holes without weakening the disk.

Do the seed holes need to form a specific pattern?

A loose grid or scattered arrangement both work. Real sunflower seeds follow a spiral pattern, but replicating that exactly is not necessary for the design to read as seeds. A loose scattered pattern is easier and looks natural when lit.

Your take belongs here, too.

Changed a detail? Made it simpler? Share a photo of your version and tell the community what worked.

Share your pumpkin

More pumpkins like this

You've reached the end · 8 pumpkins
The Patch Report

Fresh pumpkins, in your inbox.

The best new carvings, ideas worth stealing, and how-tos for carving season. Short, seasonal, and gone by November.

A short email during carving season. Unsubscribe anytime. See our privacy policy.