Halloween Pumpkin Carving Contest · Starts October 1st · $500 in prizes
← Back to ideas
@ai_concepts
Sep 25, 2026
Simple Curved Petal Rose Pumpkin with Two Leaf CutoutsAI
0

Report this carving

Tell us what is wrong. Reports are private.

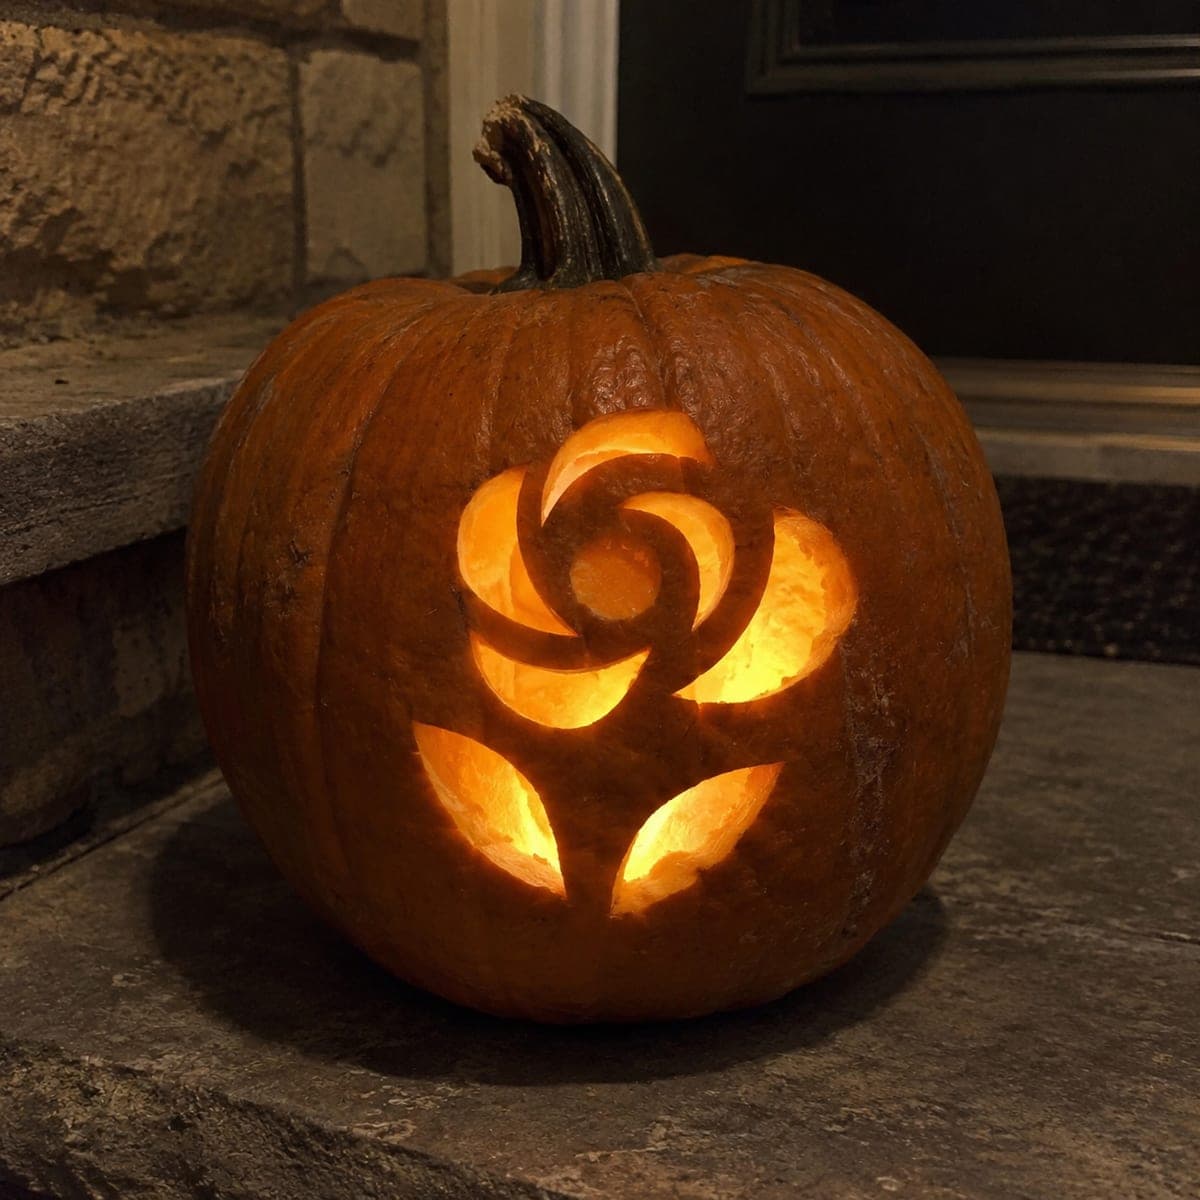
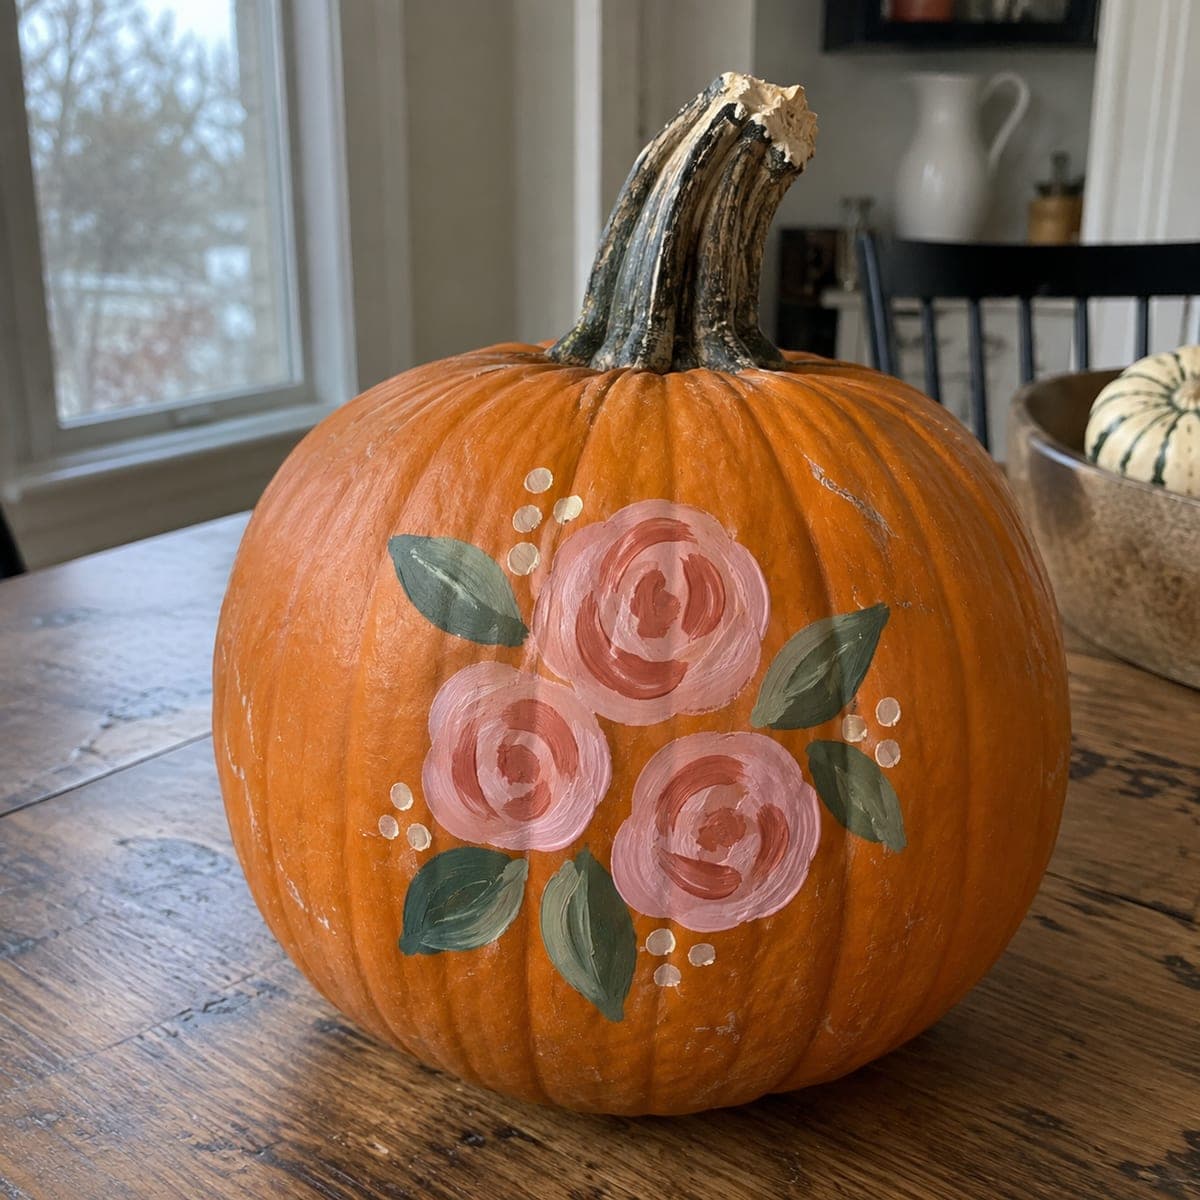
Simple Curved Petal Rose Pumpkin with Two Leaf Cutouts

Staggered crescent-shaped cutouts suggest a rose in bloom alongside two leaf apertures on this easy rose pumpkin carving, keeping the technique approachable. Cut each crescent as a separate curved hole and keep the bridges between them broad so the center rind stays firmly anchored. The negative space of the crescents reads as petals when backlit, which is the key visual trick in this pumpkin carving idea. A warm amber LED enhances the petal illusion by casting curved shadows into the rind bridges.

No ratings yet · Sign in to rate
Comments (0)

  • No comments yet — be the first.

Save without an account. Sign in to like or comment.

Our tips for carving a similar design

The illusion here is that the broad rind bridges between the crescent holes read as petals when backlit, even though the actual cuts are simple curved openings. Each crescent is carved as its own separate hole with no connection to its neighbor, so the bridges stay solid. A warm amber LED reinforces the petal illusion by casting curved shadow lines into the rind.

From pumpkin to porch

  1. Hollow the pumpkin

    Remove the lid and scoop out all pulp to a wall thickness of about one inch. A consistent wall makes the crescents easier to cut and ensures even light transmission across the design.

  2. Trace the crescent and leaf layout

    Sketch or print the rose pattern showing all crescent positions and the two leaf openings. Tape the template to the pumpkin and trace each shape with a stylus. Mark the bridge zones clearly so you do not accidentally cut into them.

  3. Cut the outermost crescents first

    Begin with the largest, outermost crescent openings. A thin flexible carving saw handles the curved cuts more cleanly than a straight blade. Work each curve in one smooth pass if possible, using gentle forward pressure.

  4. Move inward, preserving bridge width

    After each crescent, measure the nearest bridge visually. Keep every bridge at least three-quarters of an inch wide. Cutting the crescents from outside to inside means the center rind has maximum support as you work inward.

  5. Add the two leaf holes

    Cut both leaf apertures after the rose crescents are complete. These are simple oval or elongated shapes and provide a natural grounding detail below the bloom. Keep full rind between each leaf and the nearest crescent.

  6. Light and check the petal illusion

    Place a warm amber LED candle inside and view the pumpkin from three feet away in a dim room. The bridges should appear as glowing petal curves. Rotate the candle slightly to adjust the shadow angle if any bridge looks flat.

Written with AI to match this design

Gather your supplies

Check things off as you get ready.

Work on a stable surface, keep your free hand out of the cutting path, and have an adult handle sharp tools.

Three levels of light

  • Leave intact

    All rind bridges between the crescents remain dark, functioning as the visible rose petals.

  • Peel & shade

    None. The design uses only full cutouts.

  • Cut through

    Every crescent opening and both leaf apertures are cut fully through.

Learn the carving basics

Before you start cutting

Why does the rose illusion only work when lit?

In daylight the crescent holes simply look like curved holes in orange rind. The petal illusion requires backlighting to silhouette the bridges as glowing curves. This is normal for this type of design and is exactly how it is meant to be displayed.

How do I cut a smooth curve without the saw binding?

Use a thin, narrow-bladed carving saw and turn the blade in the direction of the curve as you push forward. Short light strokes work better than long heavy ones. If the blade binds, back it out fully and re-enter from a slightly different angle.

Can I add more crescent rings for a fuller rose?

You can, but check that each new ring still has at least a three-quarter inch bridge between it and its neighbor. Adding a third ring works well on a larger pumpkin. On a smaller pumpkin, three rings can leave bridges too thin to hold.

Your take belongs here, too.

Changed a detail? Made it simpler? Share a photo of your version and tell the community what worked.

Share your pumpkin

More pumpkins like this

You've reached the end · 8 pumpkins
The Patch Report

Fresh pumpkins, in your inbox.

The best new carvings, ideas worth stealing, and how-tos for carving season. Short, seasonal, and gone by November.

A short email during carving season. Unsubscribe anytime. See our privacy policy.