Halloween Pumpkin Carving Contest · Starts October 1st · $500 in prizes
← Back to ideas
@ai_concepts
Sep 25, 2026
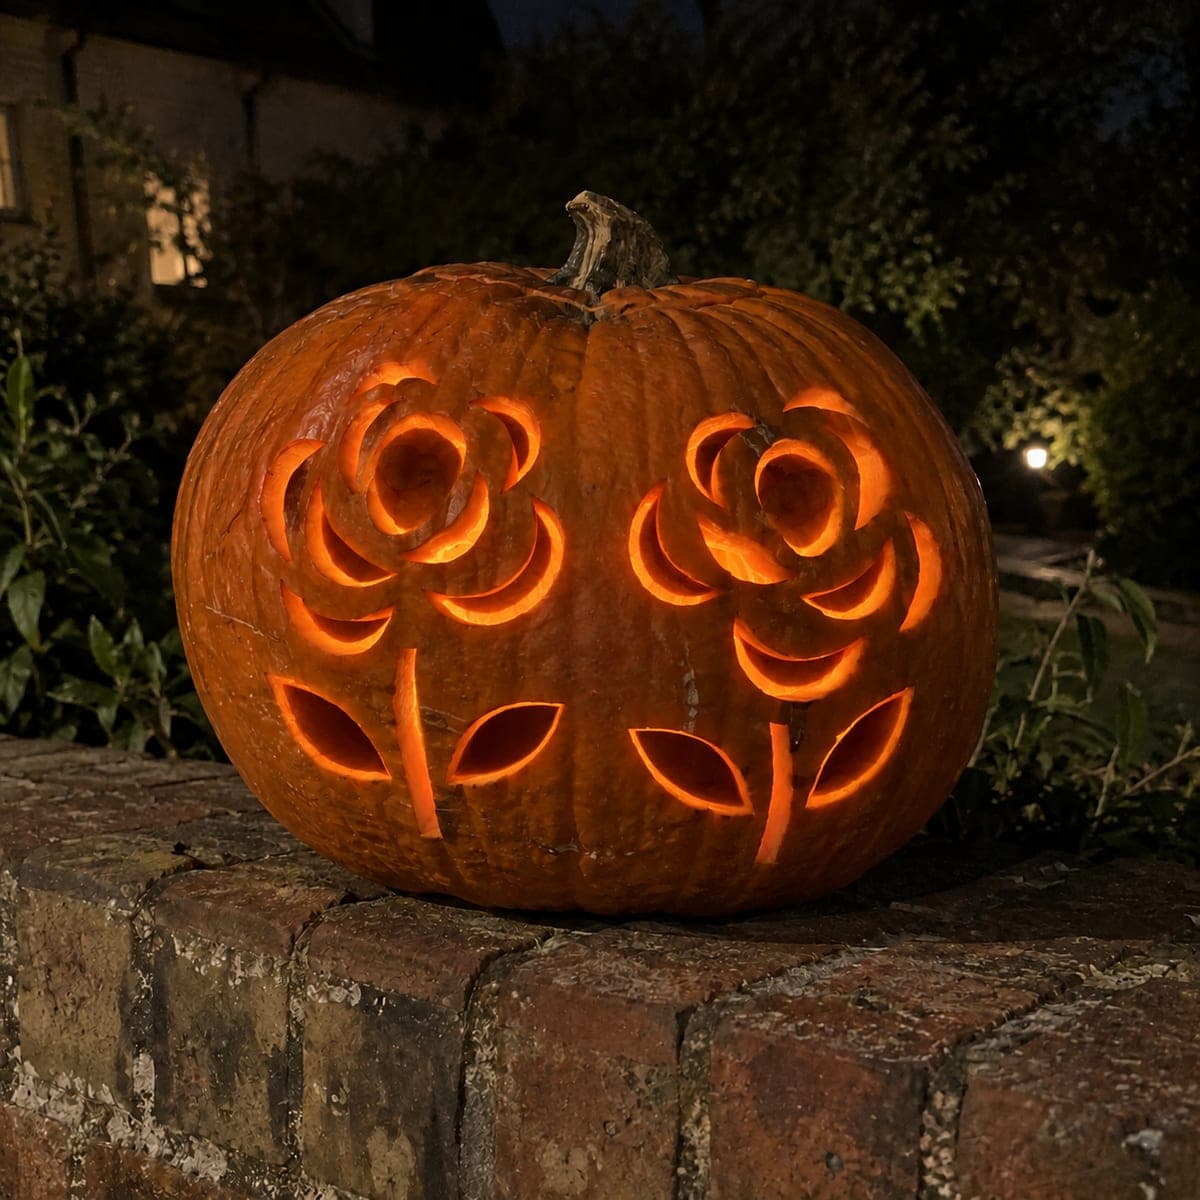
Twin Rose Pumpkin with Connected Petal BridgesAI
0

Report this carving

Tell us what is wrong. Reports are private.

Twin Rose Pumpkin with Connected Petal Bridges

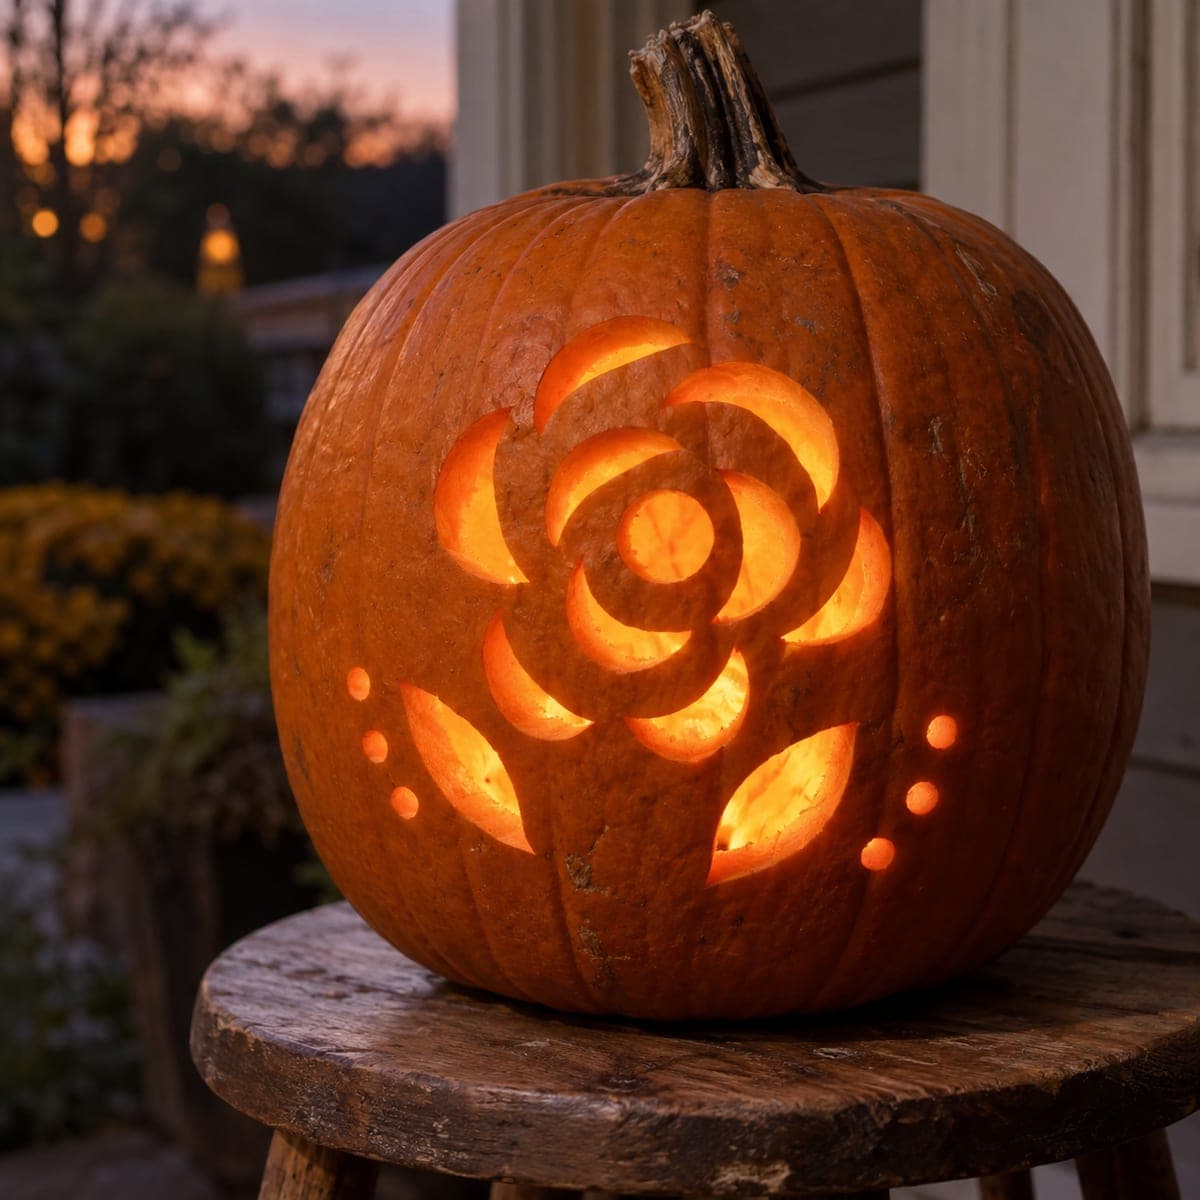
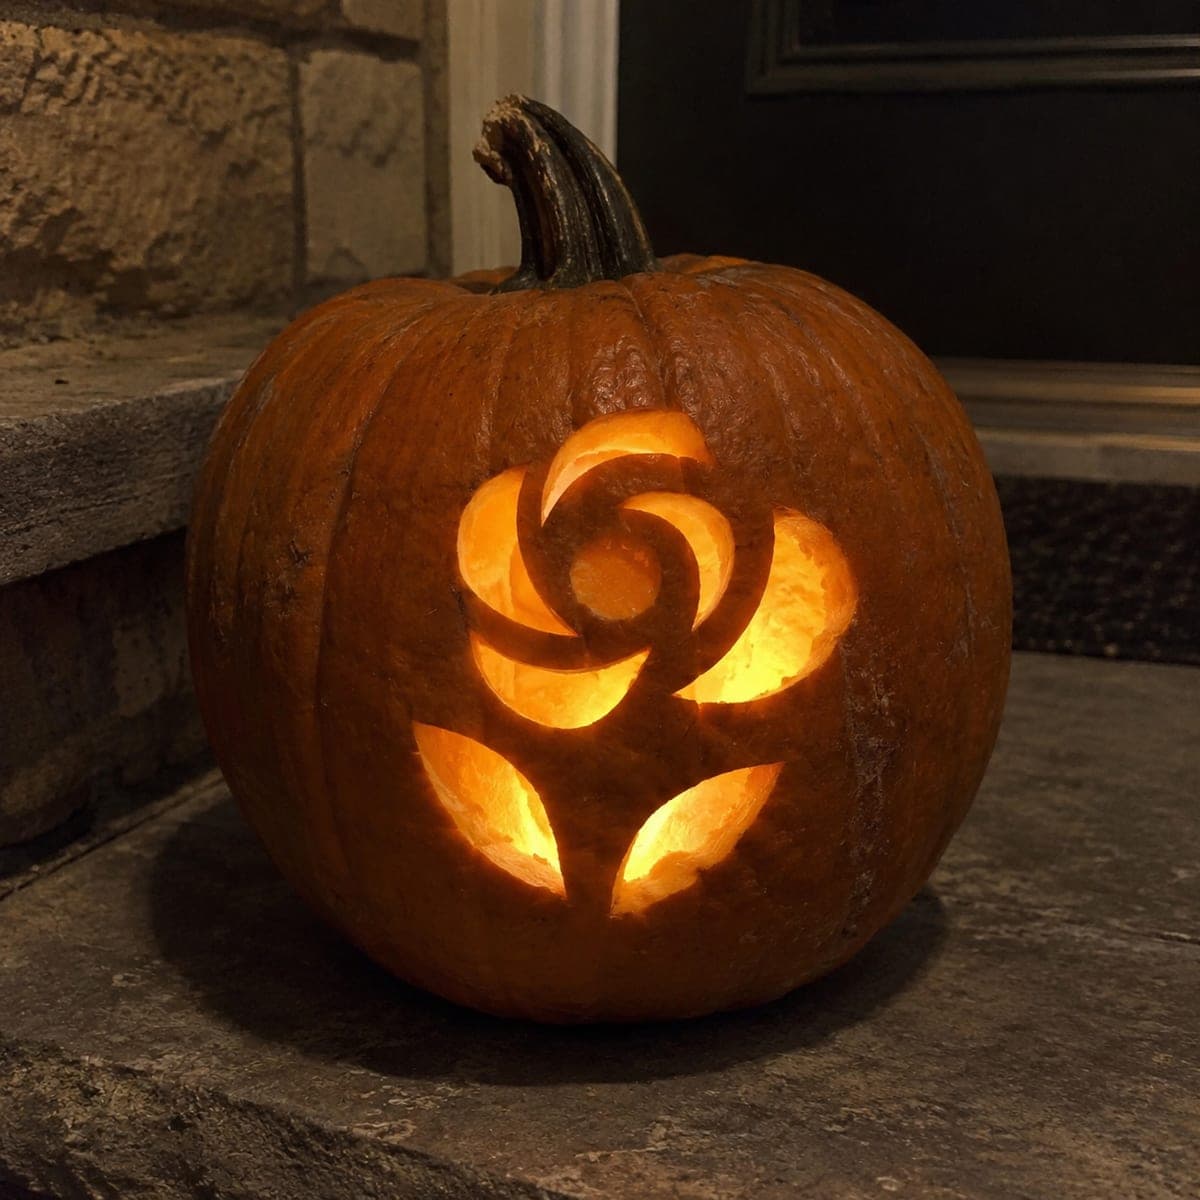
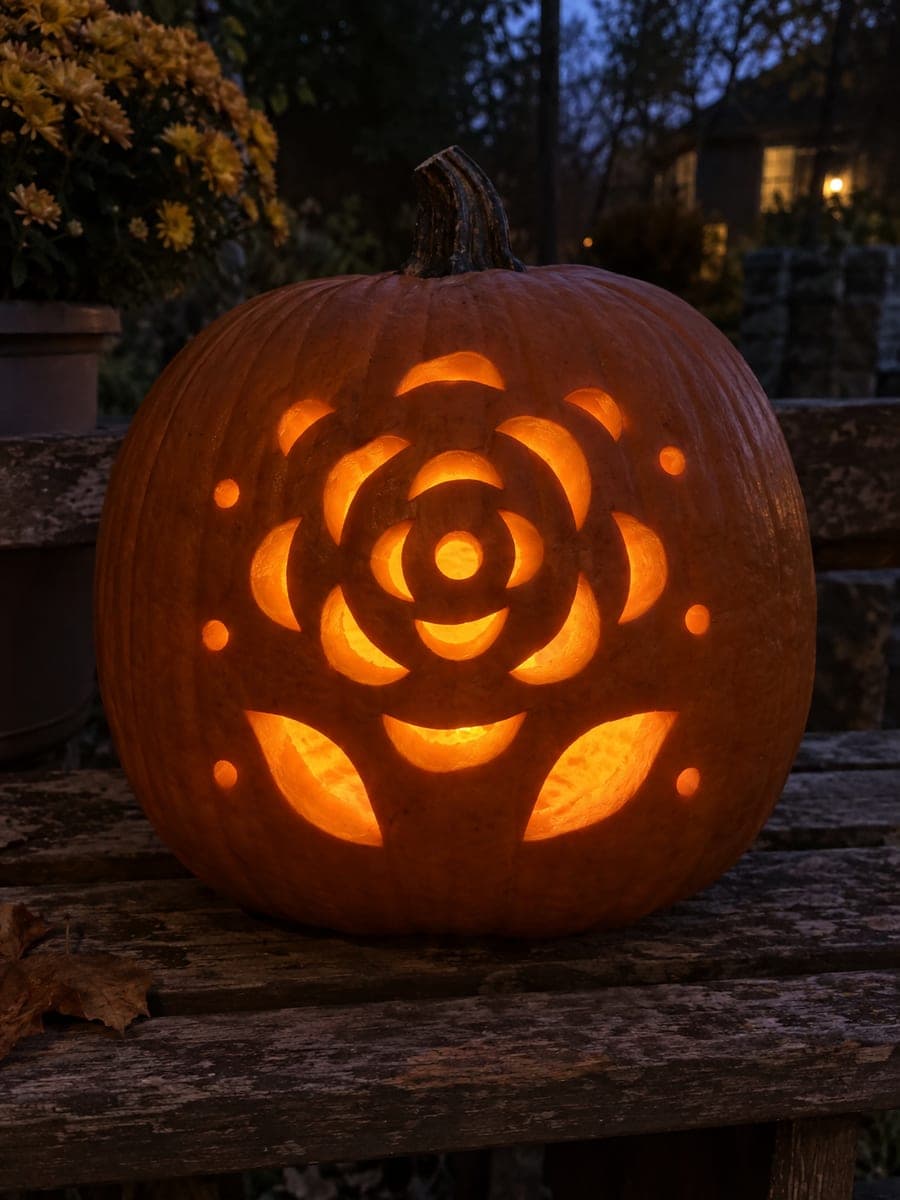
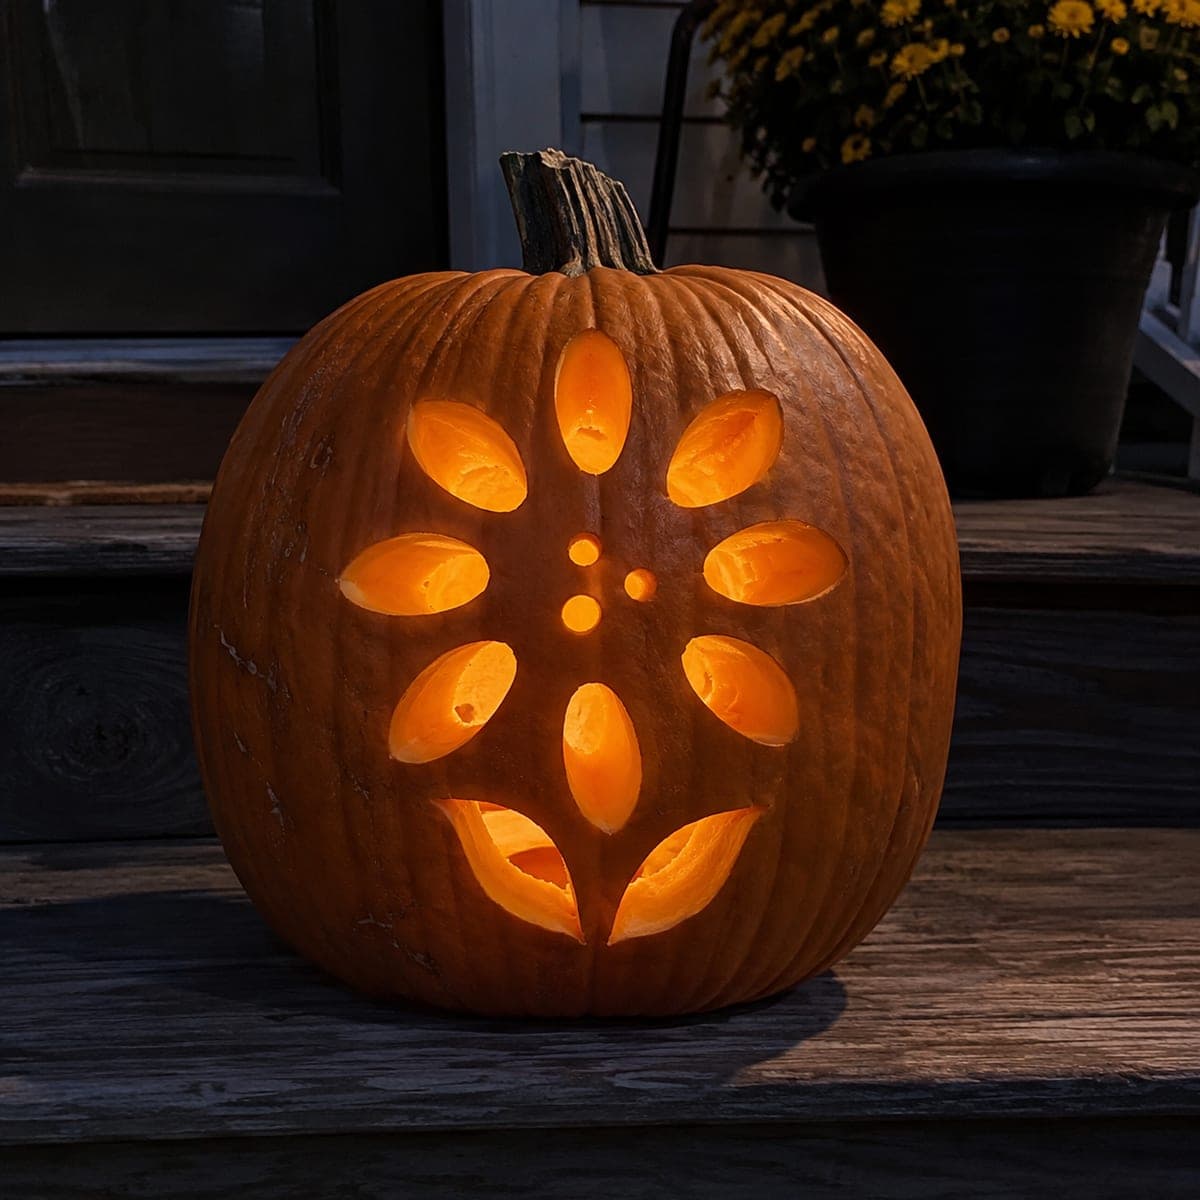
Two carved rose motifs with broad connecting petal rind bridges, inner nubs removed, and independent leaf and stem apertures make this hard rose pumpkin carving a layered design. Plan the two roses so their outer crescent rings do not overlap, keeping healthy shell between the two motifs. Remove inner nubs only after the outer petals of both roses are confirmed stable. Leaf and stem holes come last, placed at the base to ground the composition visually.

No ratings yet · Sign in to rate
Comments (0)

  • No comments yet — be the first.

Save without an account. Sign in to like or comment.

Our tips for carving a similar design

Two separate rose motifs are built from individual crescent holes with broad petal bridges, with the roses positioned so their outer rings never overlap and a healthy band of intact shell lies between them. Inner nubs are removed only after both outer petal rings are confirmed stable, preventing a cascade failure if one center weakens. Leaf and stem holes at the base ground the composition visually and are cut last.

From pumpkin to porch

  1. Layout and hollow

    Sketch the two rose positions on paper first, ensuring at least one-and-a-half inches of rind between the outermost crescent of each rose. Hollow the pumpkin to a consistent one-and-a-quarter inch wall. Transfer the layout with a grease pencil before attaching the detailed template.

  2. Transfer the full template

    Tape the full template and trace all crescent positions, inner nub areas, leaf shapes, and stem openings with a stylus. Keep the two rose zones visually distinct on the template with different colored pen traces to avoid confusion while cutting.

  3. Cut all outer crescents on both roses

    Complete the outer crescent ring on the first rose, then immediately move to the outer crescent ring on the second. Working both outer rings before any inner cuts ensures the pumpkin face is never structurally compromised on only one side.

  4. Confirm all outer rings, then add inner nubs

    Press each center firmly after both outer rings are done. Only when both are confirmed stable, remove the inner nub holes that define the rose cores. Inner nubs are small, so use a narrow punch or detail saw.

  5. Cut leaves and stem apertures last

    With both rose structures complete, add the leaf and stem holes at the base. These ground the design and prevent the two roses from floating visually. Keep generous rind between the stem holes and the nearest crescent bridges.

  6. Light and assess from a distance

    Insert an LED candle centered between the two roses so both receive equal light. Step back to six feet and check that both roses read as distinct glowing blooms. Adjust candle position if one rose appears dimmer.

Written with AI to match this design

Gather your supplies

Check things off as you get ready.

Work on a stable surface, keep your free hand out of the cutting path, and have an adult handle sharp tools.

Three levels of light

  • Leave intact

    All petal bridges on both roses and the rind band separating the two motifs stay dark and uncut.

  • Peel & shade

    None. All illumination is through full cutouts.

  • Cut through

    All crescent apertures on both roses, inner nubs, leaf holes, and stem openings are cut completely through.

Learn the carving basics

Before you start cutting

How much rind between the two roses is truly safe?

One-and-a-half inches is the minimum for a standard pumpkin with one-inch-thick walls. If your pumpkin has thinner walls or is particularly soft, increase that gap to two inches. The band between the roses is the weakest structural point of the design.

What if the roses are different sizes because of the pumpkin's curve?

A slight size difference due to curvature is fine and actually looks natural. Avoid trying to force identical sizes by cutting one rose larger than the template suggests, as that reduces bridge width.

Can I add a third rose if the pumpkin is large enough?

Yes, but treat the third rose exactly like the other two: outer ring first, confirm stability, then inner nubs and details. The rind between three roses needs careful planning, so sketch the full three-rose layout on paper before committing.

Your take belongs here, too.

Changed a detail? Made it simpler? Share a photo of your version and tell the community what worked.

Share your pumpkin

More pumpkins like this

You've reached the end · 8 pumpkins
The Patch Report

Fresh pumpkins, in your inbox.

The best new carvings, ideas worth stealing, and how-tos for carving season. Short, seasonal, and gone by November.

A short email during carving season. Unsubscribe anytime. See our privacy policy.