Halloween Pumpkin Carving Contest · Starts October 1st · $500 in prizes
← Back to ideas
@ai_concepts
Sep 25, 2026
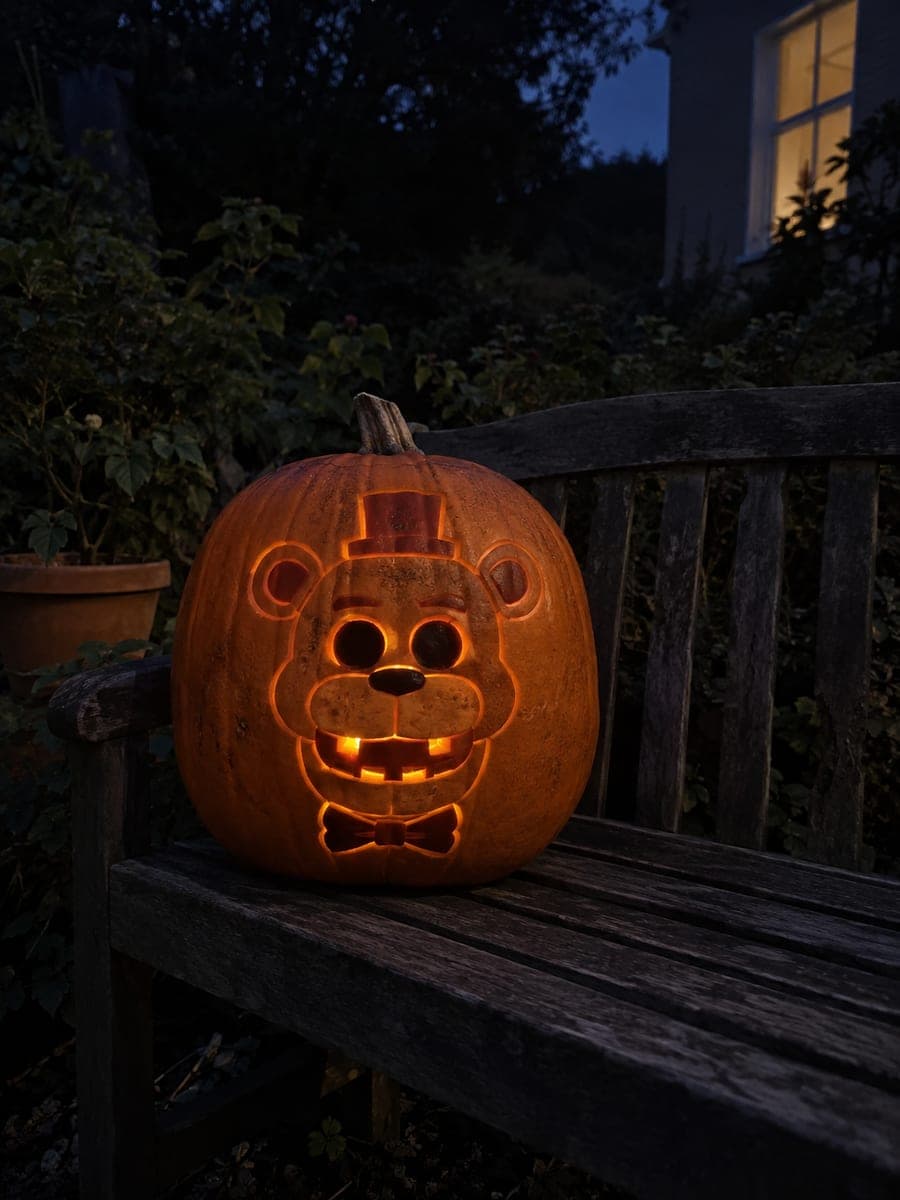
Expert Freddy Fazbear Pumpkin with Microphone AperturesAI
0

Report this carving

Tell us what is wrong. Reports are private.

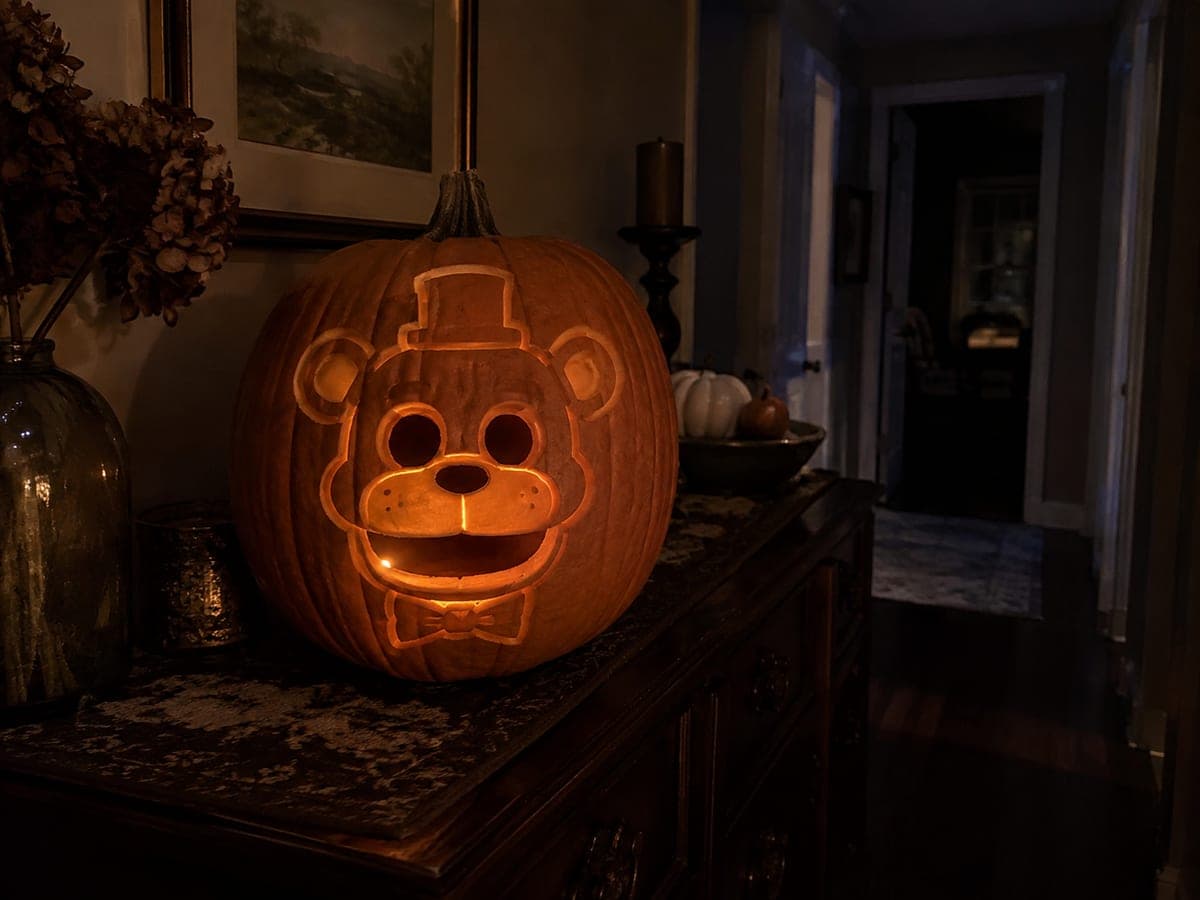
Expert Freddy Fazbear Pumpkin with Microphone Apertures

The expert Freddy Fazbear pumpkin carving idea adds separate microphone apertures alongside the hollow eyes, open mouth with rooted teeth, and full shallow-backed hat, ears, and bowtie relief. The microphone cutouts are the final detail to add, placed after all structural cuts are stable. Plan the layout so the microphone holes align with where Freddy would logically be holding it. A flickering LED inside completes the effect, mimicking the erratic stage lighting of Freddy's Pizzeria.

No ratings yet · Sign in to rate
Comments (0)

  • No comments yet — be the first.

Save without an account. Sign in to like or comment.

Our tips for carving a similar design

The expert Freddy design adds separate microphone apertures on top of the full hollow-eye, rooted-teeth mouth, and complete hat, ear, and bowtie shallow relief. The microphone holes are added last, once every structural cut is stable. Planning the microphone position in the layout phase ensures it aligns logically with where Freddy would hold it and does not crowd the lower face detail.

From pumpkin to porch

  1. Prep and hollow

    Cut the back lid and scoop to one inch of wall thickness throughout. This is the most complex Freddy design, so take extra time during the hollow to ensure consistent wall thickness across the full face. Dry the interior completely. Mark the face vertical center before taping the template.

  2. Transfer the full expert layout

    The template should include all elements: eye apertures, mouth boundary with individual tooth root lines, hat outline with brim detail, ear shapes, bowtie, outer contour, and the microphone aperture position. Place the microphone holes in the lower outer area of the face, logically positioned as if Freddy is holding it at cheek height. Mark everything before cutting.

  3. Cut the eye apertures

    Always start with the eyes. Cut both eye holes with a fine carving saw and remove pieces by pushing inward. Double-check tooth root lines are still clearly visible and undisturbed before moving to the mouth.

  4. Score tooth roots and cut the mouth

    Score every tooth root line with a detail knife before cutting the mouth opening. Cut the mouth gap in sections, protecting each tooth root. Check all roots after removal. This step is identical to the hard version; take the same care here even after completing the expert template work.

  5. Shallow-back the hat, ears, bowtie, and outer contour

    Use a linoleum gouge and flat chisel to back-carve the hat brim, hat crown panel, inner ear surfaces, bowtie, and outer face contour. The outer contour back-carving is the broadest area and benefits from a wide flat gouge to maintain consistent depth. Check depth with a flashlight after each zone.

  6. Cut the microphone apertures last

    With all structural cuts stable, cut the microphone apertures. These are typically two to three small oval or rectangular holes grouped close together in the microphone head area. Use a fine detail knife to outline each hole before cutting through with a narrow saw blade. Place a flickering LED inside and close the back lid to complete the effect.

Written with AI to match this design

Gather your supplies

Check things off as you get ready.

Work on a stable surface, keep your free hand out of the cutting path, and have an adult handle sharp tools.

Three levels of light

  • Leave intact

    Outer rind, hat crown, outer ear edges, and lip-to-gum area above teeth stay dark

  • Peel & shade

    Hat brim, ear surfaces, nose, bowtie, and outer face contour are shallow-backed for soft mid glow

  • Cut through

    Eye apertures, the mouth gap around rooted teeth, and the microphone apertures are fully cut through

Learn the carving basics

Before you start cutting

How small should the microphone apertures be?

Each aperture should be roughly the size of a large pencil eraser, grouped in a tight cluster to read as a microphone grille. Smaller holes are cleaner and safer structurally; larger holes risk weakening the face rind in that quadrant. Score the outline of each hole before cutting to keep edges clean.

The microphone is on one side. Will that make the design feel unbalanced?

The asymmetry is actually part of Freddy's character, since he holds the microphone to one side. Position the apertures slightly off-center toward the lower outer corner of the face, which reads naturally as a held object. The hat and both ears on either side of the face visually balance the composition despite the offset microphone.

I am worried about structural failure with so many cuts on one pumpkin. Is there a reinforcement strategy?

Plan the layout so no two openings are closer than half an inch edge to edge, which preserves a rind bridge between every cut. Keep the outer face contour back-carving shallower than the other details to preserve that border mass. Display the pumpkin indoors or in a sheltered spot to avoid rain softening the rind prematurely.

Your take belongs here, too.

Changed a detail? Made it simpler? Share a photo of your version and tell the community what worked.

Share your pumpkin

More pumpkins like this

You've reached the end · 8 pumpkins
The Patch Report

Fresh pumpkins, in your inbox.

The best new carvings, ideas worth stealing, and how-tos for carving season. Short, seasonal, and gone by November.

A short email during carving season. Unsubscribe anytime. See our privacy policy.