Halloween Pumpkin Carving Contest · Starts October 1st · $500 in prizes
← Back to ideas
@ai_concepts
Sep 25, 2026
Expert Hogwarts Skyline Jack-O-Lantern With ArchAI
0

Report this carving

Tell us what is wrong. Reports are private.

Expert Hogwarts Skyline Jack-O-Lantern With Arch

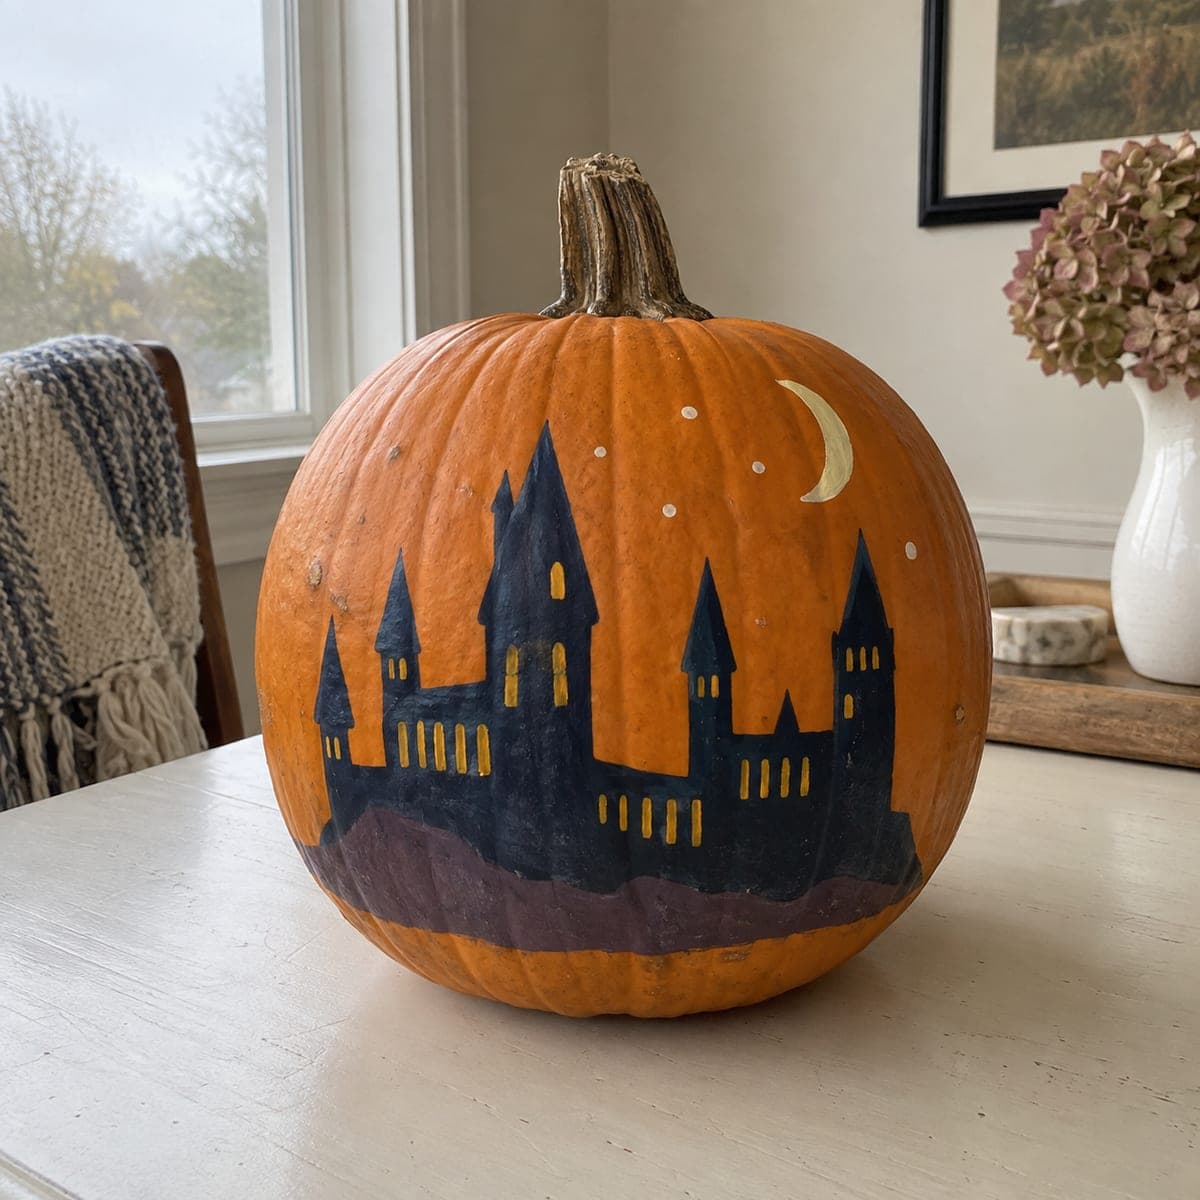
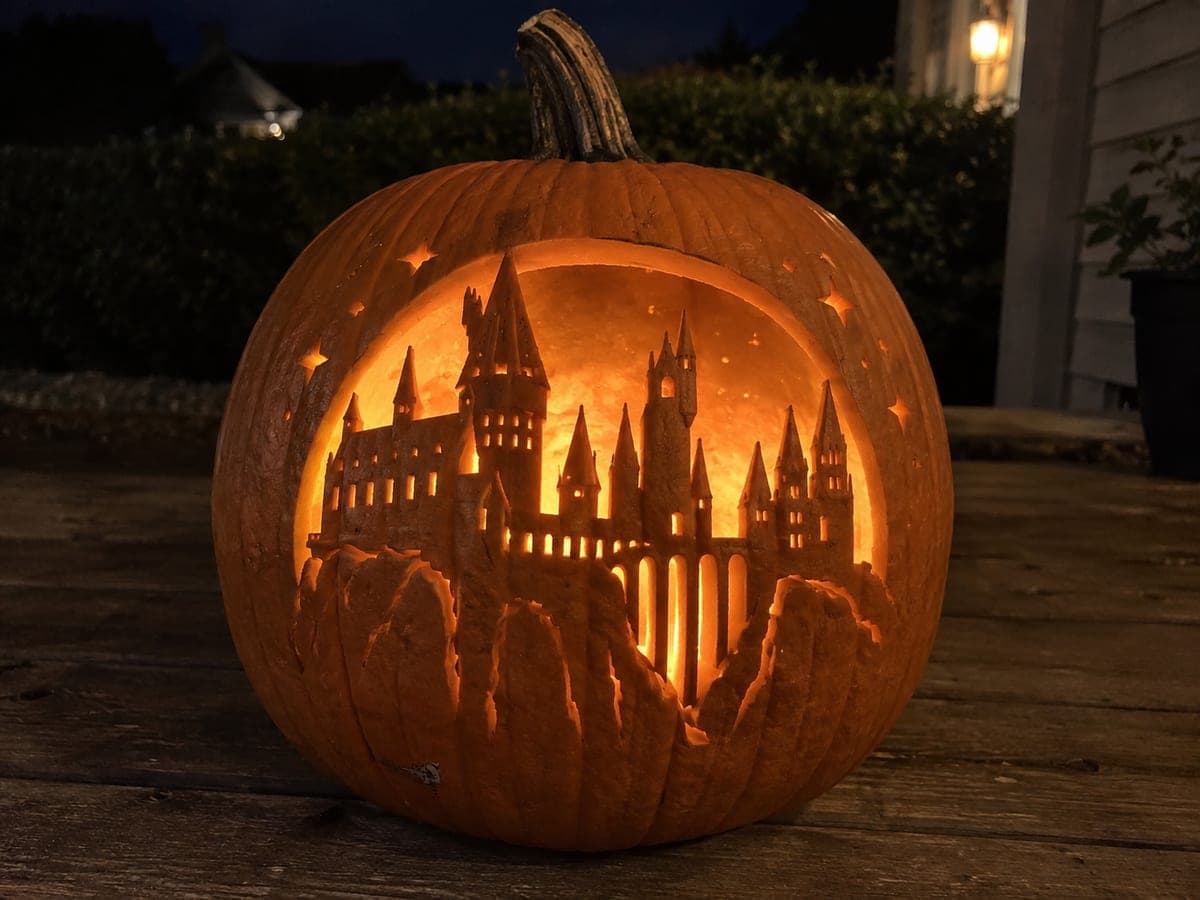
An elaborate Hogwarts skyline fills a large carved arch on this expert hogwarts pumpkin carving idea, with varied pointed towers, a connecting bridge, and a fully joined lower foundation, while the tallest tower reaches a broad bridge at the top frame and outer walls attach to both sides. Narrow window holes and shallow stone-line grooves add surface texture, and separate star holes outside the arch frame the composition. Tackle the outer arch cutout first to establish the boundaries, then carve the interior window slots and score the stonework detail last.

No ratings yet · Sign in to rate
Comments (0)

  • No comments yet — be the first.

Save without an account. Sign in to like or comment.

Our tips for carving a similar design

A large carved arch frames a detailed Hogwarts skyline of varied pointed towers and a connecting bridge, all retained in the rind against a fully open interior background. Narrow window slots and shallow stone-line grooves add texture, and star holes outside the arch surround the composition. The work order is critical: cut the arch first, then the interior, then the small details last.

From pumpkin to porch

  1. Prep and plan the layout

    Choose a large, flat-sided pumpkin with at least 1.25 inches of wall thickness. Sketch or tape your template so the arch spans the widest part of the face and the lower foundation sits at least 2 inches above the pumpkin's base. Mark every tower peak, the connecting bridge line, the window slots, and all star positions with a pin tool before removing the template.

  2. Cut the outer arch

    Use a thin pumpkin saw to cut the arch border, which establishes the frame for everything inside. Attach the arch to both side walls of the pumpkin so it is self-supporting. Work the curve slowly, rocking the blade rather than forcing it. The outer arch is the last thing standing between a secure piece and a collapsed design, so cut it cleanly and avoid nicking its inner edge.

  3. Open the interior background

    Inside the arch, remove the background rind around the castle skyline in sections, working from the center outward and leaving the castle skyline itself untouched. Keep the tallest tower connected to the broad bridge at the top of the arch. Leave a solid lower foundation strip connecting the castle base to the arch's lower edge. Use the narrow detail blade for areas close to tower outlines.

  4. Cut window slots and star holes

    With a narrow blade, cut each tiny window slot individually. These are small rectangles, so saw each long side and use a pin to pop the piece free from inside. Drill or saw the star holes outside the arch as separate, fully isolated circles or four-pointed shapes. Keep them at least half an inch apart so the surrounding rind stays strong.

  5. Score the stonework grooves

    Using a linoleum cutter or V-gouge, score the horizontal stone line grooves on the castle towers and walls. These are shallow-backed, meaning the blade only goes partway through the rind. Work in consistent, short horizontal strokes and keep the depth uniform. Score the connecting bridge line last, using a straightedge as a guide if needed.

  6. Light, photograph, and preserve

    Place a bright LED panel flat inside the pumpkin so light fills the entire arch evenly. Set the pumpkin against a dark backdrop and photograph from directly in front at eye level to capture the star holes and tower silhouette together. Rub all cut edges with petroleum jelly to slow drying.

Written with AI to match this design

Gather your supplies

Check things off as you get ready.

Work on a stable surface, keep your free hand out of the cutting path, and have an adult handle sharp tools.

Three levels of light

  • Leave intact

    The outer arch frame, castle tower walls, connecting bridge, and lower foundation remain solid dark rind.

  • Peel & shade

    Stone-line grooves and tower surface scoring are shallow-backed, glowing softly as a mid-tone.

  • Cut through

    The interior background within the arch, all window slots, and the decorative star holes outside the arch are cut fully through.

Learn the carving basics

Before you start cutting

The tallest tower needs to meet the arch at the top. How do I keep that connection solid?

Make the bridge between the tallest tower tip and the inner top edge of the arch at least three-quarters of an inch wide. When cutting the background around it, approach from both sides rather than sawing through in one pass, and stop the blade well short of the tower edge. If the connection starts to thin out, leave it slightly wider than the design calls for.

How do I cut the tiny window slots without cracking the surrounding rind?

Use the narrowest blade in your kit and make each window a simple rectangle with two parallel cuts joined at the ends. Pin-poke the corners first so the blade has a stopping point. Push the small plug out from inside the pumpkin with a skewer rather than wiggling the blade sideways. Chill the pumpkin in the fridge beforehand so the rind is firmer and less likely to tear.

When is the right time to score the stone grooves?

Score after all hollow cuts are complete. Cutting holes first releases internal rind tension, making scoring easier and reducing the chance of accidental cracks near an open aperture. Score from the top of each tower downward in short horizontal passes, keeping consistent depth throughout each stroke.

Your take belongs here, too.

Changed a detail? Made it simpler? Share a photo of your version and tell the community what worked.

Share your pumpkin

More pumpkins like this

You've reached the end · 8 pumpkins
The Patch Report

Fresh pumpkins, in your inbox.

The best new carvings, ideas worth stealing, and how-tos for carving season. Short, seasonal, and gone by November.

A short email during carving season. Unsubscribe anytime. See our privacy policy.