Halloween Pumpkin Carving Contest · Starts October 1st · $500 in prizes
← Back to ideas
@ai_concepts
Sep 25, 2026
Expert Tennis Racket Pumpkin With Open Square LatticeAI
0

Report this carving

Tell us what is wrong. Reports are private.

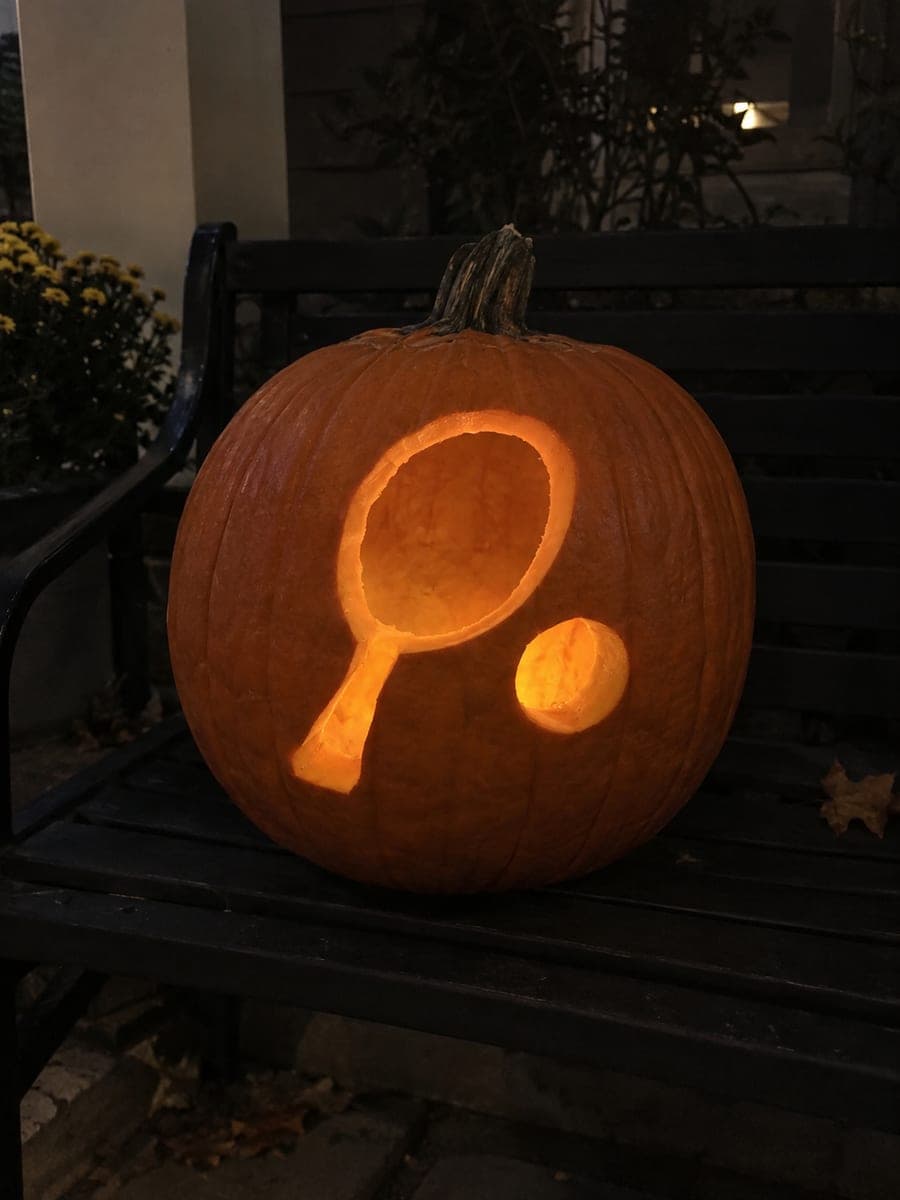
Expert Tennis Racket Pumpkin With Open Square Lattice

A full tennis racket with an open square string lattice, a connected ball motif, and a leaf border make this expert tennis pumpkin carving idea the most detailed design in the set. The racket handle roots to the base and the head connects to the surrounding leaf border, creating a fully supported composition. Open square holes are separated by continuous broad grid ribs, while the ball is isolated by broad seam bars. Leaf rib shapes connect to the outer frame so no element floats unsupported.

No ratings yet · Sign in to rate

Comments (0)

  • No comments yet — be the first.

Save without an account. Sign in to like or comment.

Our tips for carving a similar design

The racket handle roots to the shell base and the head connects to the surrounding leaf border frame, creating a fully supported composition where nothing floats free. The string lattice consists of open square holes separated by continuous broad grid ribs, and the ball is isolated by broad seam bars. Every leaf rib also connects to the outer frame, making this design one continuous structural web.

From pumpkin to porch

  1. Build the structural map

    Print the expert template and identify every connection point: handle-to-base, head-to-leaf-border, each leaf rib-to-outer-frame, and each ball seam bar. Mark these in a third color and confirm that removing any individual open aperture would still leave the composition fully connected through the remaining rind. This structural audit is essential before carving begins.

  2. Hollow and prepare the pumpkin

    Cut from the base and hollow thoroughly, scraping the wall to a consistent three-quarters of an inch. This design has both a dense lattice grid and a surrounding leaf border, so wall consistency is critical for even light transmission across the full composition.

  3. Transfer and color-code the template

    Tape and prick every element. After removing the template, connect all through-cut lattice holes, ball areas, and leaf apertures in one marker color, and all backed scores (leaf rib lines, ball seam bars, racket shaft detail) in another. Confirm the color-coding against the structural map before picking up any blade.

  4. Carve the racket lattice grid

    Work the open square lattice holes from the outer row of the racket head inward, cutting row by row toward the throat. Leave all broad grid ribs intact. Use a craft knife for corner precision and a thin blade for the straight sides. Pause after every four holes to check overall structural integrity.

  5. Carve the leaf border apertures

    Move to the surrounding leaf border and cut each leaf aperture from the outer frame edge inward. Each leaf shape must remain connected to the outer frame through its rib. Carve the outermost leaves first, then work inward toward the racket head border.

  6. Score backed details and display

    Use a V-tool to score the ball seam bars, leaf rib lines, and racket shaft detail in shallow backed lines. Insert a bright wide-angle LED and step back to view from at least five feet on a garden table. The full lattice and leaf composition reads best from a distance.

Written with AI to match this design

Gather your supplies

Check things off as you get ready.

Work on a stable surface, keep your free hand out of the cutting path, and have an adult handle sharp tools.

Three levels of light

  • Leave intact

    All broad grid ribs, leaf ribs, ball seam bars, handle, and outer frame border stay solid and dark.

  • Peel & shade

    The ball seam bars, leaf rib lines, and racket shaft detail are shallow backed scores.

  • Cut through

    All open square lattice holes inside the racket head, the ball aperture, and the leaf apertures in the border are cut fully through.

Learn the carving basics

Before you start cutting

The leaf border sounds complex. How many leaves are manageable at expert level?

Ten to sixteen leaf apertures evenly spaced around the racket head frame is achievable for a patient expert carver. Each leaf should be separated from the next by a rib that connects back to the outer frame. Attempting more than twenty leaves significantly increases the chance of accidentally cutting through a rib.

How do I cut the curved inner corners of each square lattice hole cleanly?

Pre-score each corner with a craft knife pointed into the corner at forty-five degrees before making the straight side cuts. This releases the corner material cleanly without tearing. A micro V-tool can also refine corners after the main cut if they look ragged.

What is the best way to view the finished composition to check for missed dark spots?

Insert the LED, move to a darkened room, and view the pumpkin from at least five feet away. At that distance the overall pattern becomes readable and any area that appears darker than its neighbors reveals a thick spot in the rind. Mark those areas from the outside and thin the inner wall by scraping until the light transmission matches the surrounding areas.

Your take belongs here, too.

Changed a detail? Made it simpler? Share a photo of your version and tell the community what worked.

Share your pumpkin

More pumpkins like this

You've reached the end · 8 pumpkins
The Patch Report

Fresh pumpkins, in your inbox.

The best new carvings, ideas worth stealing, and how-tos for carving season. Short, seasonal, and gone by November.

A short email during carving season. Unsubscribe anytime. See our privacy policy.