@toothpick_tessa
Sep 7, 2026

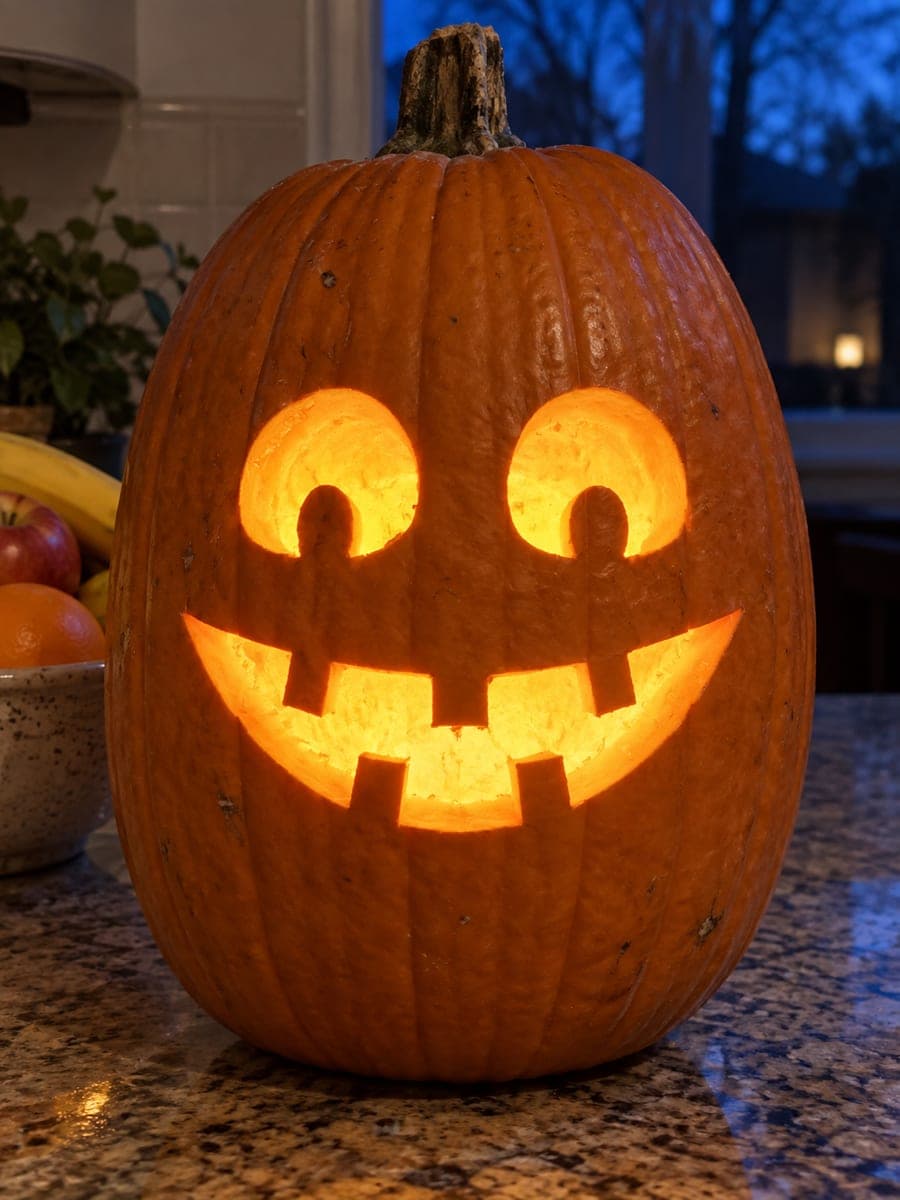
The whole charm here is a simple, cheerful jack-o-lantern face made from a few clean cutouts. You carve two triangle eyes, a small triangle nose, and a wide smile with a couple of square teeth left in place. Keeping the shapes big and rounded makes this an easy, forgiving project that still glows beautifully from a windowsill.
Written by PumpkinCarvingIdeas.com, inspired by @toothpick_tessa's photo above. These are our suggestions, not instructions from the uploader, and this approach hasn't been tested on their exact carve.
Choose a medium, round pumpkin with a flat side facing out and no soft spots. Wipe it clean and set it on a stable table covered with newspaper. Have an adult cut a lid around the stem at a slight angle so it will not fall in. Keep the cut tilted inward so the lid rests on a ledge.
Scoop out the seeds and pulp with a sturdy spoon or a scraper. Thin the front wall down to about one inch so it is easier for young hands to cut through. A thinner wall also lets more light escape. Save the seeds for roasting if you like.
With a washable marker, draw two triangle eyes, a smaller triangle nose, and a wide curved smile. Sketch a couple of square teeth inside the smile so you remember to leave them attached. Keep every shape big and simple for a cute, easygoing look. Step back and check the spacing before you cut.
An adult should cut the eyes and nose first using a small serrated carving saw. Use gentle back and forth strokes and push the pieces out from the inside. Doing the small openings before the big smile keeps the pumpkin sturdy while you work. Take your time on the corners of each triangle.
Cut the smile last since it is the largest opening. Carve carefully around each tooth so those little squares stay connected to the top and bottom of the mouth. Push the waste pieces out gently to avoid snapping a tooth. Clean up any rough edges with the saw tip.
Drop in a battery LED tea light or a small puck light for a safe, steady glow. Set the pumpkin on a windowsill or porch where trick-or-treaters can see the smile. Add a warm mug nearby and snap a photo. If the pumpkin dries out, a damp cloth over it overnight helps it last.
Check things off as you get ready.
Work on a stable surface, keep your free hand out of the cutting path, and have an adult handle sharp tools.
The whole outer skin of the pumpkin stays dark and orange.
You can lightly scrape the cheeks around the mouth for a soft glow if you want a little extra warmth.
The triangle eyes, nose, and toothy smile are cut all the way through for the brightest light.
Keep the shapes generous and rounded so they are easy to cut and read from a distance. Big openings also let out the most light, which suits this cheerful face. Just leave enough skin between features so the wall stays strong.
Draw the teeth clearly first so you remember to cut around them, not through them. Each tooth should stay attached to both the top and bottom of the mouth. Push waste pieces out gently from inside rather than yanking them.
Yes, this is one of the friendliest first carves. Kids can scoop the insides, draw the face, and choose where the light goes, while an adult handles the saw. Give everyone a job and keep sharp tools with the grown-ups.
Changed a detail? Made it simpler? Share a photo of your version and tell the community what worked.
The best new carvings, ideas worth stealing, and how-tos for carving season. Short, seasonal, and gone by November.




Comments (0)