Halloween Pumpkin Carving Contest · Starts October 1st · $500 in prizes
← Back to ideas
@ai_concepts
Aug 22, 2026
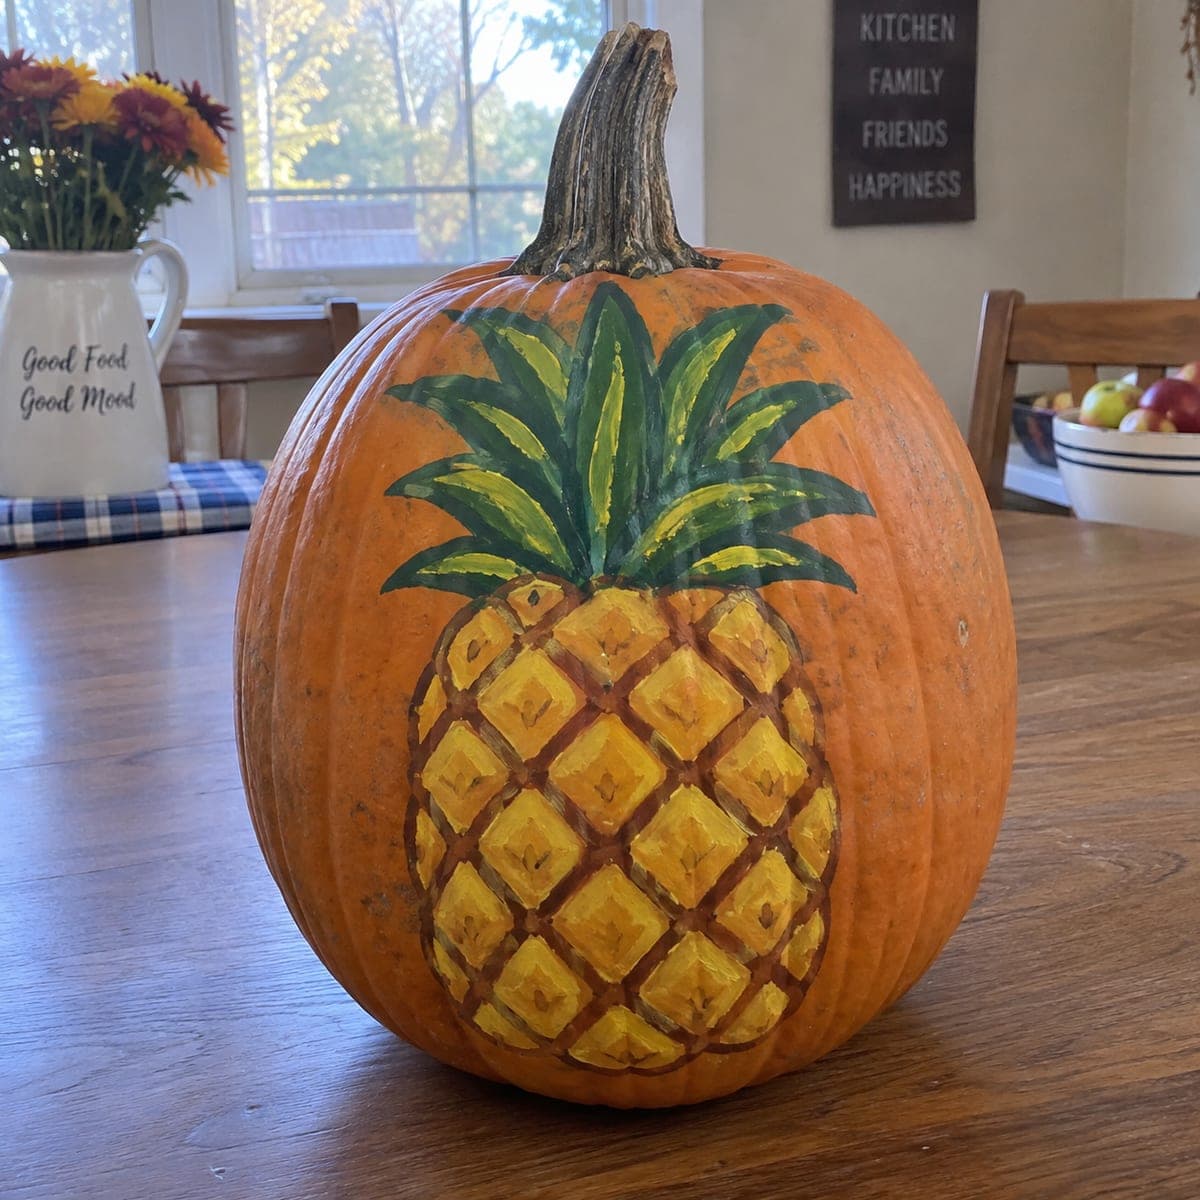
Glowing Pineapple Jack-O-Lantern CarvingAI
0

Glowing Pineapple Jack-O-Lantern Carving

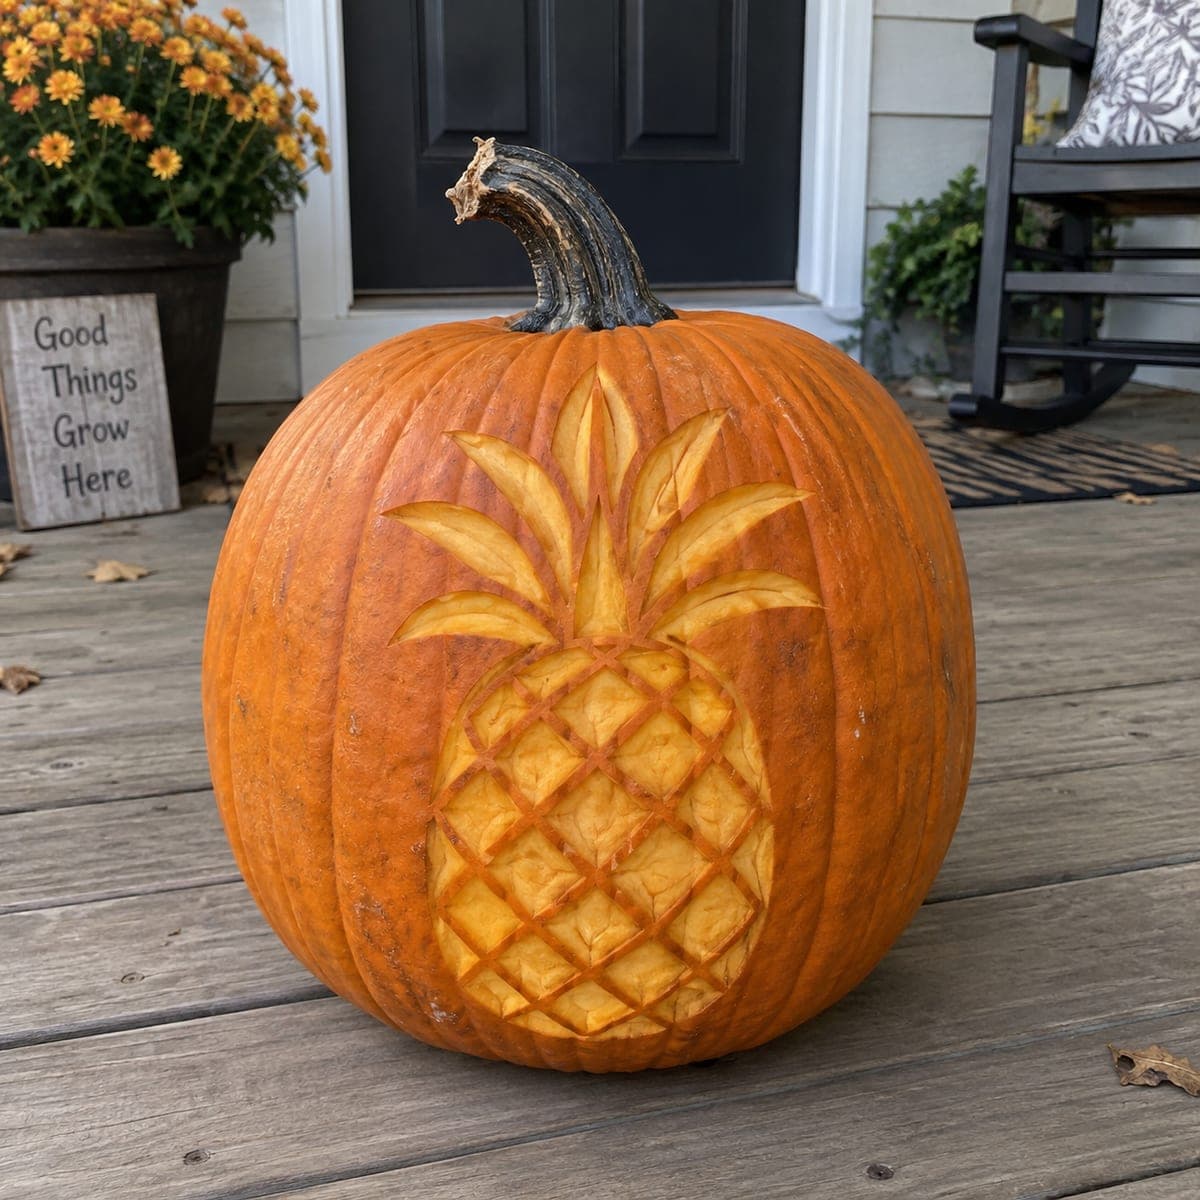
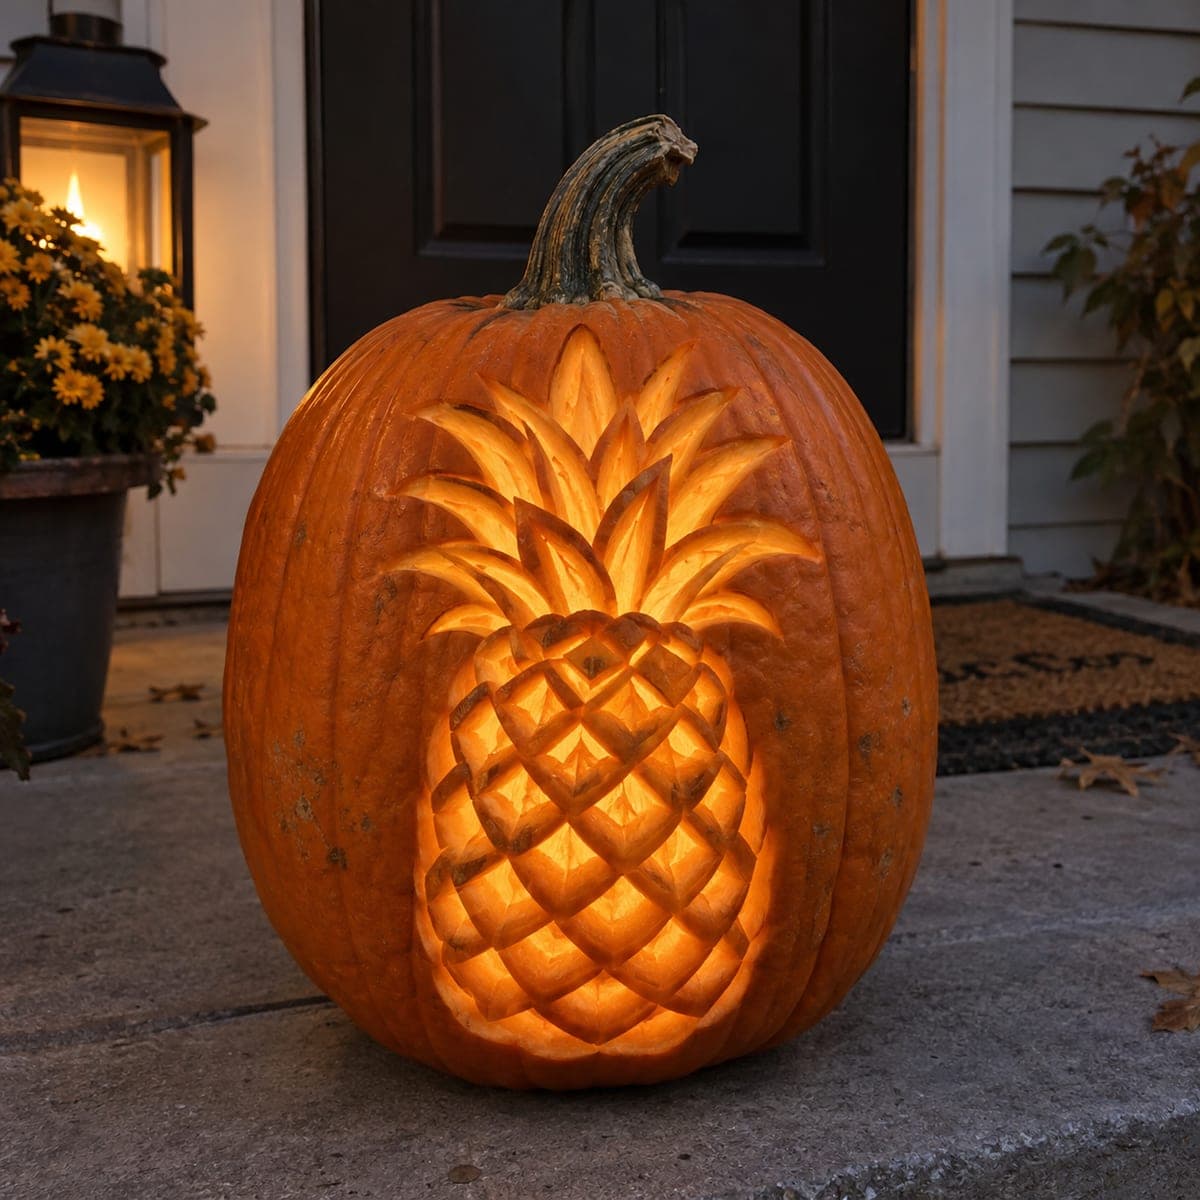
A pineapple carved into a pumpkin makes a fun tropical twist on the traditional jack-o-lantern, with a diamond-textured body and a spray of pointed leaves that all glow from within. The crosshatch pattern is scored deep and the diamond centers are thinned so each segment lights up individually. Carve the leaf blades first while the surface is firm, then grid the body with straight scored lines. It doubles nicely as late-summer luau decor.

This is an AI-generated concept image: a realistic, carvable design idea rather than a photo of a finished carve. AI concepts are always labeled and sit out the leaderboard and the contest.

No ratings yet · Sign in to rate
Comments (0)

  • No comments yet — be the first.

Save without an account. Sign in to like or comment.

Our tips for carving a similar design

The core trick here is relief shading rather than open cutouts: you skin the pumpkin down to different depths so light glows through thin walls while the raised ridges stay dark. Plan the pineapple as two parts, a spray of pointed leaf blades up top and a diamond crosshatch body below. Score your outlines first, then peel and thin the panels so each diamond and leaf reads on its own when lit.

Written by PumpkinCarvingIdeas.com, inspired by the image above. These are our suggestions, not instructions from the uploader. This approach to the AI concept has not been tested on a real pumpkin.

From pumpkin to porch

  1. Prep the pumpkin and cut the lid

    Pick a tall, rounded pumpkin so the pineapple body has room to stretch. Cut a lid from the bottom or the back rather than the top, since you want the front surface clean for the design. Scoop the inside and scrape the carving wall down to about one inch thick so light passes through easily. A thinner wall makes the shading and thinning steps much more forgiving.

  2. Transfer the pineapple outline

    Tape your stencil flat and poke the main outlines: the crown of leaf blades, the top of the body, and the outer edge of the diamond grid. Mark the leaves as long pointed shapes and the body as a repeating diamond lattice. Connect the dots lightly with a marker so you can see the full shape before any cutting. Getting the grid spacing even now saves you trouble later.

  3. Score the leaf blades first

    Work the crown while the surface is still firm and easy to control. Use a small detail knife or a V gouge to cut the outline of each pointed leaf, keeping the tips attached to the shell so nothing snaps off. Vary the depth so front leaves cut deeper and back leaves stay shallower, which gives the spray a layered look. Leave the raised ridges between leaves untouched so they stay dark and define each blade.

  4. Score the diamond crosshatch

    Cut the body grid as two sets of straight scored lines that cross into diamonds, using a lino cutter or V tool for consistent grooves. Keep the lines shallow at first, then deepen them evenly so every diamond is outlined clearly. Do not cut all the way through; you are carving channels, not holes. The raised diamond faces will glow softly while the grooves between them stay shadowed.

  5. Thin the diamond and leaf centers

    This is where the pineapple comes to life. Using a shallow gouge or a loop tool, peel the outer skin off the center of each diamond and each leaf until you reach the pale inner flesh. Thin the middle of a segment more than its edges so each one has a bright core that fades toward its ridges. Work slowly and check the glow with your light inside so you can even out any dark spots.

  6. Light it and photograph

    Drop in a bright battery LED or a small puck light, warm white looks the most tropical. Wipe the cut surfaces and rub a little petroleum jelly into the peeled areas to slow drying and keep the glow even. Set it on a step at dusk and shoot from straight on so the diamond grid reads clearly. Store it somewhere cool between showings to stretch its life.

Gather your supplies

Check things off as you get ready.

Work on a stable surface, keep your free hand out of the cutting path, and have an adult handle sharp tools.

Three levels of light

  • Leave intact

    The raised ridges between the leaves and the grooved lines of the diamond grid, which stay dark and outline the shapes.

  • Peel & shade

    The faces of each diamond and the body of each leaf blade, skinned to the pale flesh for a soft even glow.

  • Cut through

    Only a few of the deepest diamond centers if you want bright accent points; keep true cutouts minimal so the shape holds together.

Learn the carving basics

Before you start cutting

Should any part be cut all the way through?

Mostly no. This design relies on scored channels and thinned skin, not open holes, so the crosshatch and leaves read as texture. If you want a couple of brighter sparks, you can cut through the very center of a few diamonds, but do that last so the wall stays strong while you carve everything else.

How do I keep the leaf tips from breaking off?

Keep every pointed blade attached to the shell along its base and one side rather than freeing it completely. Score the outline and thin the surface instead of cutting a full silhouette. Firm, fresh pumpkin flesh holds thin points best, so carve the crown early in the session.

My diamonds glow unevenly. How do I fix that?

Uneven glow almost always means uneven wall thickness. Put the light inside and look for dark diamonds, then go back and peel those centers a little thinner until the brightness matches its neighbors. Thin the middle more than the edges of each segment so every diamond has a bright core.

Your take belongs here, too.

Changed a detail? Made it simpler? Share a photo of your version and tell the community what worked.

Share your pumpkin

More pumpkins like this

You've reached the end · 8 pumpkins
The Patch Report

Fresh pumpkins, in your inbox.

The best new carvings, ideas worth stealing, and how-tos for carving season. Short, seasonal, and gone by November.

A short email during carving season. Unsubscribe anytime. See our privacy policy.