Halloween Pumpkin Carving Contest · Starts October 1st · $500 in prizes
← Back to ideas
@ai_concepts
Sep 10, 2026
Pineapple Carved Pumpkin for Fall Porch DecorAI
0

Pineapple Carved Pumpkin for Fall Porch Decor

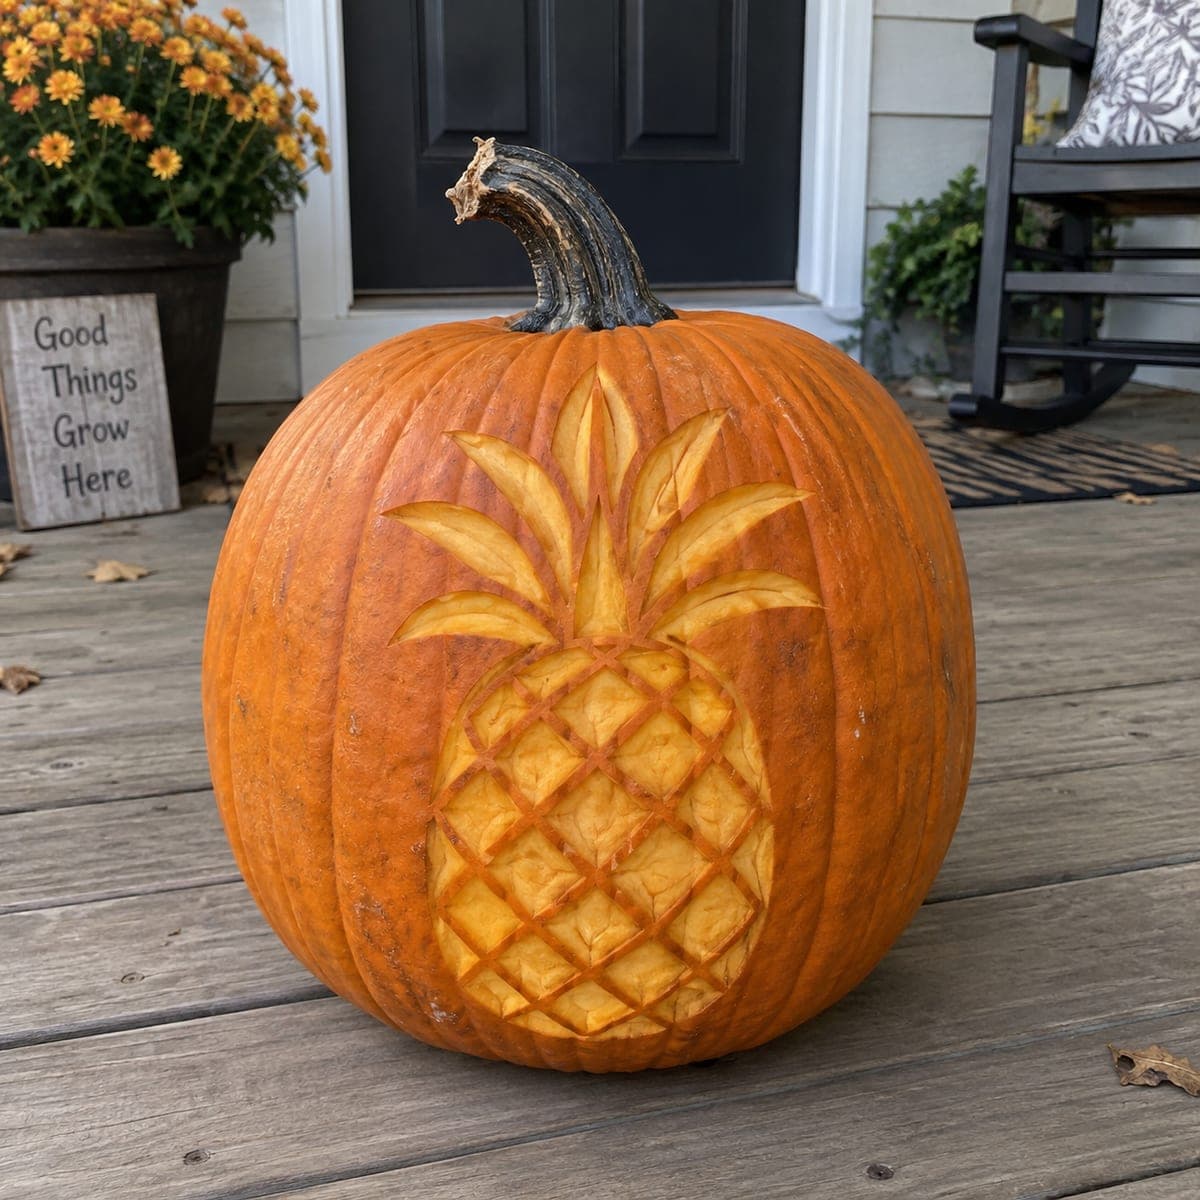
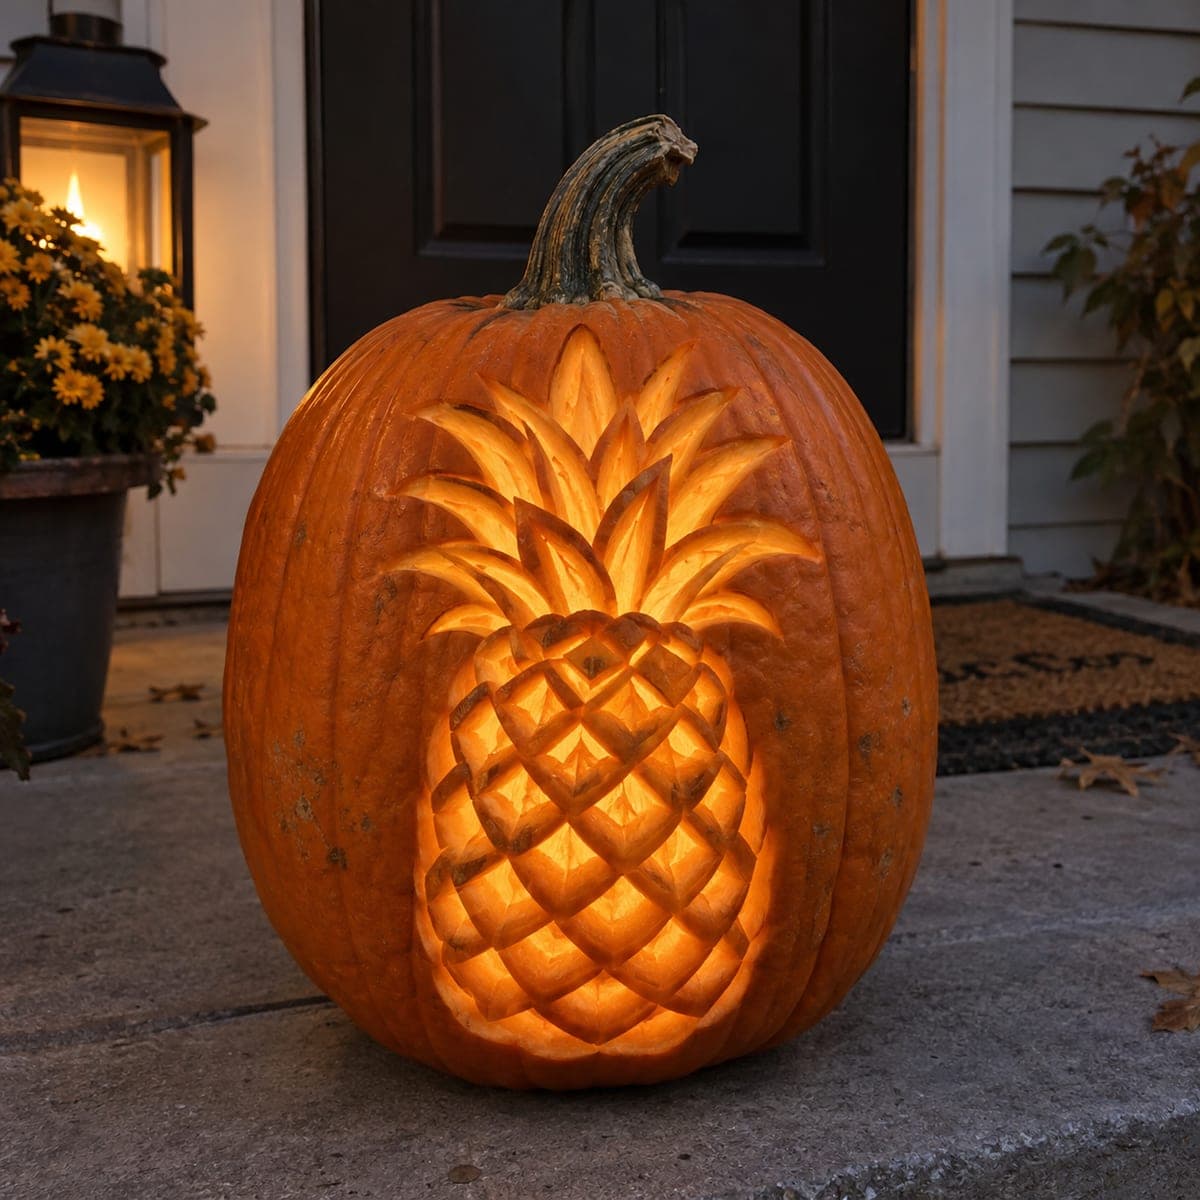
A pineapple with a spiky crown and diamond-scored body is peeled into this pumpkin, a welcoming twist on fall porch decor since the pineapple is a classic hospitality symbol. The crosshatch pattern is simply two sets of parallel grooves cut on opposing diagonals, so a ruler and V-tool handle most of the work. Peel the overall pineapple shape first, add the leaf fronds in single sweeping cuts, then score the diamond grid last.

This is an AI-generated concept image: a realistic, carvable design idea rather than a photo of a finished carve. AI concepts are always labeled and sit out the leaderboard and the contest.

No ratings yet · Sign in to rate
Comments (0)

  • No comments yet — be the first.

Save without an account. Sign in to like or comment.

Our tips for carving a similar design

The core trick here is a surface relief carving, meaning almost nothing is cut all the way through. You peel away the skin over the whole pineapple so it glows soft orange, then carve the crosshatch grid and leaf fronds as shallow grooves for shading. Because the pattern lives on the pumpkin surface, a steady hand and a V-tool do most of the work.

Written by PumpkinCarvingIdeas.com, inspired by the image above. These are our suggestions, not instructions from the uploader. This approach to the AI concept has not been tested on a real pumpkin.

From pumpkin to porch

  1. Plan and transfer the shape

    Pick the flattest, smoothest face of a round pumpkin so the design reads clearly. Sketch or tape your pineapple outline, keeping the spiky crown near the top and the diamond body filling the belly. Trace the outline and the main grid lines by poking dots along the pattern with a pin or a transfer tool. Step back and check the whole shape is centered before you cut anything.

  2. Peel the pineapple body

    Instead of opening a lid, plan to light this from a small hole in the back or base later, so the front stays intact. Use a ribbon loop or shaving tool to peel just the outer skin off the entire pineapple shape, both the body oval and the crown area. Aim for a shallow, even depth so the flesh underneath glows a warm dim orange. Take your time and keep the peeled edge crisp along the outline.

  3. Carve the leaf fronds

    Draw each frond as a long tapered leaf fanning out from the top of the body. Cut each one with a single sweeping stroke of the V-tool or a small gouge, going a little deeper than the peel for brighter contrast. Vary the length and angle so the crown looks natural and spiky rather than stiff. Leave thin ridges of raw flesh between fronds so they stay defined and structurally strong.

  4. Score the diamond crosshatch

    Lay a flexible ruler across the body and cut one set of parallel grooves on a diagonal with the V-tool. Then cut a second set on the opposite diagonal to form the diamond grid. Keep the grooves shallow and evenly spaced so the pattern stays readable and the surface does not weaken. This grid is the last detail, so work slowly and let the crossing lines line up cleanly.

  5. Cut the hidden light hole

    Turn the pumpkin around and cut a small round access hole in the back or the bottom, cleaning out the pulp through it. Scrape the inside wall behind the pineapple thinner if you want the peeled areas to glow more. Keeping the opening off the front means the front face reads as one solid decorated panel. An adult should handle this larger cut with a sturdy saw.

  6. Light it and photograph

    Drop in one or two battery LED lights and never a candle, since the sealed peel design traps heat. Set the pumpkin on your porch step near mums and a welcome sign for that hospitality feel. Rub a little petroleum jelly on the cut edges to slow drying and keep the glow crisp. Shoot photos at dusk when the peeled flesh reads warm against the darker skin.

Gather your supplies

Check things off as you get ready.

Work on a stable surface, keep your free hand out of the cutting path, and have an adult handle sharp tools.

Three levels of light

  • Leave intact

    The untouched orange skin around the pineapple, keeping the shape framed and dark.

  • Peel & shade

    The whole pineapple body and crown, peeled to a soft dim orange glow.

  • Cut through

    Only the small hidden hole in the back or base for the LED, plus the deepest frond and groove lines that read brightest.

Learn the carving basics

Before you start cutting

Do I need to cut a lid on top?

No, this design works best with the front left solid. Cut a small access hole in the back or bottom instead so the pineapple reads as one clean panel. That also keeps the crown and body structurally strong.

How deep should the crosshatch grooves be?

Keep them shallow, just deep enough to catch light and cast a thin shadow. Deep cuts risk breaking through the wall and washing out the diamond pattern. A light V-tool pass on each diagonal is plenty.

Since this is a concept image, can a real pumpkin look like this?

Yes, the effect is achievable because it is mostly surface peeling and shallow scoring rather than fragile cutouts. Just choose a smooth flat face and keep the fronds attached with ridges between them. Real flesh glows a warm orange when peeled, close to the pictured look.

Your take belongs here, too.

Changed a detail? Made it simpler? Share a photo of your version and tell the community what worked.

Share your pumpkin

More pumpkins like this

You've reached the end · 8 pumpkins
The Patch Report

Fresh pumpkins, in your inbox.

The best new carvings, ideas worth stealing, and how-tos for carving season. Short, seasonal, and gone by November.

A short email during carving season. Unsubscribe anytime. See our privacy policy.