Halloween Pumpkin Carving Contest · Starts October 1st · $500 in prizes
← Back to ideas
@ai_concepts
Aug 24, 2026
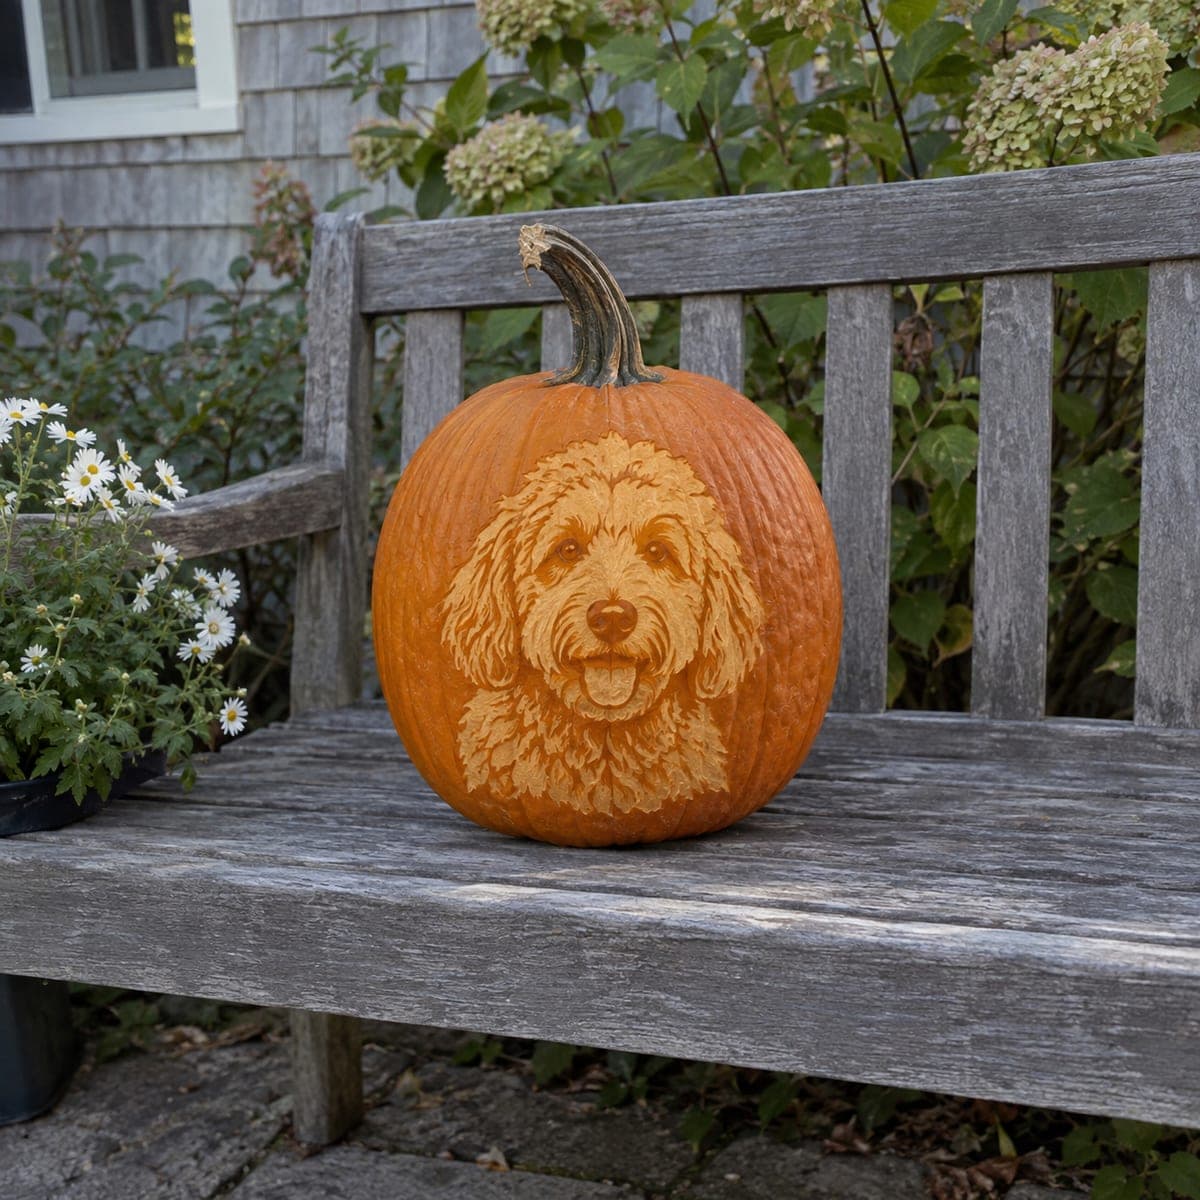
Goldendoodle Face Shaded Pumpkin CarvingAI
0

Goldendoodle Face Shaded Pumpkin Carving

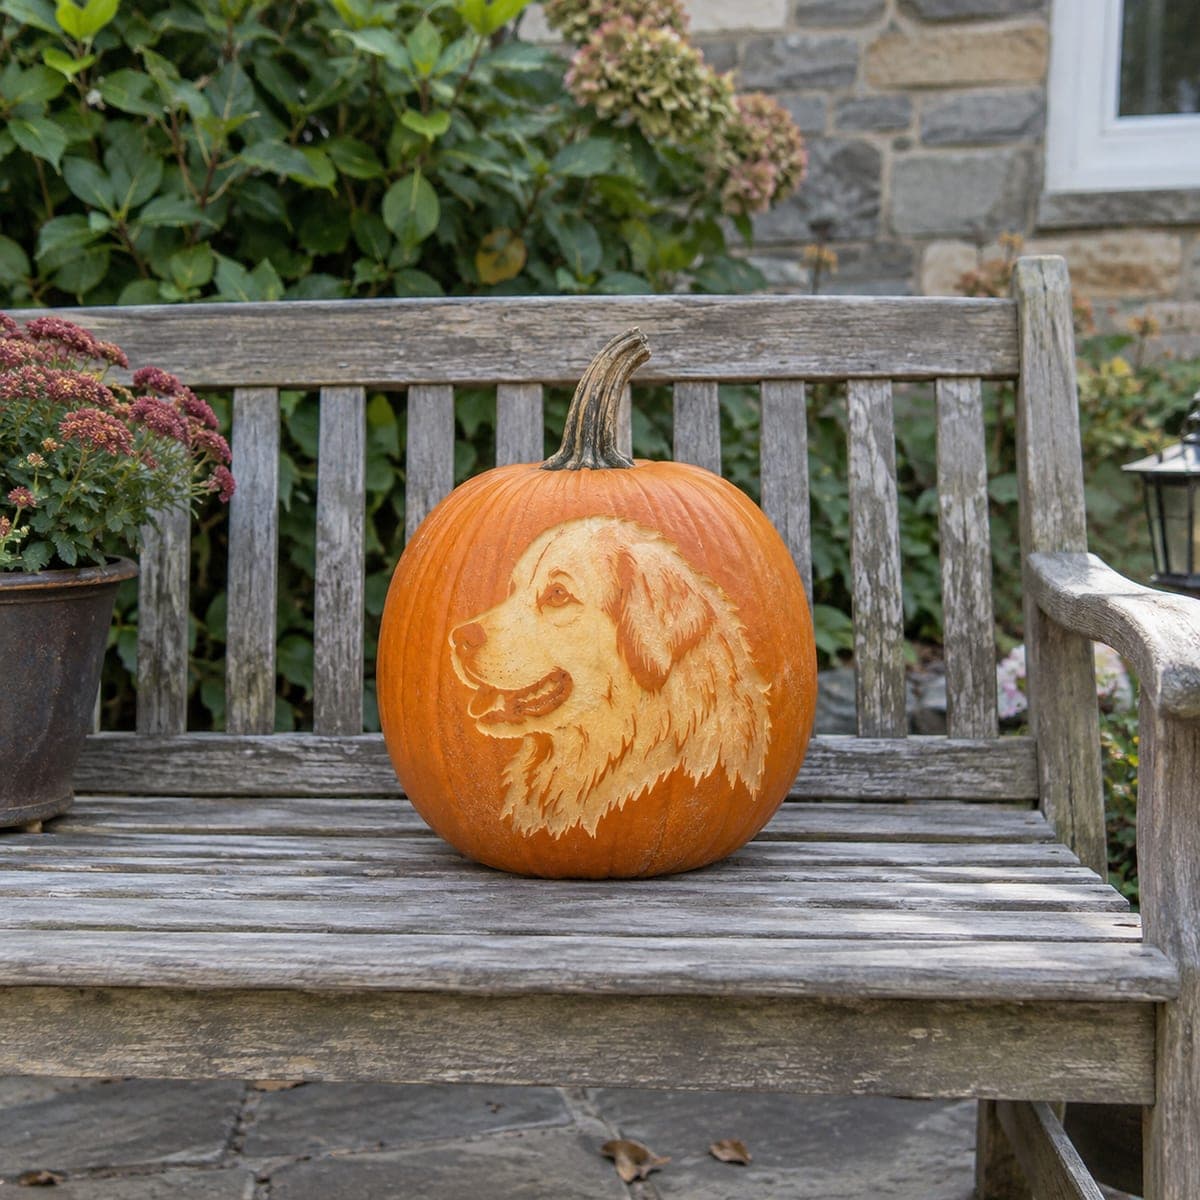
A shaggy goldendoodle with a happy open-mouth smile is etched into this pumpkin in hundreds of short curly strokes that mimic the breed's wavy coat. The curl texture is surprisingly forgiving, since small slips just read as more fur. Peel the tongue and muzzle areas deepest for highlights, work the curls in loose spirals with a V-tool, and display it unlit on a bench where daylight shows the texture.

This is an AI-generated concept image: a realistic, carvable design idea rather than a photo of a finished carve. AI concepts are always labeled and sit out the leaderboard and the contest.

No ratings yet · Sign in to rate
Comments (0)

  • No comments yet — be the first.

Save without an account. Sign in to like or comment.

Our tips for carving a similar design

The whole trick here is depth, not holes. You are peeling the pumpkin skin at different levels so light and shadow do the drawing, with short curling V-tool strokes standing in for a wavy coat. Because the fur reads as texture, a stray slip just looks like one more curl, which makes this shaded portrait more relaxing than it first appears.

Written by PumpkinCarvingIdeas.com, inspired by the image above. These are our suggestions, not instructions from the uploader. This approach to the AI concept has not been tested on a real pumpkin.

From pumpkin to porch

  1. Prep and transfer the design

    Since this is a concept image with no real pumpkin behind it, start by choosing a tall, smooth pumpkin with a flat front panel for the face. Wipe it clean and dry, then tape a doodle-face stencil across the widest part. Poke through the main outlines with a transfer tool or pushpin, marking the eyes, muzzle, tongue, and the outer edge of the fur. Keep the dots close together so you can still read the shape once the paper comes off.

  2. Score the outlines first

    With a fine detail knife, lightly trace the key boundaries: the eyes, nose, mouth, tongue, and the ruff of fur around the face. These are guide cuts, not deep ones, just enough to keep your shading from wandering. Do not remove any material yet. Think of this as sketching in lines before you paint.

  3. Peel the brightest highlight zones

    Use a ribbon or loop tool to skin off the orange peel on the muzzle, the bridge of the nose, and the open tongue, taking these areas deepest for the strongest glow. Work slowly and keep the peeled surface smooth so it reads as a clean highlight. Leave a thin raised edge where the muzzle meets the surrounding curls so the snout pops forward. These deep-peeled spots will be your lightest tones.

  4. Etch the curls in loose spirals

    Switch to a small V-tool and carve short comma and spiral strokes to build the coat, following the direction fur would naturally fall away from the face. Vary your pressure so some curls are shallow and dim while others bite deeper and glow. Overlap the strokes and let them cluster thicker around the cheeks and chest for that shaggy doodle look. This is the slow part, so take breaks and rotate the pumpkin to keep your wrist comfortable.

  5. Deepen the eyes and shadows

    Give the eyes life by peeling a small bright catchlight and leaving the surrounding skin dark for contrast. Deepen the shadow lines under the ears, along the mouth, and where fur layers overlap so the face gains dimension. Step back often to check that the light and dark areas still read as a dog from a few feet away. Resist cutting any hole all the way through, since this design lives entirely in shading.

  6. Clean up and display

    Brush out loose pulp with a dry pastry brush and wipe the surface. This portrait shows best in daylight, so set it on a bench or step where sunlight rakes across the texture and reveals every curl. If you want a soft evening glow, tuck a battery LED puck behind it or set one low nearby rather than inside, since there are no cutouts to release light. Rub cut edges with a little petroleum jelly to slow browning.

Gather your supplies

Check things off as you get ready.

Work on a stable surface, keep your free hand out of the cutting path, and have an adult handle sharp tools.

Three levels of light

  • Leave intact

    The untouched orange skin around the outer fur edge and the dark eye rims stay darkest, framing the face.

  • Peel & shade

    The curls of the coat get shallow-to-medium peeling so they glow in soft, varied mid tones.

  • Cut through

    The muzzle, nose bridge, open tongue, and eye catchlights are peeled deepest for the brightest highlights, but nothing is cut through.

Learn the carving basics

Before you start cutting

Do I need to cut any holes through the pumpkin?

No, this is a fully shaded portrait, so every effect comes from peeling the skin to different depths. Cutting through would blow out the soft gradients that make the fur look real. Keep even your deepest highlight areas as a thin translucent wall of flesh.

How do I make the curls look natural instead of random?

Pick a direction for the fur to fall, usually away from the center of the face, and let your V-tool strokes follow that flow. Work in short comma and spiral shapes and cluster them tighter near the cheeks and chest. Overlapping the strokes and varying their depth is what sells the wavy doodle coat.

Will this design hold up if I want to light it at night?

It is built for daylight, where raking sun shows off the texture best. For evening you can place a battery LED puck behind or beside it rather than inside, since there are no cutouts to let interior light escape. A shaded pumpkin like this also tends to dry and darken faster, so plan to enjoy it within a couple of days.

Your take belongs here, too.

Changed a detail? Made it simpler? Share a photo of your version and tell the community what worked.

Share your pumpkin

More pumpkins like this

You've reached the end · 8 pumpkins
The Patch Report

Fresh pumpkins, in your inbox.

The best new carvings, ideas worth stealing, and how-tos for carving season. Short, seasonal, and gone by November.

A short email during carving season. Unsubscribe anytime. See our privacy policy.