Halloween Pumpkin Carving Contest Β· Starts October 1st Β· $500 in prizes
← Back to ideas
@ai_concepts
Sep 25, 2026
Graveyard Pumpkin with Cross, Tombstones and Bare TreeAI
0

Report this carving

Tell us what is wrong. Reports are private.

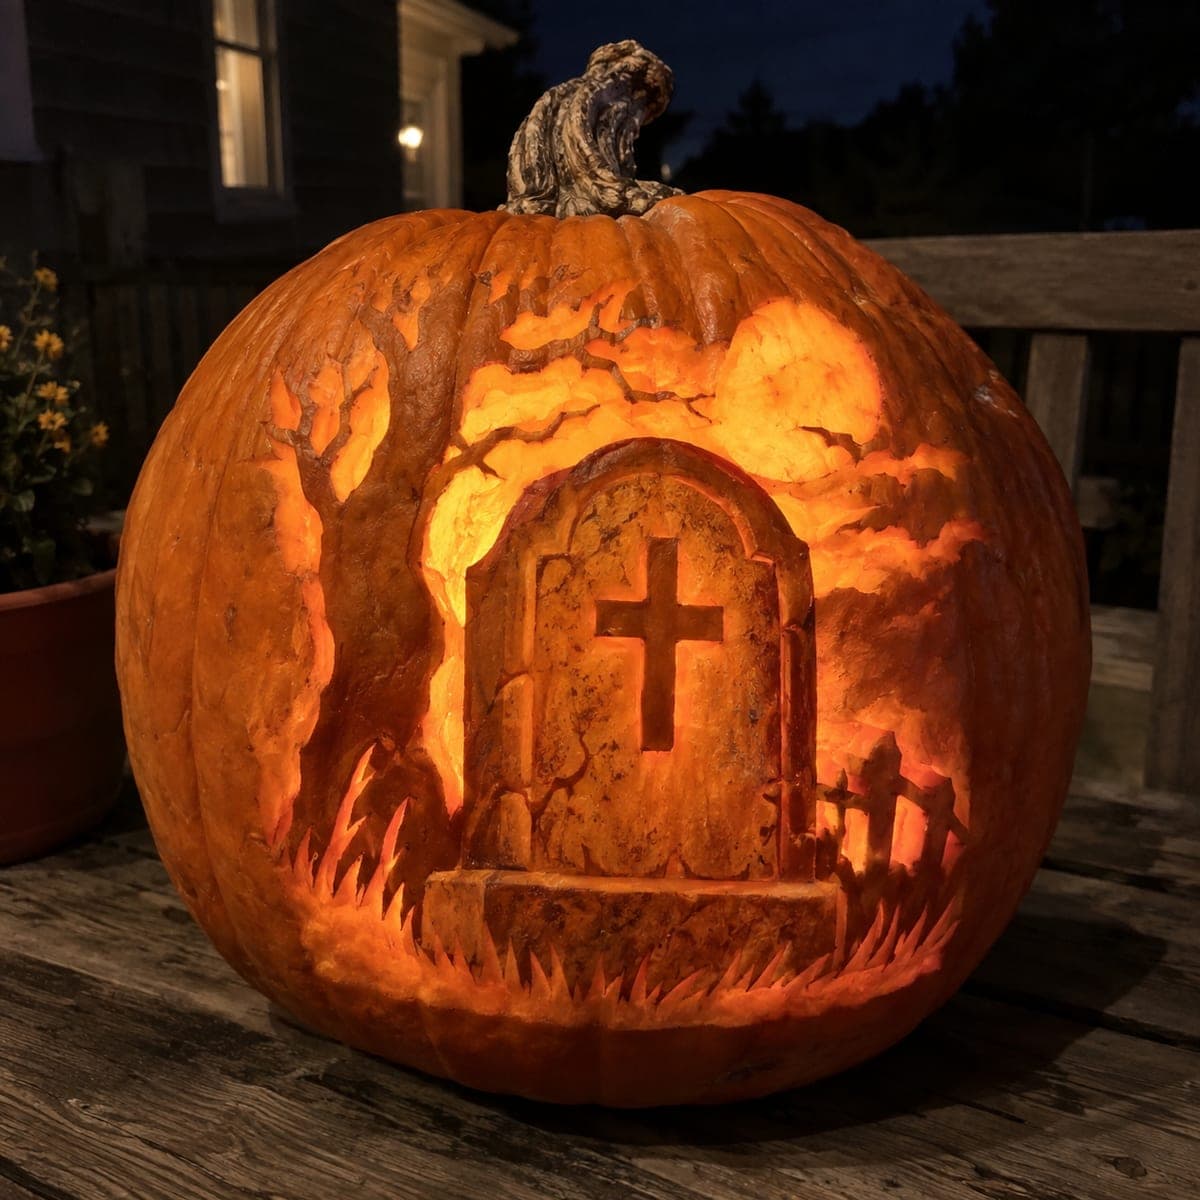
Graveyard Pumpkin with Cross, Tombstones and Bare Tree

Tombstones and a cross rooted into a broad ground strip, plus a bare tree connecting to both the base and the outer arch, make this cemetery pumpkin carving idea feel like a complete graveyard scene carved in relief. Cut the tree last since its branches span the widest area and depend on all other elements being stable. The cross needs at least a half-inch root at the base and both horizontal arm ends connected to neighboring rind. A warm LED candle placed toward the back of the pumpkin casts the tree's branch shadows through the tombstone openings.

No ratings yet Β· Sign in to rate

Comments (0)

  • No comments yet β€” be the first.

Save without an account. Sign in to like or comment.

Our tips for carving a similar design

This design works as a layered scene: tombstones and a cross rooted into a broad ground strip form the lower layer, while a bare tree rises from that base and connects its branch tips to the outer rind arch above. The tree is the last element to cut because it depends on the stability of everything else: if the ground strip and tombstones are solid, the tree has a firm anchor. Placing a warm LED candle toward the back of the pumpkin casts the tree's branch shadows through the tombstone openings, layering the light beautifully.

From pumpkin to porch

  1. Plan the structural hierarchy before cutting

    Sketch the layout and mark the broad ground strip, tombstone root locations, cross arm connection points, tree trunk base, and all branch tip connection points to the outer arch. Every element has a dependency: mapping them prevents a sequence error that could strand an island of rind.

  2. Prep and gut the pumpkin

    Cut a wide bottom cap and scoop to about an inch of wall thickness. Dry the surface and transfer the full pattern, keeping bridge points clearly marked in a contrasting color from aperture areas.

  3. Cut the ground strip boundary and tombstones

    Define the ground strip first by cutting the sky area above the tombstone row. Then shape each tombstone as a retained rind shape rooted broadly into the ground strip. Cut the rind between tombstones as narrow sky slots, but leave the area just above each tombstone's sides intact to connect to the ground strip.

  4. Shape the cross with connected arm ends

    The cross needs at least a half-inch base root into the ground strip. Cut the sky areas beside the vertical shaft of the cross as two separate openings. Keep both horizontal arm ends connected to neighboring rind on each side. An arm that floats free will fall within a day.

  5. Carve the bare tree last

    Start with the main trunk, keeping it rooted into the base ground strip. Work outward branch by branch, confirming each tip connects to the outer rind arch before making the final cut of that branch. Cut the sky between branches as individual apertures. Carve roots similarly, confirming each root tip connects to the ground strip.

  6. Light and display

    Place a warm LED candle toward the back of the pumpkin to cast tree branch shadows through the tombstone openings. Display at ground level or on a low step where the scene reads naturally as a graveyard viewed from outside. Apply petroleum jelly to all cut edges before the first night of display.

Written with AI to match this design

Gather your supplies

Check things off as you get ready.

Work on a stable surface, keep your free hand out of the cutting path, and have an adult handle sharp tools.

Three levels of light

  • Leave intact

    Broad ground strip, tombstone body rind, cross shaft and arm rind, main tree trunk, all branch rind connecting to the outer arch, and all root rind connecting to the ground strip

  • Peel & shade

    None, all light comes through through-cuts

  • Cut through

    Sky areas between tombstones, rind between cross arms and neighboring elements, sky openings between tree branches, and any accent apertures within tombstone bodies

Learn the carving basics

Before you start cutting

How many branch tips need to connect to the outer arch?

Every branch tip must connect to the outer rind arch or to another branch that connects to the arch. No branch should float free. If a branch tip is too short to reach the arch, extend it slightly in your template before transfer. A floating branch tip will droop within 24 hours as the rind dries.

My cross horizontal arm keeps cracking at the junction. What helps?

The T-junction where the horizontal arm meets the vertical shaft is the most stressed point on the cross. Keep both pieces of the junction at least half an inch wide and carve the negative space beside the shaft in two separate passes rather than one large opening. If the junction does crack, a toothpick inserted diagonally through the crack and sealed with petroleum jelly can hold it overnight.

Does the tree have to be a single uninterrupted shape?

No. The sky openings between branches naturally divide the tree into multiple rind sections, all of which must connect back to the trunk or the arch. Think of it as a series of rind bridges radiating from the central trunk, with negative space between them, rather than a single solid tree form with cutouts in it.

Your take belongs here, too.

Changed a detail? Made it simpler? Share a photo of your version and tell the community what worked.

Share your pumpkin

More pumpkins like this

You've reached the end Β· 8 pumpkins
The Patch Report

Fresh pumpkins, in your inbox.

The best new carvings, ideas worth stealing, and how-tos for carving season. Short, seasonal, and gone by November.

A short email during carving season. Unsubscribe anytime. See our privacy policy.