Halloween Pumpkin Carving Contest · Starts October 1st · $500 in prizes
← Back to ideas
@ai_concepts
Sep 25, 2026
Grim Reaper Pumpkin with Broad Cloak and Shoulder SupportsAI
0

Report this carving

Tell us what is wrong. Reports are private.

Grim Reaper Pumpkin with Broad Cloak and Shoulder Supports

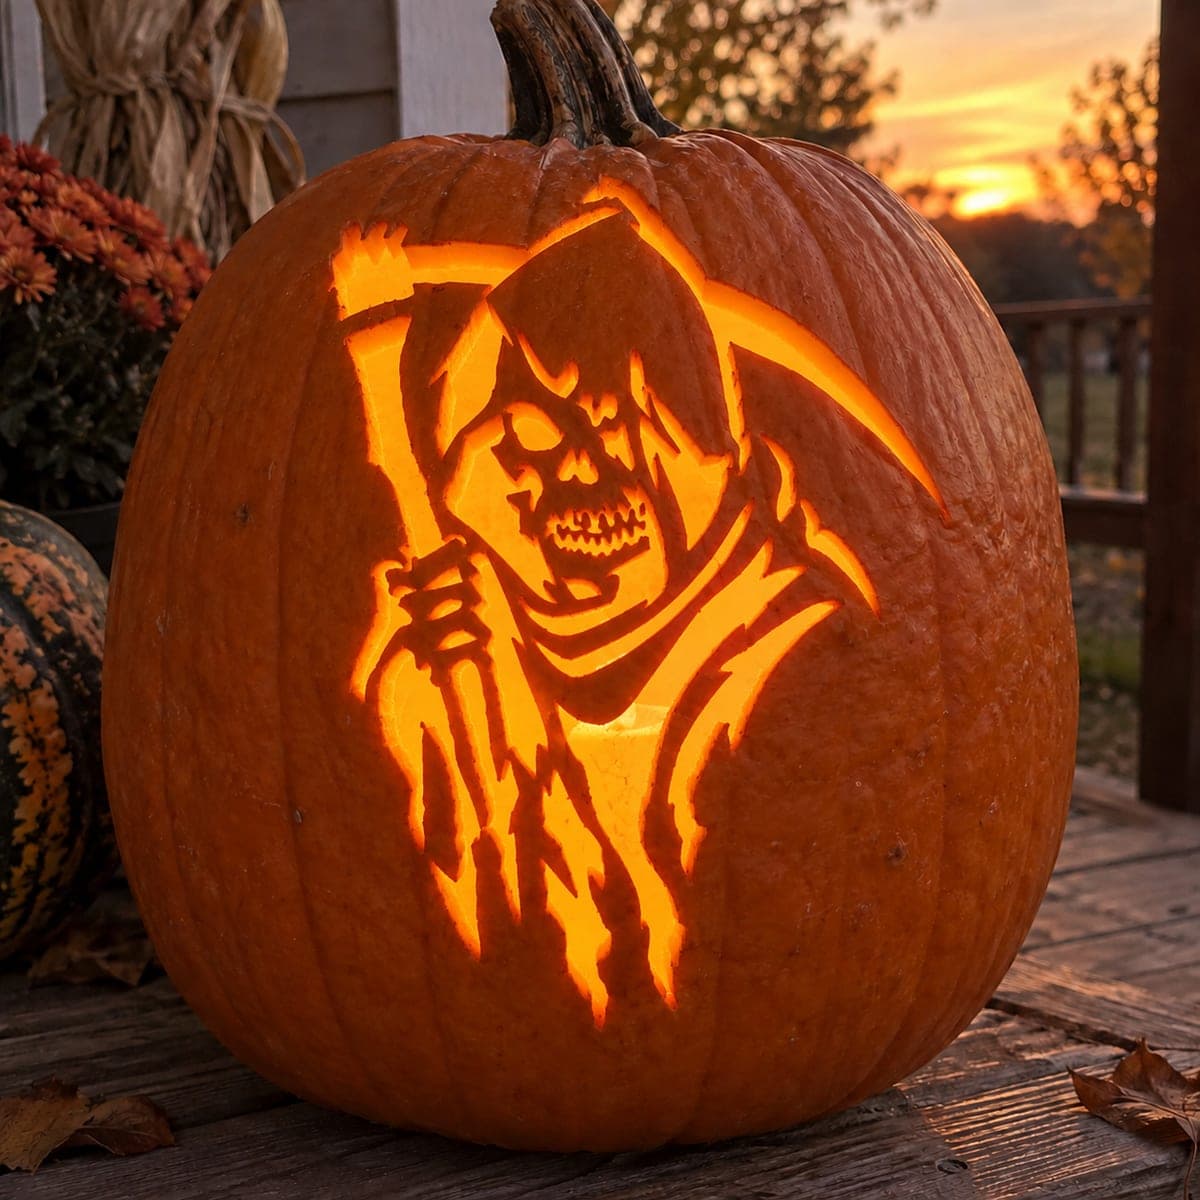
The retained cloak-and-shoulder figure joins the pumpkin base on both sides for this grim reaper pumpkin carving idea, while separate facial and accent holes provide glowing detail within the solid silhouette. Carve the negative space on each side of the figure first, leaving the cloak fully attached to the base before adding any facial details. This approach keeps the figure stable throughout the carving process. Placed outdoors at night, the backlit cloak silhouette casts a dramatic reaper shape on a wall or fence.

No ratings yet · Sign in to rate

Comments (0)

  • No comments yet — be the first.

Save without an account. Sign in to like or comment.

Our tips for carving a similar design

Rather than carving features into an orange face, this design retains the reaper figure as a solid rind silhouette by removing the negative space on either side and below the cloak. The figure joins the pumpkin base at both sides, which keeps the entire cloak stable throughout carving. Separate facial and accent holes glow within the solid silhouette, giving the reaper a face that appears to emerge from darkness.

From pumpkin to porch

  1. Hollow and sketch the full silhouette

    Cut a back-angled lid and scoop walls to a consistent inch. Draw the full reaper cloak outline on the pumpkin face, marking where the cloak base connects to the pumpkin on each side. The negative space on either side of the cloak and below it will all be removed.

  2. Remove the negative space on each side of the figure

    Cut the large open areas on either side of the cloak first, working slowly along the cloak's inner boundary. This is the most consequential cut; drifting into the cloak outline removes irrecoverable rind. Use a narrow blade and follow the sketched line precisely. Adults should manage these large cuts.

  3. Remove the negative space below the cloak

    Cut the open area below the cloak base, again staying precisely on the boundary line. Confirm after this cut that the cloak base still connects to the pumpkin on both sides. Those two connection zones are the only things holding the figure in place.

  4. Add the facial apertures within the hood

    Mark small eye and mouth shapes within the retained hood area of the cloak. Cut these as clean isolated apertures, staying well clear of the cloak's outer boundary. Each facial aperture adds a glowing point of detail inside the otherwise solid silhouette.

  5. Add any cloak accent holes

    If the design includes small accent holes within the cloak fabric, cut them as isolated apertures with substantial rind between each. These interior holes create the impression of a glowing figure beneath the cloak. Keep them sparse to preserve cloak integrity.

  6. Seal and display outdoors at night

    Coat all cut edges with petroleum jelly. Place a warm LED inside. At night the backlit cloak silhouette casts a dramatic reaper shadow on any wall or fence behind the pumpkin, projecting the design several feet beyond the pumpkin itself.

Written with AI to match this design

Gather your supplies

Check things off as you get ready.

Work on a stable surface, keep your free hand out of the cutting path, and have an adult handle sharp tools.

Three levels of light

  • Leave intact

    The entire retained cloak figure stays as solid orange rind, forming the dark reaper silhouette.

  • Peel & shade

    None; this design uses full cut-throughs only.

  • Cut through

    The large negative space areas on both sides and below the cloak, the interior facial apertures, and any accent holes in the cloak are all cut completely through for full glow.

Learn the carving basics

Before you start cutting

How do I prevent the saw from wandering into the cloak silhouette on the long curved cuts?

Score the cloak boundary line with a stylus or sharp tool before sawing. The scored groove gives the saw blade a channel to follow and reduces the risk of drifting. Make the initial break-through cut well inside the negative space area, then work toward the scored boundary line incrementally.

Should the cloak base connection to the pumpkin be wide or narrow?

Wide connections are much stronger. Aim for at least two inches of solid rind connecting each side of the cloak base to the pumpkin. Narrow connections look elegant in a drawing but fail quickly on a real pumpkin as it dries. Do not sacrifice structural width for visual drama here.

Can I add a scythe to this design?

Yes, but a scythe extending from the cloak figure needs its own connection points to the outer rind or it becomes a freestanding piece that will fall out. Route the scythe handle to touch the pumpkin shell at the top or side edge and ensure the blade end also connects to something. Free-hanging scythe shapes are common failures in reaper carvings.

Your take belongs here, too.

Changed a detail? Made it simpler? Share a photo of your version and tell the community what worked.

Share your pumpkin

More pumpkins like this

You've reached the end · 8 pumpkins
The Patch Report

Fresh pumpkins, in your inbox.

The best new carvings, ideas worth stealing, and how-tos for carving season. Short, seasonal, and gone by November.

A short email during carving season. Unsubscribe anytime. See our privacy policy.