@grinninggreta
Sep 7, 2026

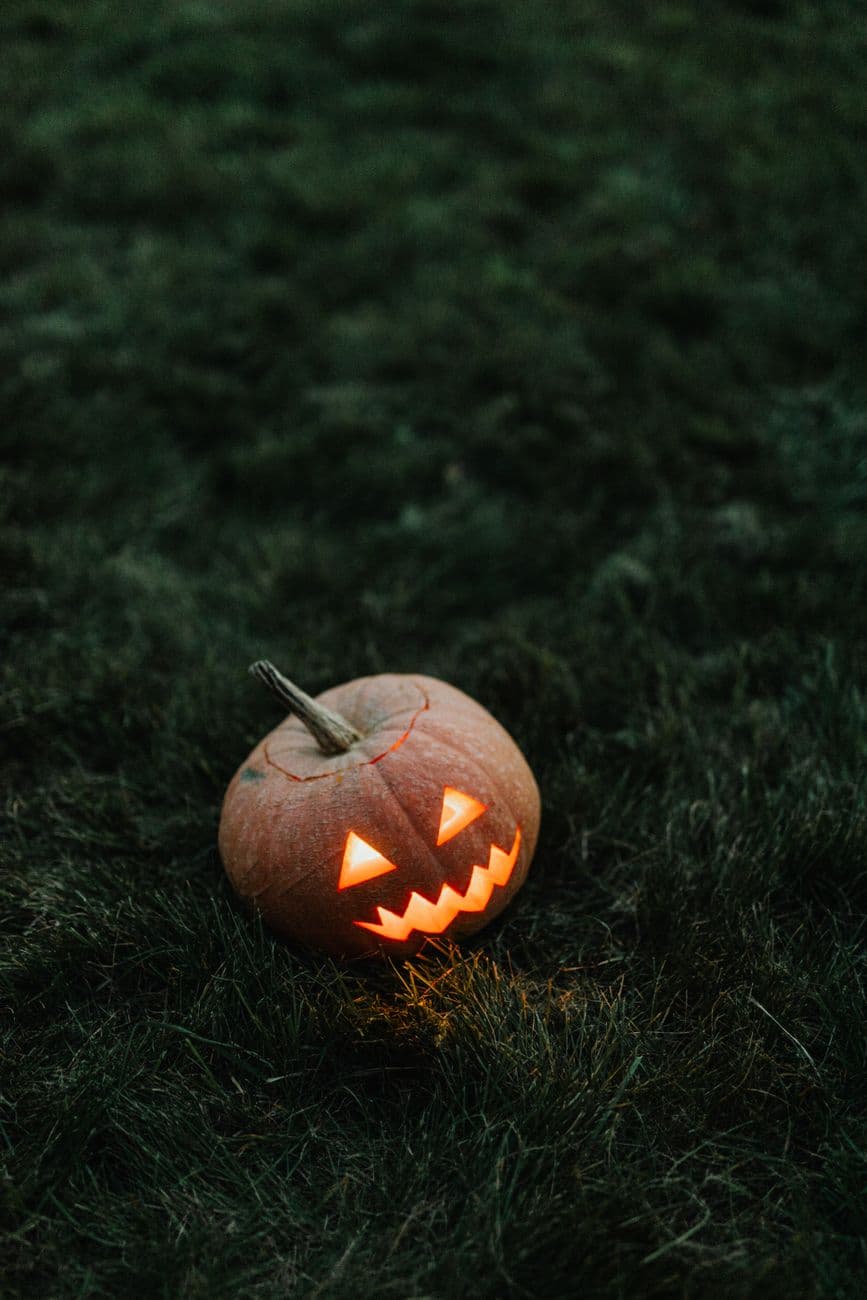
This design leans on a classic angry jack-o'-lantern grin, with sharp angled eyes, a triangular nose, and a wide mouth full of jagged teeth. The core trick is keeping the small teeth attached at top and bottom so the mouth reads as a real grin instead of one big hole. Plan your cuts so the delicate teeth stay supported while the big eye and mouth openings glow bright.
Written by PumpkinCarvingIdeas.com, inspired by @grinninggreta's photo above. These are our suggestions, not instructions from the uploader, and this approach hasn't been tested on their exact carve.
Choose a round, firm pumpkin and wipe it clean. Cut a lid or, better, a wide hole in the bottom so you can set the pumpkin over an LED light later. Scoop out the seeds and scrape the front wall down to about one inch thick so it is easier to cut through. Print or draw your grinning skull face and tape the stencil onto the front.
Poke the design onto the skin with a pushpin or a poking tool, following the eyes, nose, and every tooth edge. Space the holes close together so the shapes are easy to read once the paper comes off. Peel the stencil and connect the dots lightly with a marker if you need a clearer guide. Take your time here, since clean lines make the whole face look sharp.
Using a small serrated carving saw, cut out the two angled eyes and the triangular nose. Start with these smaller shapes while the pumpkin wall is still strong and supported by the surrounding areas. Cut with gentle sawing motions and push the pieces out from inside. Adults should handle all the sharp tools.
Outline the wide mouth, then cut the zigzag teeth one notch at a time. Leave each tooth connected to the lip above or below it so the row stays strong and does not snap off. Work slowly around the points, and avoid prying so you do not crack a tooth. Save the largest gaps in the mouth for last so the front stays supported as long as possible.
For a worn, spooky glow, use a lino or ribbon tool to shave a thin layer of skin around the eyes and along the cheek lines without cutting all the way through. These peeled areas will glow a soft dim orange when lit. Keep the peeling shallow and even. This step is optional but adds the eerie shading you see on scary faces.
Set a battery LED light or a string of them inside and place the pumpkin over the bottom opening. Avoid open flames, since the thin teeth can scorch and the whole face is fragile. Photograph in a dark room so the bright cutouts pop against the untouched skin. A little petroleum jelly on the cut edges slows drying and keeps the grin looking fresh.
Check things off as you get ready.
Work on a stable surface, keep your free hand out of the cutting path, and have an adult handle sharp tools.
The outer face and cheeks stay as untouched skin for a dark base.
Shallow shaved areas around the eyes and cheek lines glow a dim orange.
The angled eyes, triangle nose, and jagged mouth are cut through for the brightest light.
Leave each tooth attached to the lip above or below it rather than carving them as free-floating points. Cut one notch at a time and push scraps out gently instead of prying. A firm, fresh pumpkin with a one inch wall also holds thin details much better.
Opening the bottom is the better choice for a face like this. It lets you set the pumpkin down over an LED light easily and keeps the top intact for a cleaner look. It also gives the stem area more strength above the eyes.
Full cutouts like the mouth and eyes let all the light through, so they read as the brightest parts. The untouched skin stays dark, and any shallow peeled areas sit in between with a soft orange glow. Balancing these three levels is what gives the face depth.
Changed a detail? Made it simpler? Share a photo of your version and tell the community what worked.
The best new carvings, ideas worth stealing, and how-tos for carving season. Short, seasonal, and gone by November.




Comments (0)