Halloween Pumpkin Carving Contest · Starts October 1st · $500 in prizes
← Back to ideas
@ai_concepts
Sep 25, 2026
Grogu Wide Ears Pumpkin Carving IdeaAI
0

Report this carving

Tell us what is wrong. Reports are private.

Grogu Wide Ears Pumpkin Carving Idea

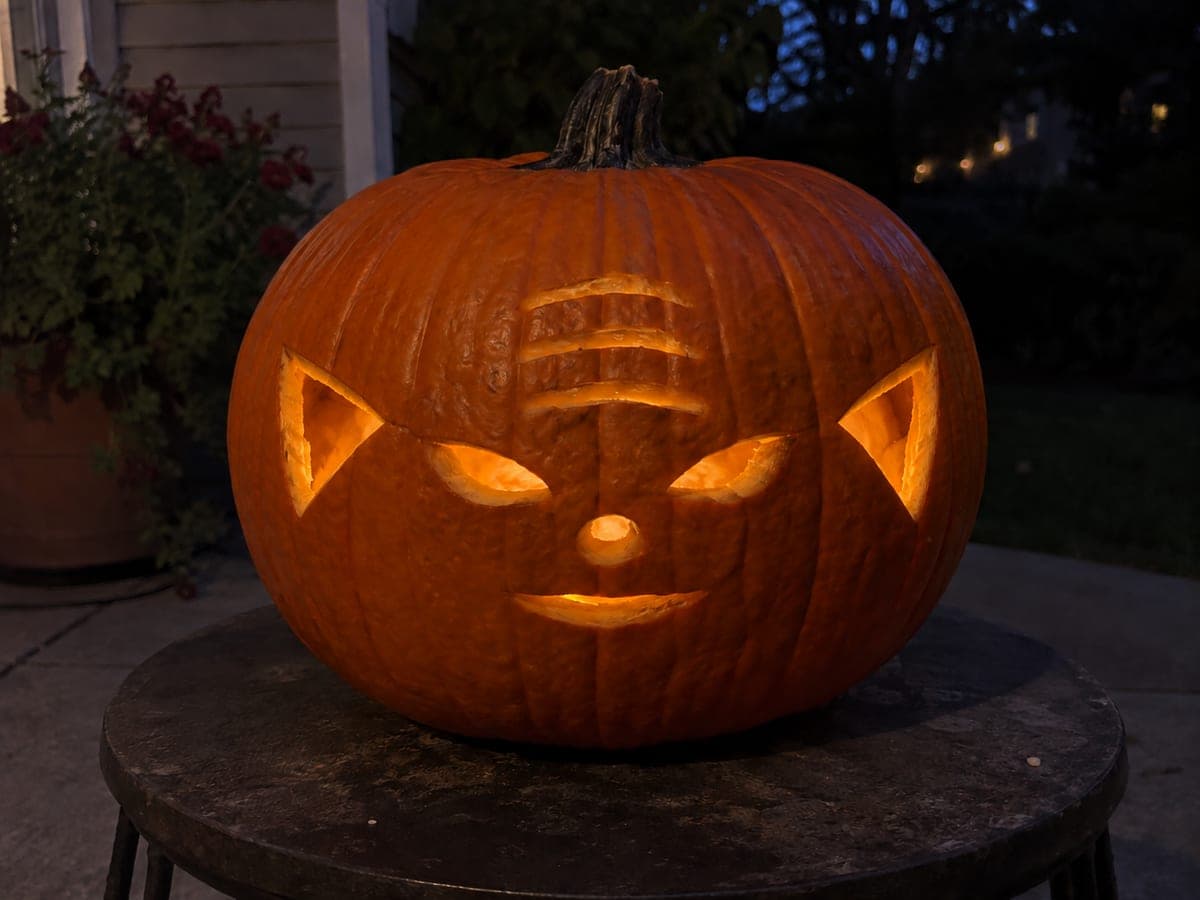
Grogu's broad, expressive ears spread wide on either side of his round face in this medium-difficulty grogu pumpkin carving idea. The facial features and ear openings are cut as separate apertures, while the head outline and wrinkle details are kept as shallow-backed scoring in the rind rather than full cuts. Begin with the larger facial openings before tackling the finer wrinkle lines, and use a linoleum-carving tool or Dremel for the shallow surface work. Soft warm lighting inside emphasizes the character's round, gentle features.

No ratings yet · Sign in to rate
Comments (0)

  • No comments yet — be the first.

Save without an account. Sign in to like or comment.

Our tips for carving a similar design

Grogu's broad ears and round face are built from separate cut-through apertures for the ear openings and facial features, while the head outline and delicate wrinkle details are kept as shallow back-carved scoring rather than full cuts. Beginning with the larger facial openings before tackling the finer wrinkle lines keeps the most rind in place while you are working with the saw. Soft warm lighting inside brings out the character's round, gentle quality.

From pumpkin to porch

  1. Hollow to an even thickness

    Cut a back panel or lid, remove all pulp, and thin the carving face walls to three-quarters of an inch. The wrinkle scoring on this design will go roughly halfway through the wall, so even thickness ensures the back-carved lines glow consistently rather than some appearing brighter than others.

  2. Transfer the pattern

    Print the Grogu face pattern at scale and tape it to the pumpkin. Trace the ear aperture outlines, facial feature openings, head contour line, and wrinkle positions with a pin tool. Mark the head contour line in a distinct color pen to remind yourself it is a scoring line, not a through-cut.

  3. Cut the ear apertures

    Start with the two large ear openings since they establish the widest span of the design. Adults handle all cutting. Use a thin carving saw and cut each ear as a separate clean aperture. Confirm both ears are the same height and width before moving to the face.

  4. Cut the facial feature apertures

    Move to the eye, nose, and mouth openings, working from the largest to the smallest. Keep any small retained detail, such as pupil circles, on wide bridges connecting to at least two sides of the surrounding aperture edge.

  5. Score wrinkles and head contour

    Using a linoleum-carving tool or a Dremel ball bit, carve the wrinkle lines and head contour to roughly half the wall depth. Work in slow, deliberate strokes along the traced impressions. Check depth from inside with a flashlight: a warm ambient glow without a full hole is the correct depth.

  6. Add warm light and display

    Insert a soft warm-white or amber LED. Avoid bright cool lights that can make Grogu's gentle features look harsh. Display at a height where the wide ears and face are visible at the viewer's eye level.

Written with AI to match this design

Gather your supplies

Check things off as you get ready.

Work on a stable surface, keep your free hand out of the cutting path, and have an adult handle sharp tools.

Three levels of light

  • Leave intact

    The head outline boundary and surrounding rind stay as dark uncut shapes

  • Peel & shade

    Wrinkle lines and head contour scoring glow softly as a warm mid-tone layer across the face

  • Cut through

    Ear apertures and facial feature openings are fully cut through for full light output

Learn the carving basics

Before you start cutting

How do I make the wrinkle scoring look natural rather than mechanical?

Let the tool follow the curved impressions from the transfer rather than ruling straight lines. Shallow wrinkle lines should vary slightly in depth and end in a gradual taper rather than a blunt stop. Working at lower Dremel speed or using hand-gouge pressure you can vary intuitively produces more organic results than a fixed-speed power pass.

The ear apertures are very large relative to the face. Does this weaken the pumpkin?

Large ears cut as open apertures do reduce rind mass across the design. To compensate, leave at least an inch of uncut rind border between the outer edge of each ear aperture and the pumpkin's natural rim. Avoid cutting any structural line in the rind between the two ear openings; keep that bridge of rind solid throughout.

Can I add color to make this look more like the character?

Yes. Dabbing a diluted wash of sage green acrylic over the face area of the pumpkin before carving, then allowing it to dry completely, tints the retained rind to suggest Grogu's skin tone. The wash is thin enough that it does not significantly change the glow quality once the LED is inside.

Your take belongs here, too.

Changed a detail? Made it simpler? Share a photo of your version and tell the community what worked.

Share your pumpkin

More pumpkins like this

You've reached the end · 8 pumpkins
The Patch Report

Fresh pumpkins, in your inbox.

The best new carvings, ideas worth stealing, and how-tos for carving season. Short, seasonal, and gone by November.

A short email during carving season. Unsubscribe anytime. See our privacy policy.