Halloween Pumpkin Carving Contest · Starts October 1st · $500 in prizes
← Back to ideas
@ai_concepts
Sep 25, 2026
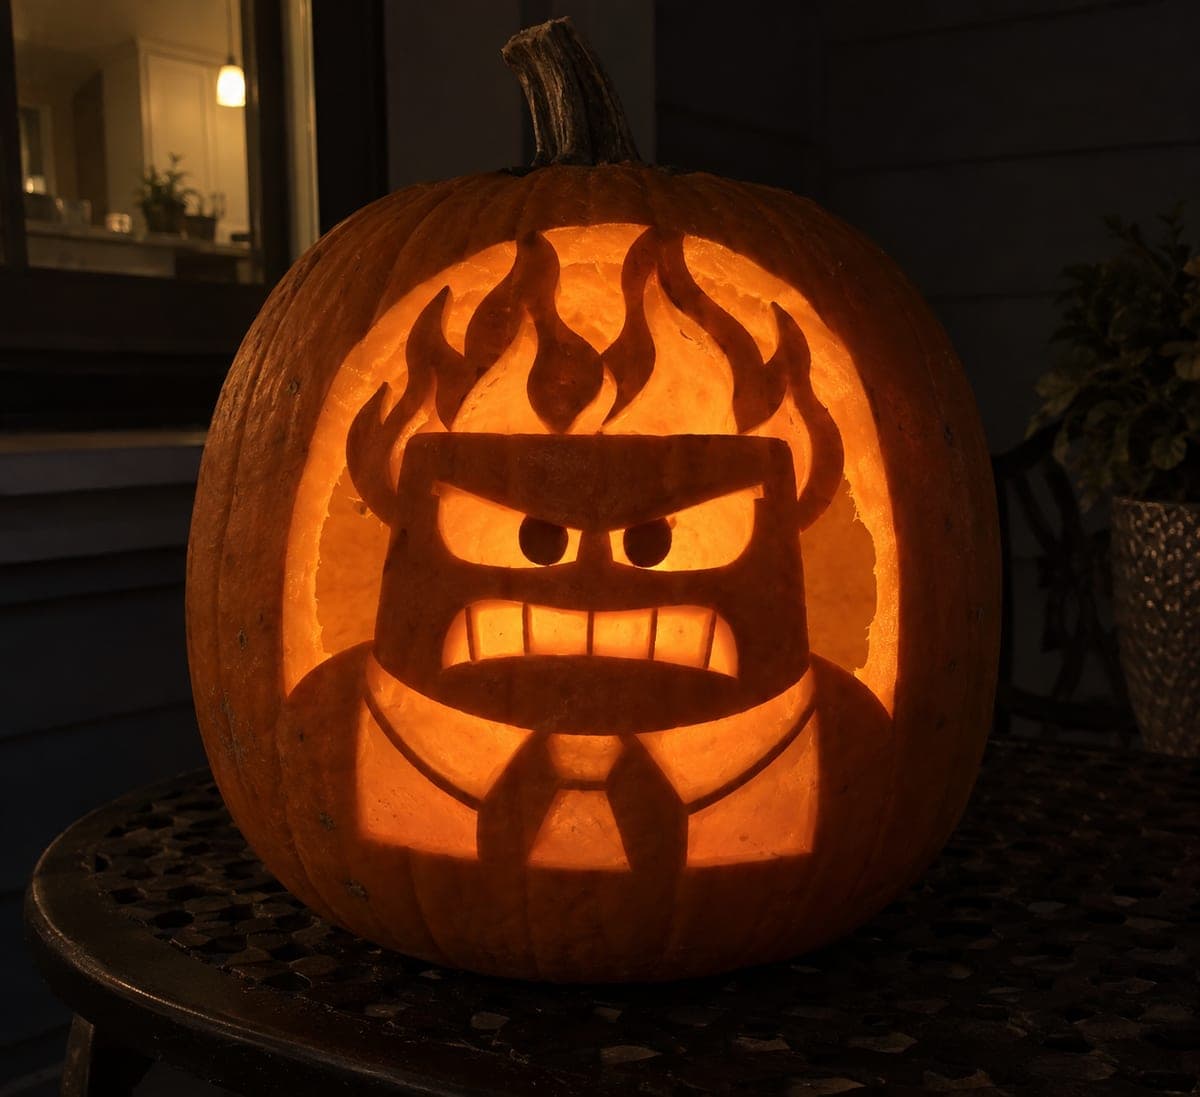
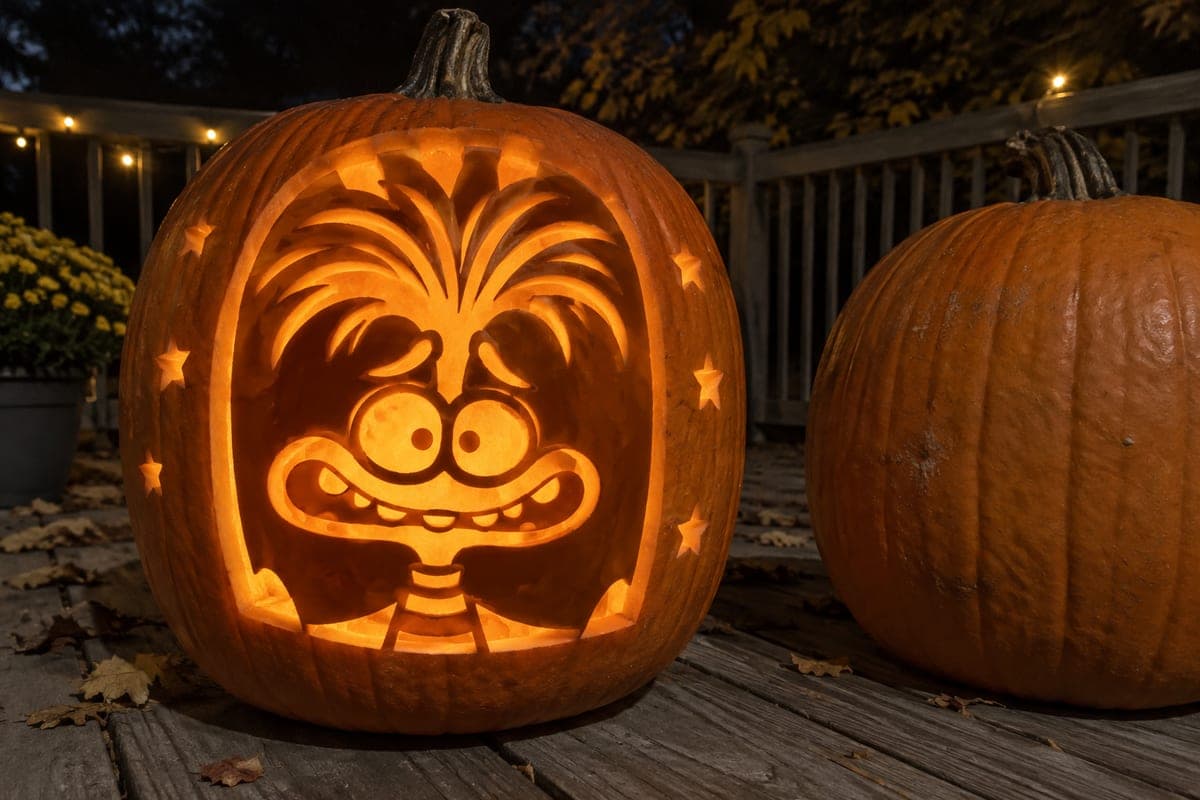
Hard Anger Pumpkin With Rectangular Head on Natural RindAI
0

Report this carving

Tell us what is wrong. Reports are private.

Hard Anger Pumpkin With Rectangular Head on Natural Rind

The hard Anger pumpkin carving idea retains the rectangular head and torso joined to the base and sides, with upper flame shapes connecting to the top frame. Pupil tabs attach at the upper eye edges and rectangular mouth divisions and collar details stay supported. The main arch and eye apertures are cut through. Carve the arch and flame joins as a continuous pass so the head stays supported while you open the interior.

No ratings yet · Sign in to rate
Comments (0)

  • No comments yet — be the first.

Save without an account. Sign in to like or comment.

Our tips for carving a similar design

The retained rectangular head and torso connect to the pumpkin base and both sides, while upper flame shapes join the top frame of the arch opening. The main arch and eye apertures are cut fully through, creating the glow. Pupil tabs attach at the upper eye edges and rectangular mouth divisions and collar details remain supported throughout. Carving the arch and flame joins as one continuous pass keeps the head fully supported while the interior opens up.

From pumpkin to porch

  1. Transfer and map structural bridges

    Scoop to 3/4 inch and dry the exterior. Transfer the full stencil by pin wheel. Mark the base contacts, side contacts, and upper flame-to-frame joins in a different color to identify all five structural bridges before you begin cutting.

  2. Plan the arch and flame pass

    The arch and upper flame joins are carved in one continuous circuit around the retained head. Sketch the path that saw follows so you can maintain consistent progress without backtracking over sensitive structural zones. Adults handle all sawing throughout.

  3. Cut the arch and flame joins

    Open the arch perimeter and the gaps between the flame shapes and the frame in one careful, steady pass. Move slowly near each flame join and the shoulder contacts. The head should still be attached at all five points when this step is complete.

  4. Cut the eye apertures

    With the arch open and the retained head supported, cut both eye apertures. Leave each pupil tab attached at the upper lid edge with at least 3/8 inch tab width. Use a narrow blade for the pupil bar sides.

  5. Cut rectangular mouth divisions and add collar detail

    Open the mouth shape, leaving the rectangular interior divisions as supported rind strips. These strips mimic the character's clenched-teeth expression and must each stay connected to at least one jaw edge. Score the collar detail shapes with a linoleum cutter rather than cutting fully through.

  6. Light and inspect

    Place an LED inside and inspect all five structural bridges from outside. Check the flame join points especially; they carry load from both sides of the flame shape. If any point looks thin, support it with a wooden toothpick inserted from the inside across the joint.

Written with AI to match this design

Gather your supplies

Check things off as you get ready.

Work on a stable surface, keep your free hand out of the cutting path, and have an adult handle sharp tools.

Three levels of light

  • Leave intact

    The full retained rectangular head and torso, pupil tabs, mouth division strips, and all five bridge zones stay solid dark

  • Peel & shade

    Scored collar details produce a faint mid glow on the natural unpainted rind

  • Cut through

    The main arch opening, eye apertures, and mouth opening are fully cut through

Learn the carving basics

Before you start cutting

What does the flame join actually look like once it is cut?

Each flame shape has solid rind on both of its long sides connecting the retained head to the outer arch frame. From outside, the glowing gaps between each flame point look like light shining between the orange flame shapes, creating the impression of actual fire rising from the character's head.

Can I make the rectangular mouth look like actual teeth?

Yes. The mouth divisions create a row of rectangular tooth-like segments connected to the upper and lower jaw. Making each division strip equal in width gives a clean, uniform tooth row. If you want more character, vary the division heights slightly to suggest uneven teeth.

How do I handle the very bottom of the arch where it meets the base contacts?

The base contacts are where the torso connects to the lower shell. Leave at least 1/2 inch of rind at each contact point. When the saw approaches the base contact zone, slow down and check the contact width before each small additional stroke. Cutting too far into the base contacts is the most common error at this difficulty level.

Your take belongs here, too.

Changed a detail? Made it simpler? Share a photo of your version and tell the community what worked.

Share your pumpkin

More pumpkins like this

You've reached the end · 8 pumpkins
The Patch Report

Fresh pumpkins, in your inbox.

The best new carvings, ideas worth stealing, and how-tos for carving season. Short, seasonal, and gone by November.

A short email during carving season. Unsubscribe anytime. See our privacy policy.