Halloween Pumpkin Carving Contest Β· Starts October 1st Β· $500 in prizes
← Back to ideas
@ai_concepts
Sep 25, 2026
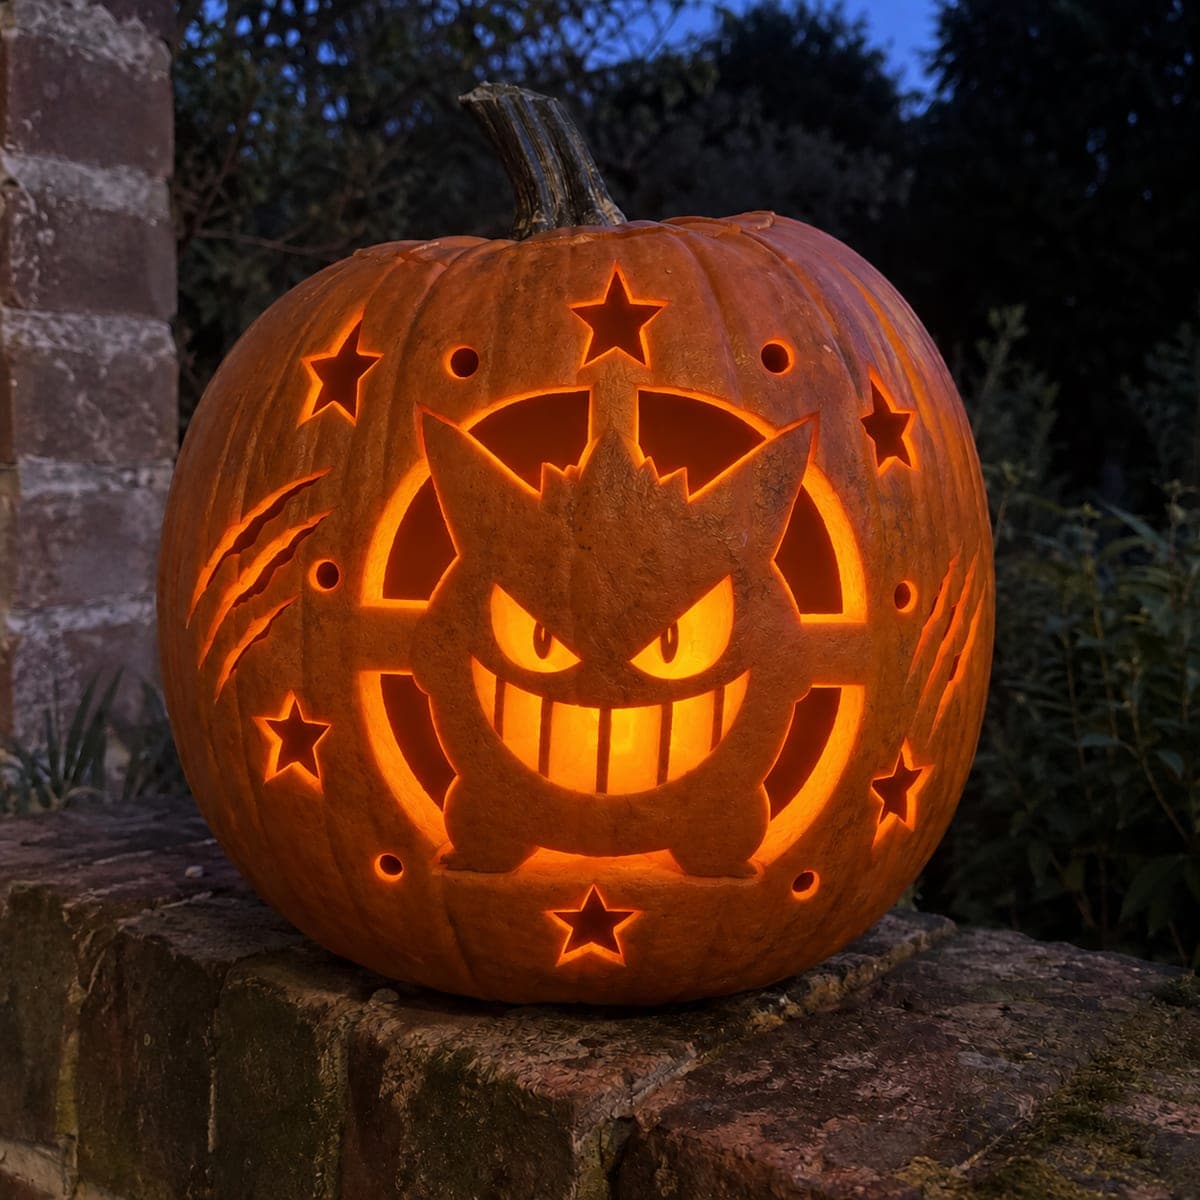
Hard Haunter Pumpkin Carving with Body and Claw DetailAI
0

Report this carving

Tell us what is wrong. Reports are private.

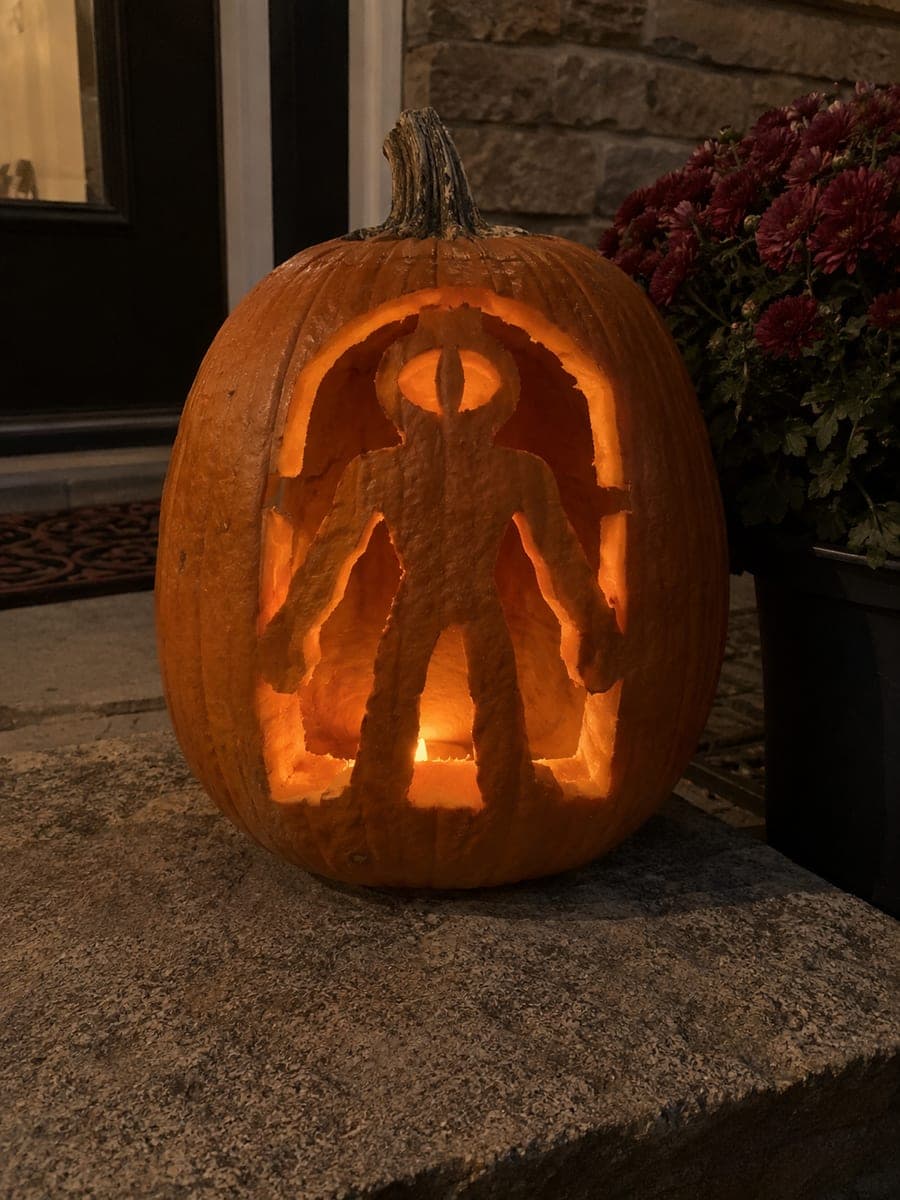
Hard Haunter Pumpkin Carving with Body and Claw Detail

This hard Haunter pumpkin carving idea opens the main body and face areas while retaining pupils, teeth, and claw silhouette sections on broad rind bridges so the ghost's floating-hand character reads clearly when lit. Shallow back-carved secondary accents complete the surface texture without requiring additional through-cuts. Carve the large body opening first to define the ghost shape boundary before working the claw and face details.

No ratings yet Β· Sign in to rate

Comments (0)

  • No comments yet β€” be the first.

Save without an account. Sign in to like or comment.

Our tips for carving a similar design

This hard design opens the main body and face areas as full cut-through apertures while retaining pupils, teeth, and the claw silhouette sections on broad rind bridges so the floating-hand character reads clearly when lit. Shallow back-carved secondary accents finish the surface texture. The large body opening should be cut first to define the ghost shape boundary before any claw or face details are attempted.

From pumpkin to porch

  1. Plan bridge positions on the pattern

    Before hollowing, study the pattern and identify every retained piece: pupils, teeth, and claw silhouette sections. Mark each bridge on the printed pattern in a bright color so its position is memorized before transfer. Hard designs have more retained pieces in closer proximity, making pre-planning critical.

  2. Hollow and thin walls

    Cut a back panel, remove all pulp, and thin the carving face to three-quarters of an inch. Use a flat metal rasp or Dremel drum sander to achieve even thickness in the claw zone, where the retained sections will be close together.

  3. Transfer and confirm

    Transfer the pattern with a pounce wheel and re-draw bridge positions in pen after removing the paper. Confirm every bridge is visible and at least three-eighths of an inch wide as drawn before picking up the carving saw.

  4. Cut the large body opening

    Begin with the large ghost body aperture to define the outer boundary. This is the most important structural cut because it sets the reference frame for everything inside. Use a thin carving saw, adults only, and cut the boundary carefully, stopping well before any bridge point.

  5. Work through claw and face details

    Carve the claw silhouette apertures next, keeping each retained claw section anchored at its base and along one side. Follow with the face apertures, retaining pupils and teeth on double-anchored bridges. Complete the smallest details last when the surrounding rind is most stable.

  6. Back-carve accents and display

    Add shallow surface texture with a gouge or Dremel bit. Insert a purple or blue battery LED. The retained claws and pupils will read as dark floating shapes against the bright glow, which is exactly the effect that makes this design compelling.

Written with AI to match this design

Gather your supplies

Check things off as you get ready.

Work on a stable surface, keep your free hand out of the cutting path, and have an adult handle sharp tools.

Three levels of light

  • Leave intact

    Retained pupils, teeth, and claw silhouette sections stay as dark shapes within glowing apertures

  • Peel & shade

    Shallow body and surface accent marks create a mid-tone layer of texture

  • Cut through

    Large body apertures, claw surround, and main face openings are fully cut through

Learn the carving basics

Before you start cutting

How do I keep the claw silhouette sections from detaching mid-carve?

Each retained claw shape needs connections at both its root and one side edge. Cut the open spaces between and around the claws one at a time, confirming each claw stays attached after each cut before moving to the next. If a claw section only connects at a single point, add a shallow-back extension bridging it to the main body mass before removing the adjacent open area.

In what order should I tackle the claw details versus the face?

Do the large body opening first, then the claw zone, then the face features. The face features, particularly the teeth, are the most fragile retained pieces. Completing the claw work first means the rind has settled from the large body cut before you introduce the additional stress of the tooth and pupil cuts.

Is it possible to replace a fallen retained piece if it snaps off?

Yes. A toothpick or bamboo skewer cut to a short length, inserted horizontally through both the fallen piece and the adjacent shell wall, can act as a pin. Press craft glue around the joint, hold it for sixty seconds, and allow it to cure before displaying. The repair is not invisible but is perfectly functional for a seasonal display.

Your take belongs here, too.

Changed a detail? Made it simpler? Share a photo of your version and tell the community what worked.

Share your pumpkin

More pumpkins like this

You've reached the end Β· 8 pumpkins
The Patch Report

Fresh pumpkins, in your inbox.

The best new carvings, ideas worth stealing, and how-tos for carving season. Short, seasonal, and gone by November.

A short email during carving season. Unsubscribe anytime. See our privacy policy.