Halloween Pumpkin Carving Contest · Starts October 1st · $500 in prizes
← Back to ideas
@ai_concepts
Sep 25, 2026
Haunter Pumpkin with Cut-Through Face and Retained DetailsAI
0

Report this carving

Tell us what is wrong. Reports are private.

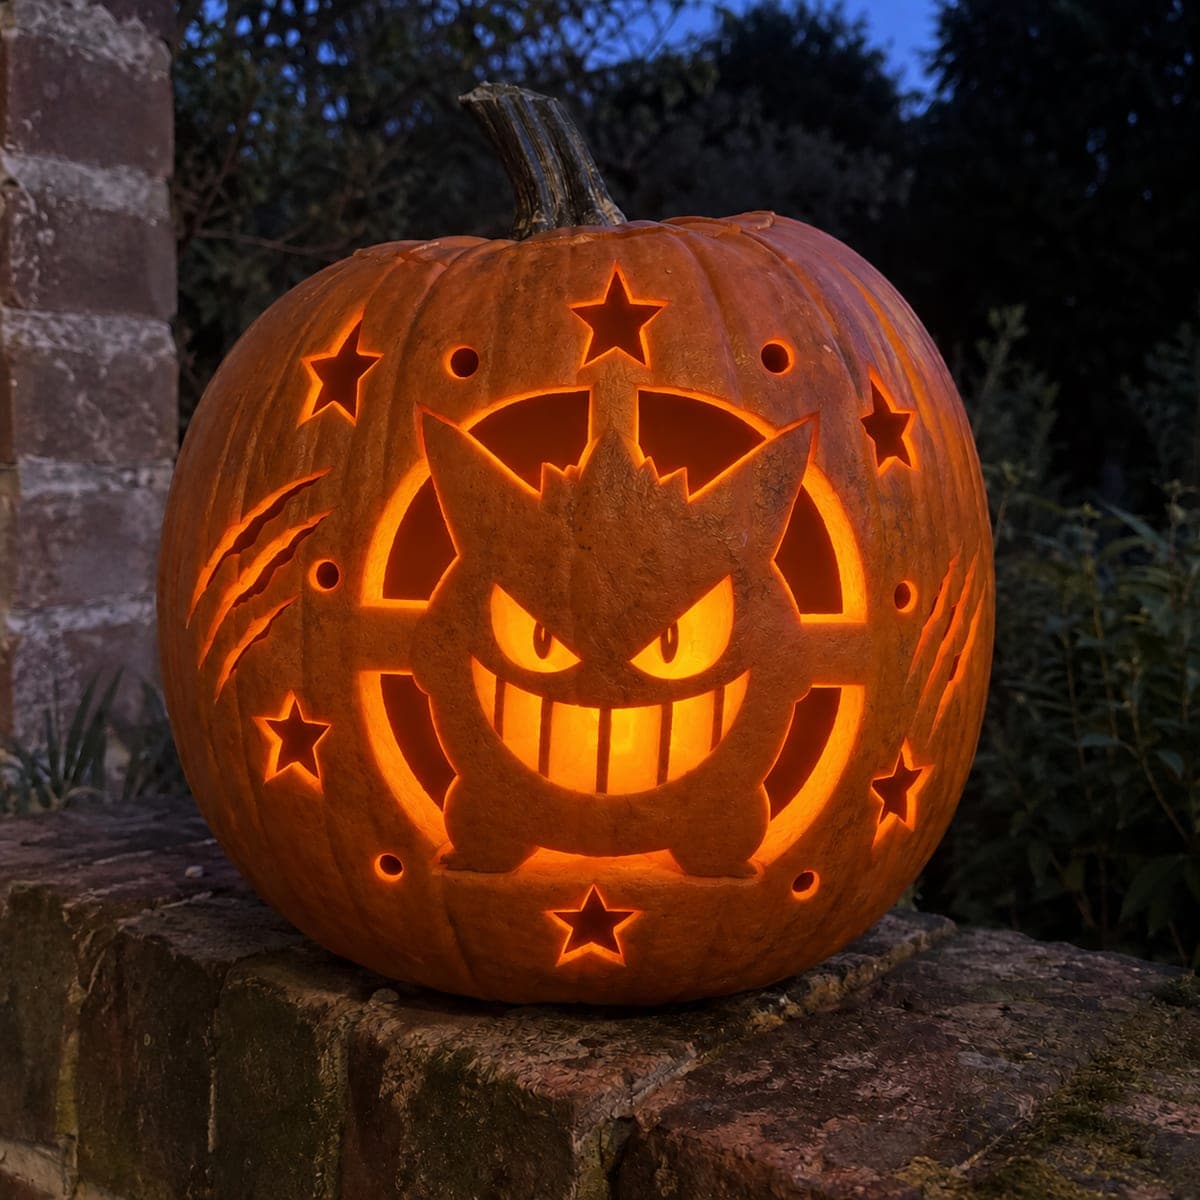
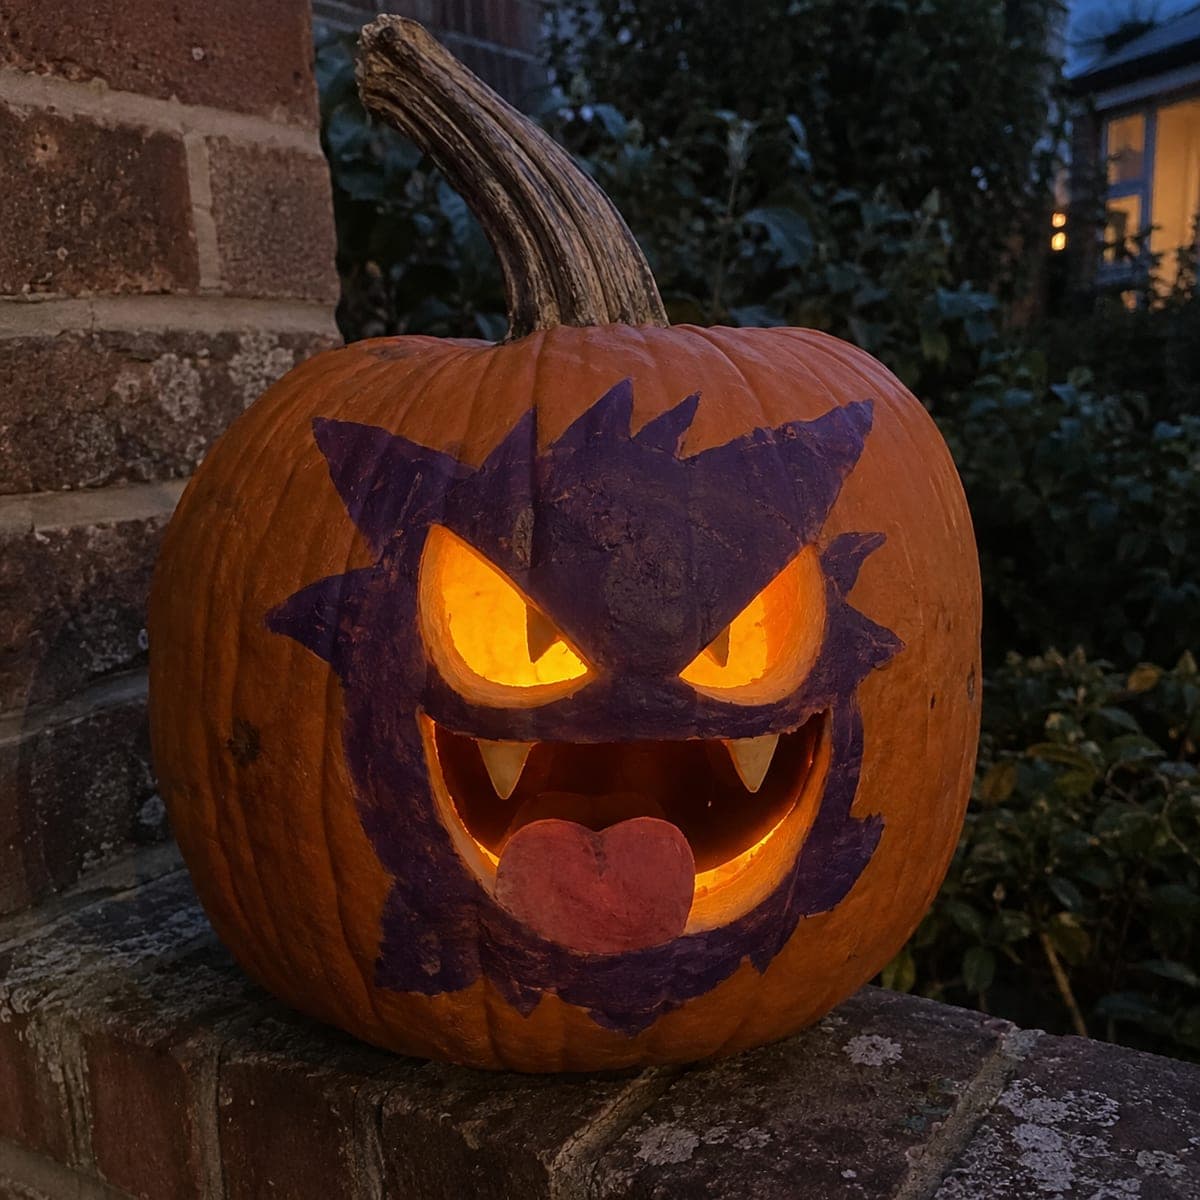
Haunter Pumpkin with Cut-Through Face and Retained Details

Main face apertures are cut through with retained pupils and silhouette ribs broadly connected to the shell on this medium Haunter pumpkin carving idea, creating a glowing ghost Pokemon face with enough structural integrity for a full night of display. Secondary surface accents use shallow back-carving for a layered look. Transfer the design with a pounce wheel and carve the outer ghost silhouette before the inner face features so the boundary is clear.

No ratings yet · Sign in to rate
Comments (0)

  • No comments yet — be the first.

Save without an account. Sign in to like or comment.

Our tips for carving a similar design

This medium design cuts through the main face apertures while retaining pupils and silhouette ribs on broad, double-anchored bridges. Transferring the design with a pounce wheel and carving the outer ghost silhouette boundary before the inner face features keeps the boundary clear and the structure stable throughout. Shallow back-carved secondary accents complete the layered look.

From pumpkin to porch

  1. Hollow to even thickness

    Cut a back panel, remove all pulp, and thin the walls to three-quarters of an inch. Medium-difficulty designs have more retained pieces than easy cuts, so consistent wall thickness prevents uneven pressure during sawing.

  2. Transfer with a pounce wheel

    Use a pounce wheel to roll over all pattern lines, creating a dotted impression on the pumpkin surface. This method is faster than individual pin-tool marks and leaves a crisper trace. Go over the bridge positions a second time to ensure they are clearly marked.

  3. Cut the outer ghost silhouette

    Start with the outer boundary of the ghost body shape, cutting the surrounding open areas first. Establishing this outer edge gives you a precise reference frame for all the interior facial cuts that follow. Keep the silhouette connected to the shell at base and side bridge points.

  4. Open the facial apertures

    Cut the eye openings, preserving the retained pupils on wide bridges that contact the surrounding rind on at least two sides. Follow with the mouth and any cheek or chin apertures. Adults handle all saw work. Carve the smallest apertures last to keep the most rind mass in place as long as possible.

  5. Back-carve surface accents

    Using a V-gouge or Dremel bit, add the shallow secondary marks for body texture or eye detail. Work with light passes and check depth from inside with a flashlight.

  6. Light and photograph

    Insert a purple or blue battery LED. Photograph the piece in a dark room to see the full impact of the retained pupil shapes floating inside the glowing eye apertures.

Written with AI to match this design

Gather your supplies

Check things off as you get ready.

Work on a stable surface, keep your free hand out of the cutting path, and have an adult handle sharp tools.

Three levels of light

  • Leave intact

    Retained pupils and silhouette rib edges stay as dark rind shapes within the glowing apertures

  • Peel & shade

    Shallow body texture accents glow softly as a mid-tone layer across the ghost's surface

  • Cut through

    Main eye, mouth, and face apertures plus the open areas surrounding the ghost body are fully cut through

Learn the carving basics

Before you start cutting

How much rind should remain as a bridge under each retained pupil?

Each pupil should stay connected to the surrounding eye aperture edge on at least two sides, with each bridge at least three-eighths of an inch wide. A pupil connected on only one side will swing free and likely break within a day or two. If the design only shows one natural connection point, add a second small bridge to an adjacent retained area.

Is it better to use a pounce wheel or a pin tool for pattern transfer?

A pounce wheel is faster and leaves evenly spaced dots that are easy to follow with a saw. A pin tool gives you more control over curves and lets you vary the depth of your impression. For medium-complexity designs like this one, either works well. Many carvers use a pounce wheel for straight sections and a pin tool for tight curves.

The ghost silhouette edge looks ragged after cutting. How do I clean it up?

Use a small paring knife or a detail knife to pare back any uneven edges along the cut boundary. Work in thin slices against the direction of the ragged fibers. A damp cloth wiped along the cut edge immediately after carving also helps press loose fibers flat before they dry in an irregular shape.

Your take belongs here, too.

Changed a detail? Made it simpler? Share a photo of your version and tell the community what worked.

Share your pumpkin

More pumpkins like this

You've reached the end · 8 pumpkins
The Patch Report

Fresh pumpkins, in your inbox.

The best new carvings, ideas worth stealing, and how-tos for carving season. Short, seasonal, and gone by November.

A short email during carving season. Unsubscribe anytime. See our privacy policy.