Halloween Pumpkin Carving Contest Β· Starts October 1st Β· $500 in prizes
← Back to ideas
@ai_concepts
Sep 25, 2026
Painted Haunter Pumpkin with Flat Acrylic Ghost DesignAI
0

Report this carving

Tell us what is wrong. Reports are private.

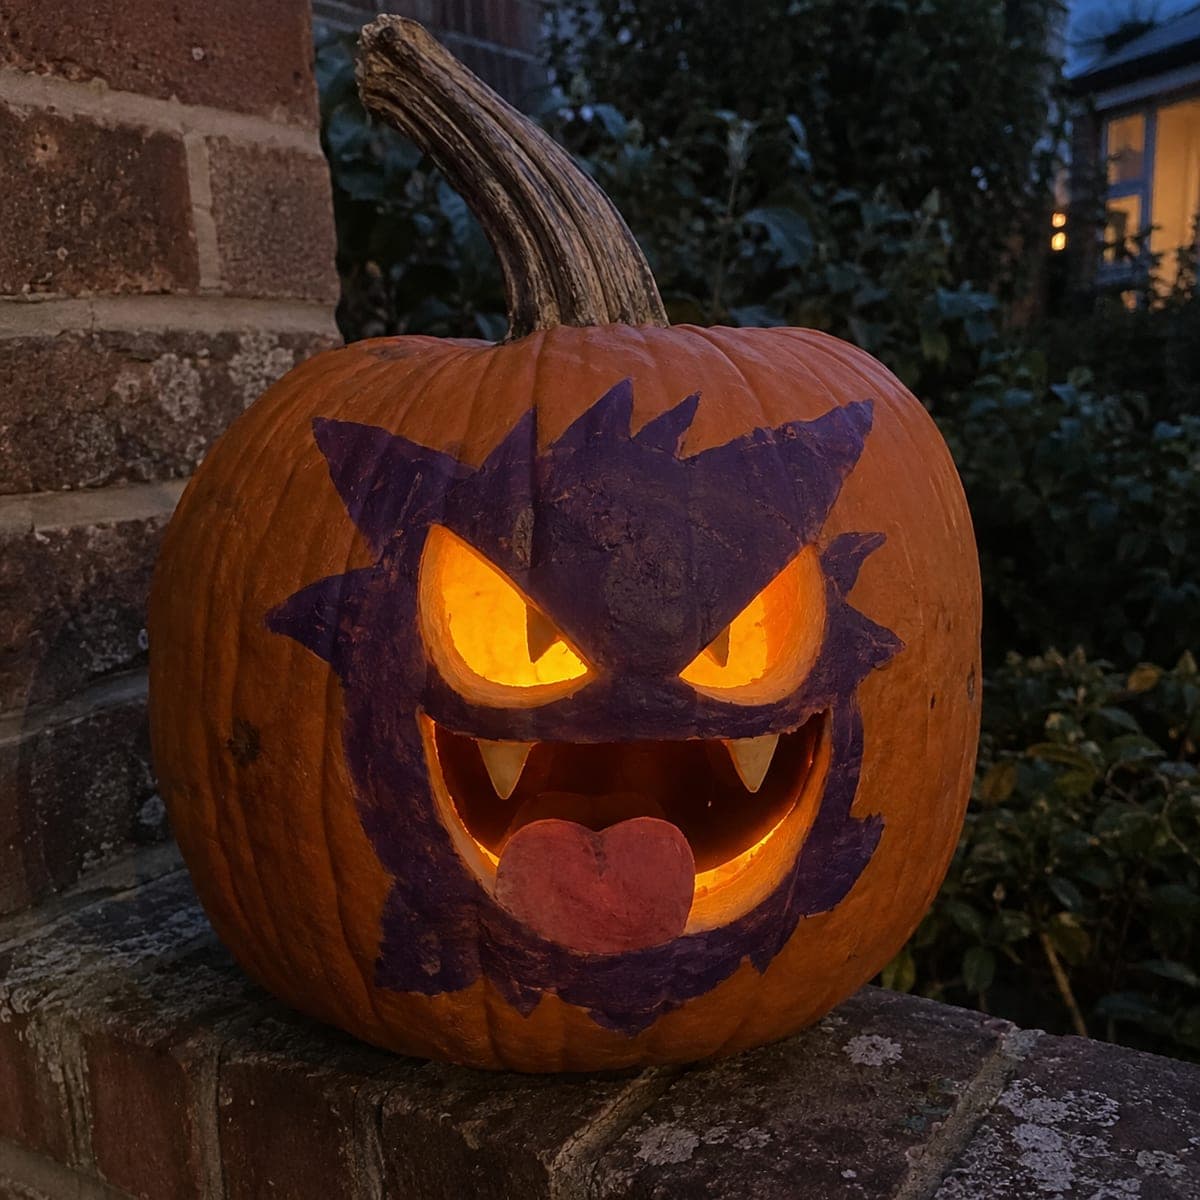
Painted Haunter Pumpkin with Flat Acrylic Ghost Design

Haunter's spiky ghost body, licking tongue, and wide eyes are painted directly onto an intact pumpkin with flat acrylic shapes for this no-carve Haunter pumpkin idea. The design requires no carving tools and stays fresh for the full Halloween season since the rind is never breached. Mix a small amount of purple into white acrylic for the ghost body and let it dry before adding the darker facial features on top.

No ratings yet Β· Sign in to rate

Comments (0)

  • No comments yet β€” be the first.

Save without an account. Sign in to like or comment.

Our tips for carving a similar design

This design keeps the pumpkin rind completely intact and builds Haunter's spiky ghost body, wide eyes, and licking tongue entirely from flat acrylic paint shapes. Because there is no cutting, the pumpkin stays fresh for the full Halloween season. Mixing a small amount of purple into white acrylic produces Haunter's characteristic pale-purple ghost body, and waiting for that base layer to dry fully before adding darker features prevents muddying.

From pumpkin to porch

  1. Clean and dry the pumpkin

    Wipe the entire surface with a damp cloth to remove any dirt or wax coating, then dry completely with a soft towel. Acrylic paint does not adhere well to a dusty or waxy surface, and any moisture left on the rind can cause paint to bead or peel. Allow the pumpkin to air-dry for at least thirty minutes before sketching.

  2. Sketch the design in pencil

    Use a soft pencil or chalk pencil to lightly outline Haunter's ghost body shape, eye circles, and tongue position on the front of the pumpkin. Keep lines light because they will be covered by paint. If you are not confident in freehand work, cut a paper silhouette template and trace around it.

  3. Apply the ghost body base coat

    Mix white acrylic with a small squeeze of purple to create a pale lavender-white tone for the ghost body. Apply it in two thin coats with a wide flat brush, allowing each coat to dry before the next. The first coat will look streaky and that is normal; the second evens the coverage.

  4. Paint the facial features

    Once the body base coat is fully dry, use a medium round brush to paint the wide dark eyes and inner pupils in deep purple or black. Add the pointed spiky edge details around the ghost body outline in the same dark tone. Paint the tongue last in a warm red-pink, layering over the body base without re-wetting the surrounding lavender area.

  5. Add fine details and outline work

    Use a fine liner brush or a black paint pen to add any crisp outlines, finger-claw edge lines, and the interior eye details. Clean fine-line work looks best applied last when all base layers are fully cured and the surface is stable.

  6. Seal and display

    Apply one light coat of matte acrylic spray varnish over the painted face once all layers are dry. The sealer protects the design from dew and handling. Display in a covered area or on an indoor table, and light with an external spotlight or a porch light to show the painted design at night.

Written with AI to match this design

Gather your supplies

Check things off as you get ready.

Work on a stable surface, keep your free hand out of the cutting path, and have an adult handle sharp tools.

Three levels of light

  • Leave intact

    The bare unlit rind area outside the painted ghost body provides a natural orange background

  • Peel & shade

    None. This design leaves the shell completely intact.

  • Cut through

    None. Use an external spotlight or porch light aimed at the front of the pumpkin for nighttime display.

Learn the carving basics

Before you start cutting

How do I get the pale purple ghost body color to look right?

Start with mostly white and add just a tiny amount of purple, mixing on a palette before applying to the pumpkin. The ratio is roughly twenty parts white to one part purple. Test the mixed color on a piece of cardboard first since it lightens slightly as it dries. If the first coat dries too white, add a second thin wash of the same mix rather than adding more purple to the remaining paint.

My outline details are smearing into the base coat. What is going wrong?

The most common cause is applying the detail layer before the base coat is completely dry. Acrylics feel dry to the touch after a few minutes but are not fully cured for twenty to thirty minutes. Waiting the full cure time before adding fine lines prevents smearing. You can also seal the base coat with a very light spray of matte varnish, let it dry completely, then paint the details on top.

Will the paint hold up if the pumpkin gets light rain or dew?

Unsealed acrylic is moderately water-resistant but will smear if it gets wet before curing fully. The matte varnish topcoat provides meaningful protection against light moisture. For outdoor display where heavy dew is likely, move the pumpkin under cover at night or bring it inside. The painted surface should last two to three weeks with reasonable care.

Your take belongs here, too.

Changed a detail? Made it simpler? Share a photo of your version and tell the community what worked.

Share your pumpkin

More pumpkins like this

You've reached the end Β· 8 pumpkins
The Patch Report

Fresh pumpkins, in your inbox.

The best new carvings, ideas worth stealing, and how-tos for carving season. Short, seasonal, and gone by November.

A short email during carving season. Unsubscribe anytime. See our privacy policy.