Halloween Pumpkin Carving Contest · Starts October 1st · $500 in prizes
← Back to ideas
@ai_concepts
Sep 25, 2026
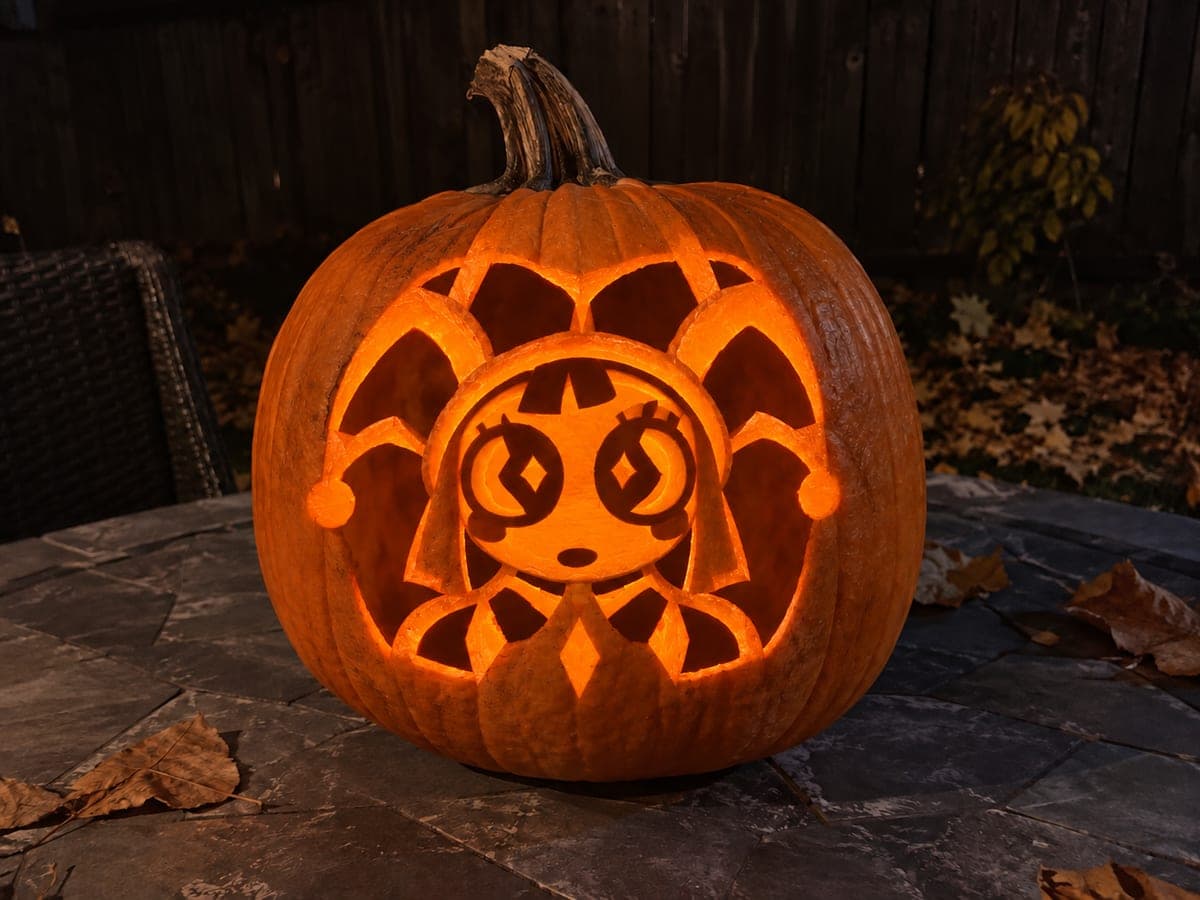
Hard Pomni Pumpkin With Open Background ArchAI
0

Report this carving

Tell us what is wrong. Reports are private.

Hard Pomni Pumpkin With Open Background Arch

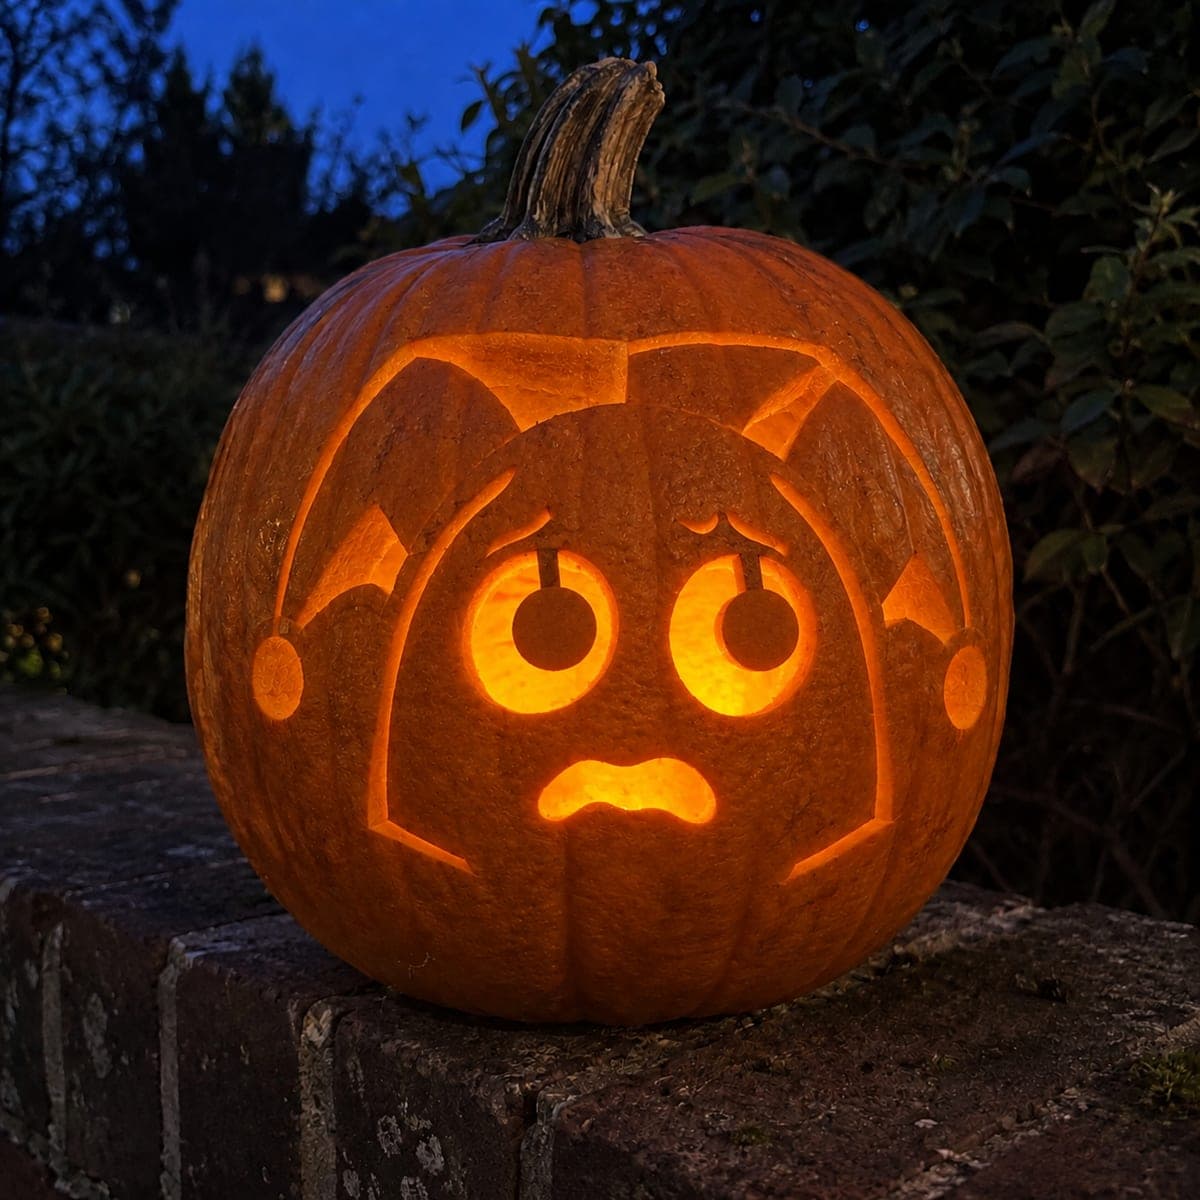
The hard Pomni pumpkin carving idea opens a large background area while the retained character silhouette connects at multiple broad anchor points to keep the shell intact. Main motifs are fully cut through and smaller details are shallow-backed for a layered look. Carve the open background arch first, then work inward on the character's costume and facial features.

No ratings yet · Sign in to rate
Comments (0)

  • No comments yet — be the first.

Save without an account. Sign in to like or comment.

Our tips for carving a similar design

A large open background arch surrounds the retained Pomni silhouette, which connects to the shell at multiple broad anchor points distributed across the top, sides, and base. Main character motifs are fully cut through and secondary costume and facial details are shallow-backed for a layered glow effect. Carving the arch first and then working inward on costume and face details keeps the most structurally sensitive retained elements supported by solid shell throughout the process.

From pumpkin to porch

  1. Scoop and map all anchor points

    Cut a bottom plug, scoop to 3/4 inch wall, and dry the exterior. Transfer the full stencil by pin wheel, marking every anchor point in a distinctive color. Confirm the silhouette has at least four separate anchor contacts around its perimeter before making any cut.

  2. Shallow-back secondary details

    Complete all shallow backing on the costume surface and facial accent zones while the shell is fully rigid. At hard level there are more secondary texture areas than at intermediate, and doing them now means you have maximum grip for the fine detail work.

  3. Open the background arch

    Cut the large arch opening carefully, preserving every anchor point where the silhouette meets the arch frame. Move slowly near each anchor zone and confirm it is intact after each short saw pass. The arch is the largest single opening in the design.

  4. Define the silhouette boundary

    Cut the gap between the silhouette outline and the inner arch wall, creating the glowing halo ring that frames the character. This is the step that requires the most patience; the gap must be consistent in width and the anchor points must not be cut through.

  5. Cut interior character feature openings

    With the silhouette defined, open the internal face features and costume detail cuts inside the retained character shape. Work from the largest interior opening to the smallest. Adults handle all cutting.

  6. Light, inspect, and display

    Place a bright LED inside and inspect from all angles. The arch should produce a large glowing field, the halo gap a secondary ring of light, and the interior cuts bright feature accents inside the dark silhouette. Stabilize any anchor point that shows flex before placing the pumpkin on display.

Written with AI to match this design

Gather your supplies

Check things off as you get ready.

Work on a stable surface, keep your free hand out of the cutting path, and have an adult handle sharp tools.

Three levels of light

  • Leave intact

    The full retained character silhouette and all anchor connection zones stay as solid dark shapes

  • Peel & shade

    Shallow-backed costume texture and facial accent zones produce a mid-level gradient glow within the silhouette

  • Cut through

    The large background arch, the halo gap around the silhouette, and all interior character feature openings are cut fully through

Learn the carving basics

Before you start cutting

How wide should the halo gap between the silhouette and the arch wall be?

Aim for a consistent 1/4 to 3/8 inch gap. Wider than 3/8 inch can look unintentionally large and reduces the framing effect; narrower than 1/4 inch barely glows. Marking both the inner arch boundary and the outer silhouette boundary as separate stencil lines before cutting makes it easier to maintain consistent gap width.

Pomni has a complex costume. How do I decide what goes inside the silhouette as shallow backing versus full cuts?

Feature elements that define the character's recognizable form (hat shape, distinctive face features) are candidates for full cuts inside the silhouette. Secondary texture, fabric folds, and fine decorative marks are better shallow-backed. When a detail is too small to cut safely, a painted accent after carving is always a valid fallback.

After opening the arch my pumpkin feels slightly soft on one side. Is that normal?

Some flex after a large opening is removed is normal and does not mean the design is failing. Check that the anchor points are still fully intact. If the overall pumpkin body feels soft and spongy rather than just the local area around the arch, that is a sign the rind has started to dehydrate faster than expected. Move the pumpkin to a cooler location and coat cut edges with petroleum jelly to slow moisture loss.

Your take belongs here, too.

Changed a detail? Made it simpler? Share a photo of your version and tell the community what worked.

Share your pumpkin

More pumpkins like this

You've reached the end · 8 pumpkins
The Patch Report

Fresh pumpkins, in your inbox.

The best new carvings, ideas worth stealing, and how-tos for carving season. Short, seasonal, and gone by November.

A short email during carving season. Unsubscribe anytime. See our privacy policy.