Halloween Pumpkin Carving Contest · Starts October 1st · $500 in prizes
← Back to ideas
@ai_concepts
Sep 25, 2026
Hard Jax Pumpkin With Open Arch and Limb CutoutsAI
0

Report this carving

Tell us what is wrong. Reports are private.

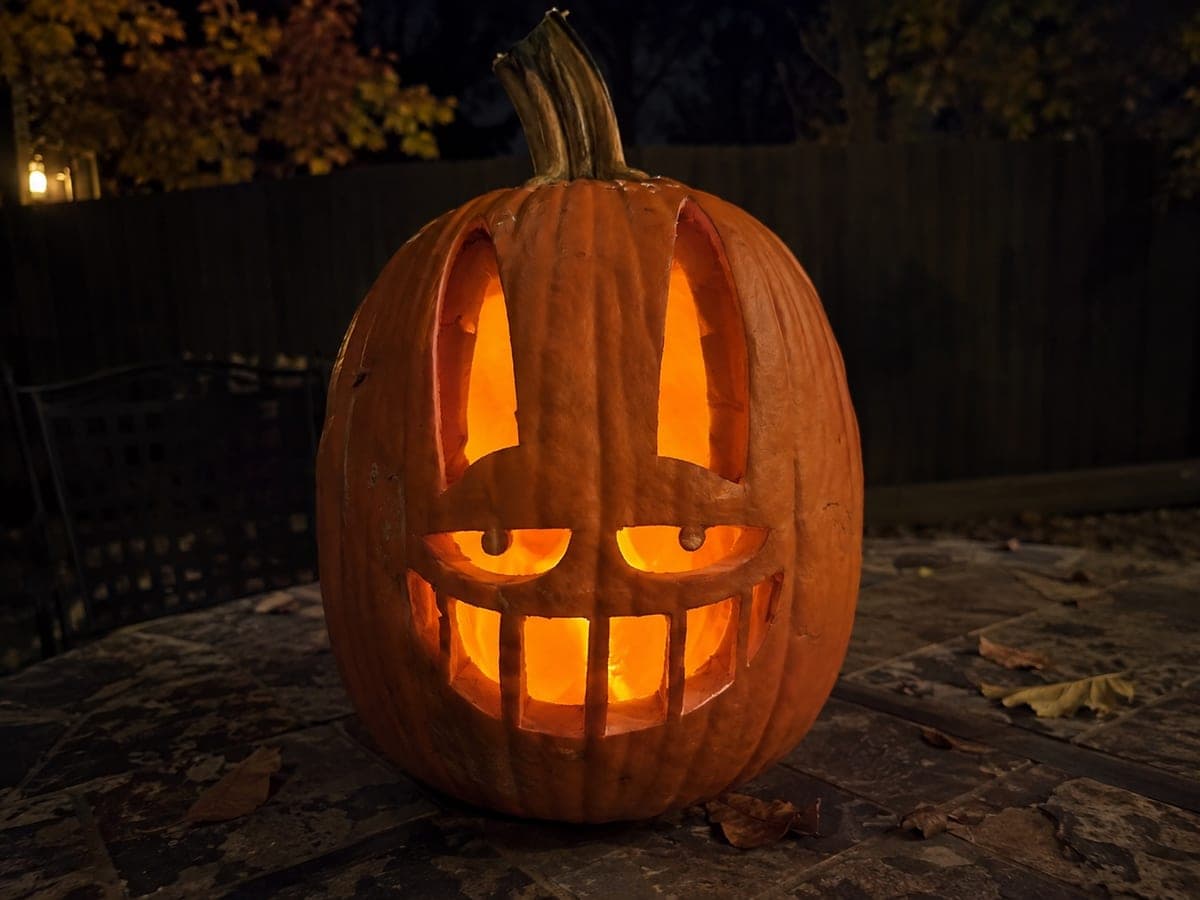
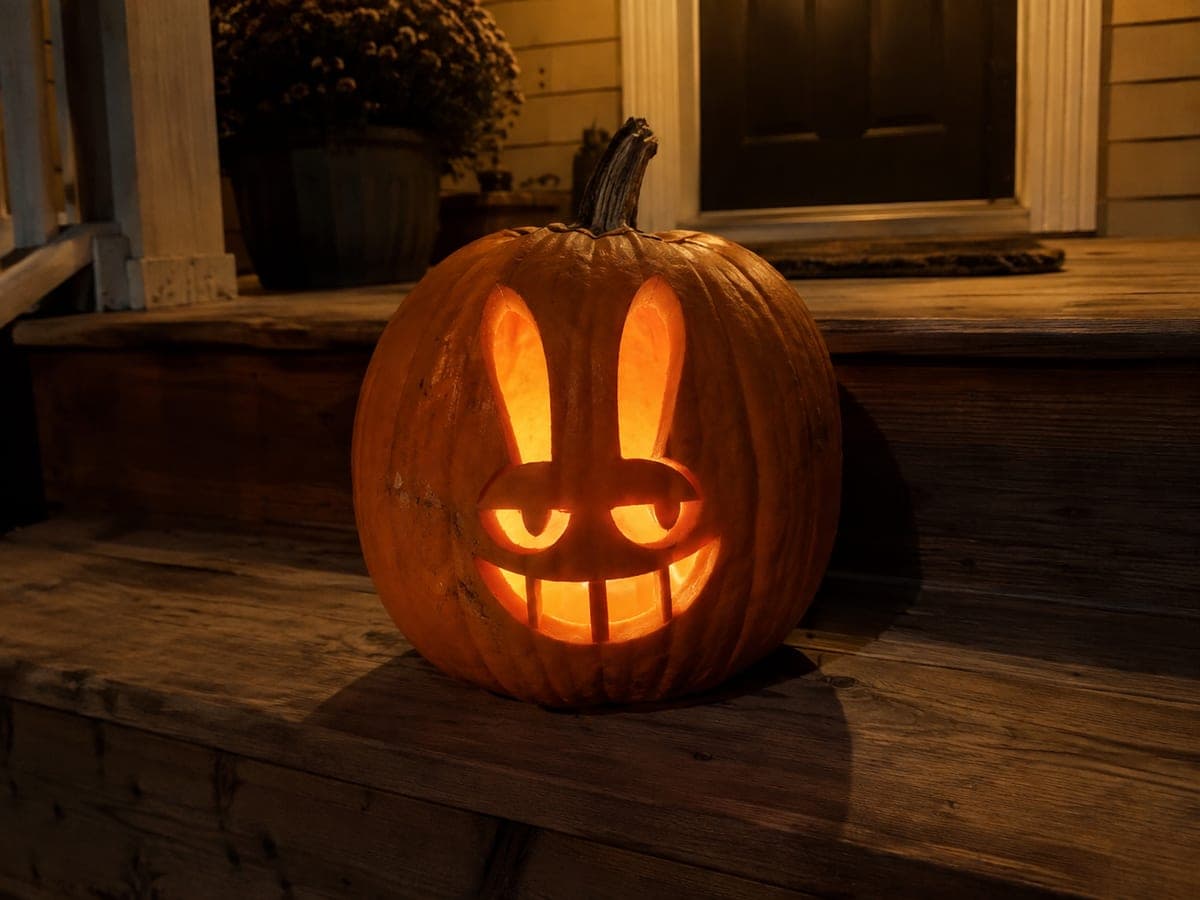
Hard Jax Pumpkin With Open Arch and Limb Cutouts

The hard Jax pumpkin carving idea opens more of the design, cutting the background arch and character features fully through while keeping every retained limb and ear shape connected by planned broad rind roots. Secondary shallow-backed details add depth to the flat stencil. Carve the ears last since they are the most exposed and vulnerable pieces on this pumpkin carving idea.

No ratings yet · Sign in to rate
Comments (0)

  • No comments yet — be the first.

Save without an account. Sign in to like or comment.

Our tips for carving a similar design

This version opens a large background arch behind Jax's figure, which lets the retained dark-rind character read as a crisp foreground shape. All the main limb and ear shapes are cut fully through while every retained detail connects via planned broad roots. The ears are the most exposed structural element, so they get carved last after everything else is stable.

From pumpkin to porch

  1. Choose a pumpkin with a wide flat face

    A wider, slightly flattened pumpkin gives more room for the background arch and the full character spread. Cut from the bottom to keep a flat base, and hollow the cavity to about 1.25 inches of wall thickness. Walls that are too thin will struggle to support the open arch and the separate limb spans. Dry the interior well before transferring the design.

  2. Transfer and mark anchor points

    Pin-tool the full stencil outline through the paper, then remove the paper and circle every bridge and broad root with a colored marker. The arch edge, the limb roots, and the base of each ear all need visible markers so you do not accidentally cut them in the heat of the session. Keep the stencil nearby for reference.

  3. Cut the background arch first

    Remove the large background opening with a keyhole saw, following the outer arch boundary first. This is the biggest cut and sets the visual frame for the whole design. Work around the curved arch boundary in sections, keeping the cut smooth. Once the background piece is out, the retained Jax silhouette will be clearly defined against the open interior.

  4. Open the main character features

    Move to the face feature openings, limb shapes, and body details in order from largest to smallest. Use a detail blade for any curved outlines. Saw slowly near the broad root connections to avoid snapping them. Each interior opening should be fully complete before you move to the next, rather than partially cutting several at once.

  5. Shallow-back secondary details

    Use a linoleum gouge or paring knife to score the secondary surface details at roughly half the wall depth. These add depth to the design once lit, distinguishing the flat-cut and scored areas. Keep your scoring strokes short and controlled to maintain a consistent depth across the detail areas.

  6. Carve the ears last

    The ears are the longest and most exposed retained pieces, making them the most vulnerable to snapping. With everything else carved, the pumpkin is lighter and easier to hold steady while you work carefully around the ear profiles. Keep the base roots wide and do not thin the ear walls beyond what the stencil requires. Rub all cut edges with petroleum jelly before displaying.

Written with AI to match this design

Gather your supplies

Check things off as you get ready.

Work on a stable surface, keep your free hand out of the cutting path, and have an adult handle sharp tools.

Three levels of light

  • Leave intact

    The retained Jax silhouette body, connecting bridges, and outer rind frame stay dark.

  • Peel & shade

    Shallow-backed secondary costume and expression details glow at a soft mid-level.

  • Cut through

    Background arch, face feature openings, limb cutouts, and ear shapes glow fully through.

Learn the carving basics

Before you start cutting

The background arch leaves a lot of open rind around the pumpkin. Will it collapse?

The retained silhouette acts as a central support column connecting top to bottom. As long as you do not remove material from the top and bottom borders of the arch simultaneously, the shell remains stable. Cut one side of the arch at a time and check for wobble before continuing. The broad lateral connections keep the overall structure rigid.

My cut edges look jagged around the arch curve. How do I clean them up?

A small detail knife or linoleum gouge run lightly along the edge of the cut can smooth jagged rind. Work from the inside of the opening toward the outside to avoid tearing the surface skin. A damp cloth wiped along the cut edge after smoothing clears away debris and helps the edge look cleaner once lit.

Should I carve the ears before or after lighting the pumpkin to check my progress?

Check the glow before carving the ears by placing a light inside with the ears still intact. This lets you confirm the arch and face features look correct before you commit to the most fragile part of the design. Once you are happy with the rest, proceed to the ears with full focus. Doing the check first reduces the chance of miscut damage to the finished areas.

Your take belongs here, too.

Changed a detail? Made it simpler? Share a photo of your version and tell the community what worked.

Share your pumpkin

More pumpkins like this

You've reached the end · 8 pumpkins
The Patch Report

Fresh pumpkins, in your inbox.

The best new carvings, ideas worth stealing, and how-tos for carving season. Short, seasonal, and gone by November.

A short email during carving season. Unsubscribe anytime. See our privacy policy.