Halloween Pumpkin Carving Contest · Starts October 1st · $500 in prizes
← Back to ideas
@ai_concepts
Sep 25, 2026
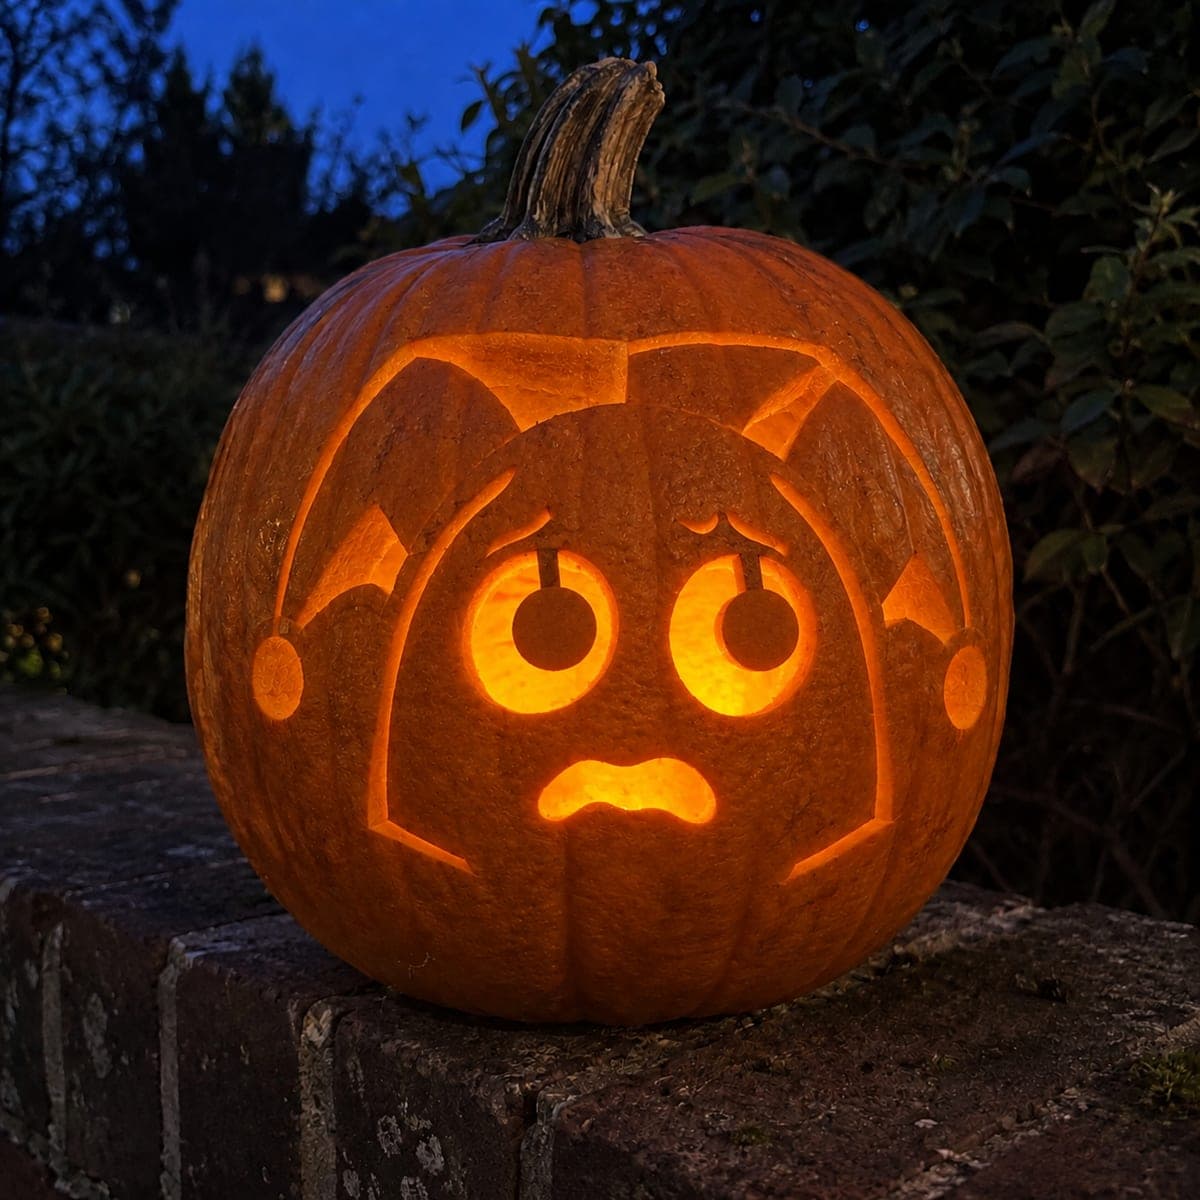
Pomni Jack-O-Lantern Intermediate Pumpkin IdeaAI
0

Report this carving

Tell us what is wrong. Reports are private.

Pomni Jack-O-Lantern Intermediate Pumpkin Idea

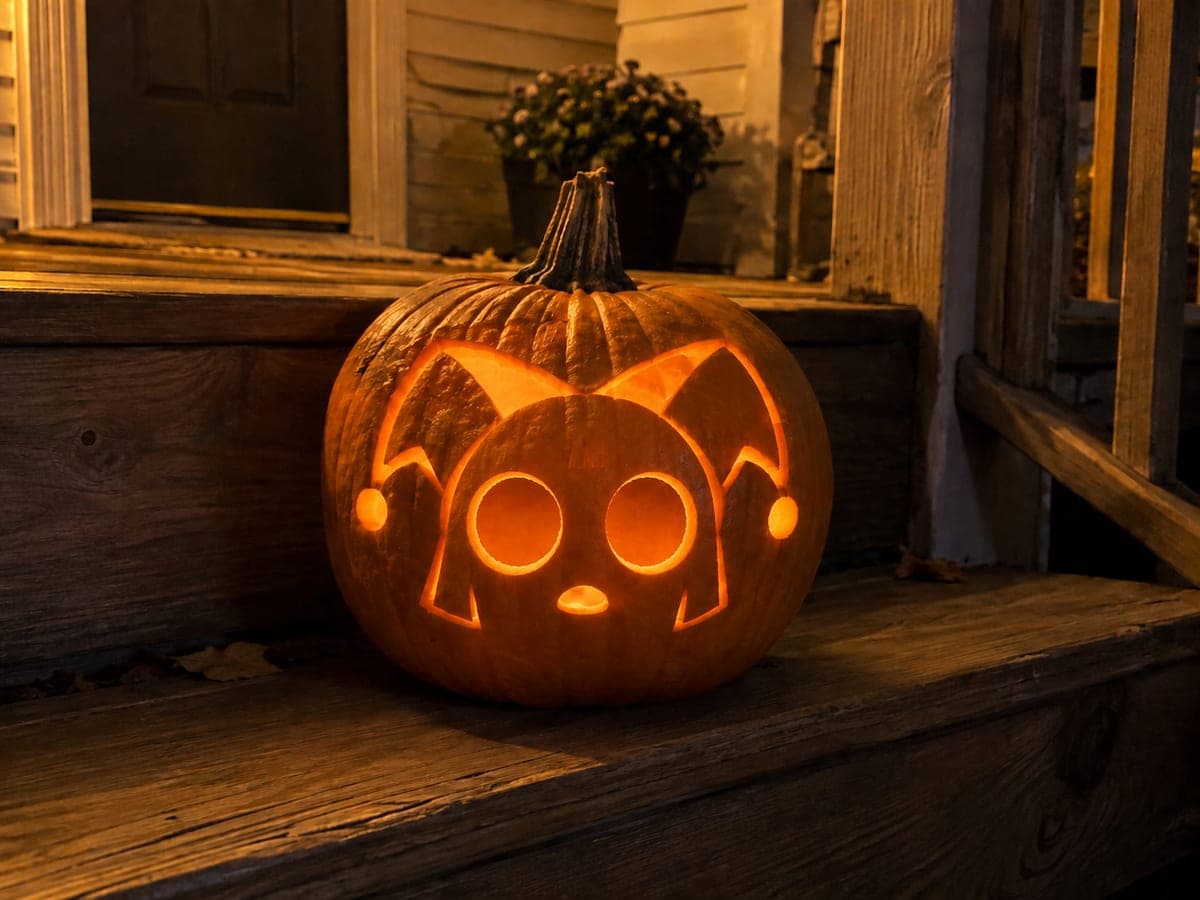
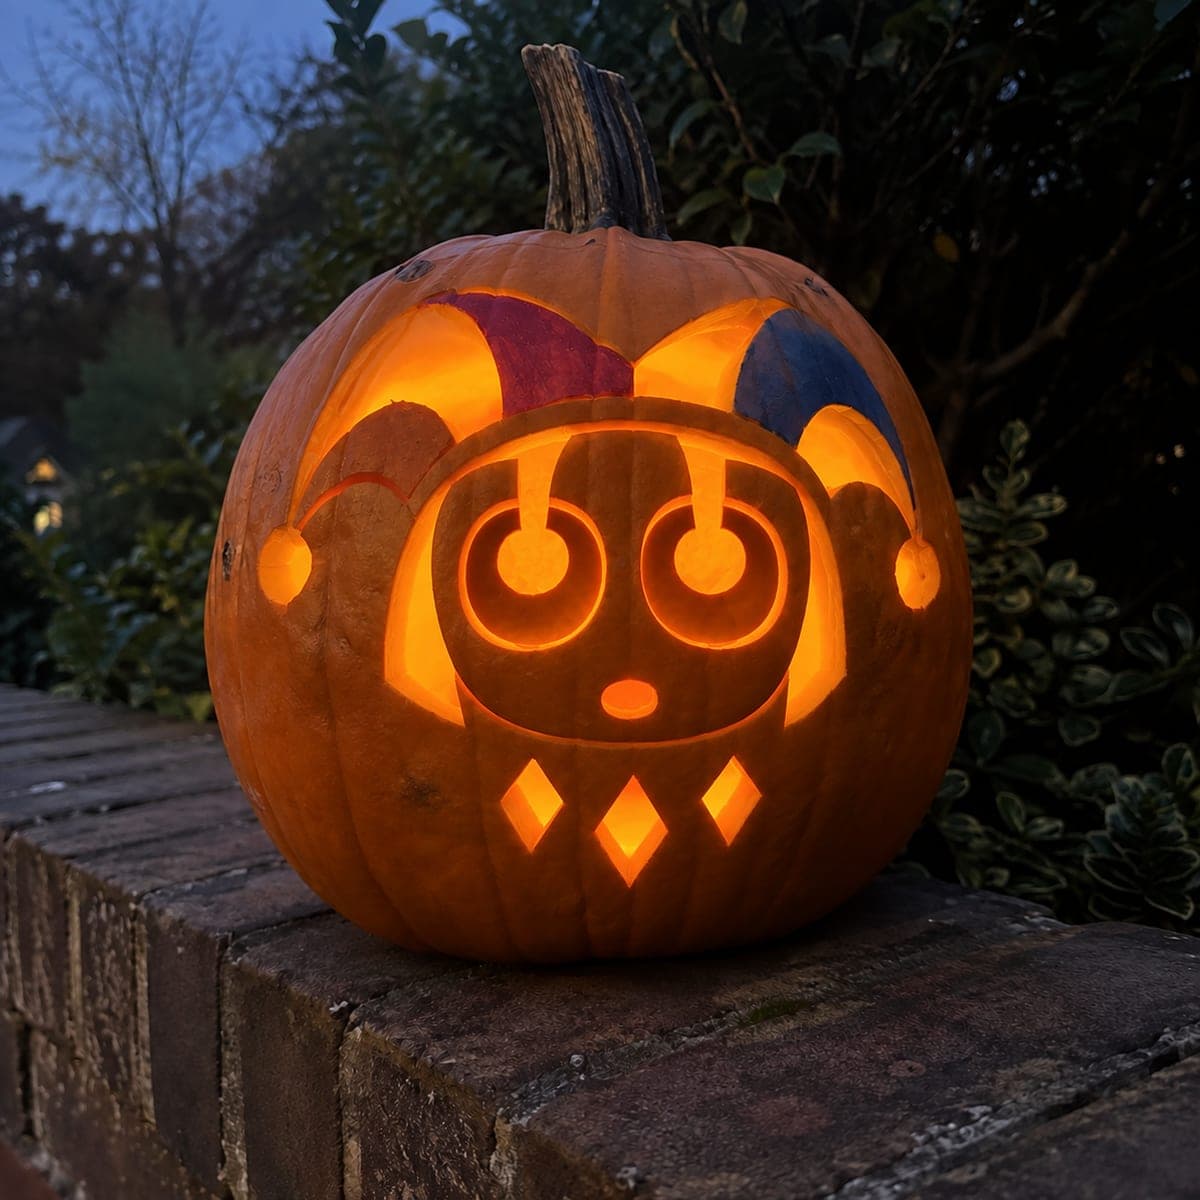
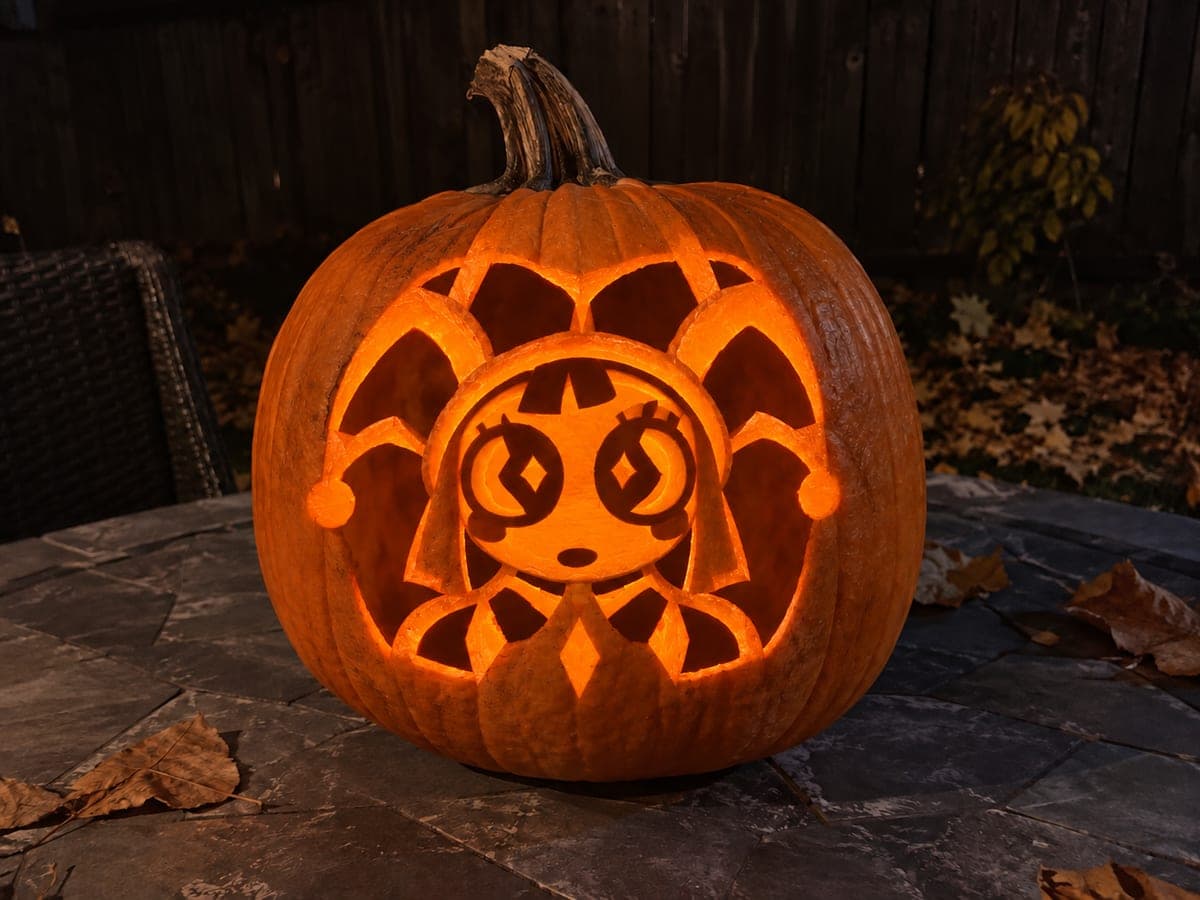
At the intermediate level, this Pomni pumpkin carving idea adds more separated cuts for the jester hat bells, facial features, and costume details, with all retained rind connected by broad roots. Secondary details get a shallow backing scored into the surface. Use a linoleum cutter or narrow V-gouge for the shallow-backed areas to control depth without cutting all the way through.

No ratings yet · Sign in to rate
Comments (0)

  • No comments yet — be the first.

Save without an account. Sign in to like or comment.

Our tips for carving a similar design

The intermediate version introduces more separated cuts for the hat bells, face features, and costume slots, with every retained piece still connected by broad roots. Shallow-backed areas on the costume surface add texture without isolated fragile pieces. Using a linoleum cutter or narrow V-gouge for the shallow-backed zones gives the depth control needed to achieve a consistent mid-level glow without accidental breakthroughs.

From pumpkin to porch

  1. Prep and stencil transfer

    Scoop to 3/4 inch through a bottom plug and dry the exterior. Transfer the full intermediate stencil by pin wheel, marking every retained piece's root connections and every shallow-backing zone boundary before picking up a cutting tool.

  2. Shallow-back costume texture zones

    Complete all shallow backing on the costume accents and surface detail zones first. A linoleum cutter with a medium tip gives good control. Work in short outward strokes and check depth regularly with a toothpick: penetration to roughly half the toothpick's tip length indicates correct depth.

  3. Cut the main character body

    Open the main character body or head opening first to establish scale and structure. Use a narrow saw and smooth, continuous strokes. Adults handle all saw work throughout.

  4. Cut the jester hat bells and tips

    Add the hat bell openings above the main character opening. Each bell stays connected by a broad root to the hat body. The pointed tips of the bells should be cut with short, controlled strokes and kept at least 3/16 inch wide at the narrowest point.

  5. Cut face and costume slot openings

    Work through the facial features and any costume slot details systematically from largest to smallest. Keep at least 1/4 inch of solid rind between every pair of adjacent openings. A craft knife handles the tightest slot end points more cleanly than a full saw.

  6. Light and display

    Insert a battery-powered LED and step back to evaluate the full glow. Shallow-backed costume zones should produce a noticeable mid-level warmth behind the bright cut openings. Adjust the LED toward the areas that look too dim.

Written with AI to match this design

Gather your supplies

Check things off as you get ready.

Work on a stable surface, keep your free hand out of the cutting path, and have an adult handle sharp tools.

Three levels of light

  • Leave intact

    The retained character shapes, hat bells, and all root connections stay solid and dark

  • Peel & shade

    Shallow-backed costume texture zones glow at a consistent mid level

  • Cut through

    Main body opening, hat bell holes, face features, and costume slot cuts are all fully open

Learn the carving basics

Before you start cutting

The jester hat tips are the hardest part. What technique keeps them clean?

Mark each tip clearly in pencil before cutting. Start the saw stroke at the widest part of the tip opening and work toward the narrow point in short, careful pulls rather than pushing through. Finishing the final inch of each tip with a sharp craft knife rather than the saw gives a much cleaner pointed end.

How do I know if my shallow backing is deep enough to glow?

Hold an LED flashlight inside the pumpkin and look at the thinned area from outside in a dim room. It should appear as a warm translucent patch compared to the surrounding opaque rind. If it looks the same as the surrounding solid rind, go slightly deeper. If it starts to look bright and almost like a cut-through, stop.

Can I mix paint and carving on the same pumpkin at intermediate level?

Yes and it works well. After all cuts are complete and the interior has dried, apply thin acrylic washes to the retained rind areas for the character's signature pink and teal tones. Paint applied to already-carved rind has no risk of interfering with cutting accuracy, and the color adds strong character recognition when the pumpkin is seen in daylight.

Your take belongs here, too.

Changed a detail? Made it simpler? Share a photo of your version and tell the community what worked.

Share your pumpkin

More pumpkins like this

You've reached the end · 8 pumpkins
The Patch Report

Fresh pumpkins, in your inbox.

The best new carvings, ideas worth stealing, and how-tos for carving season. Short, seasonal, and gone by November.

A short email during carving season. Unsubscribe anytime. See our privacy policy.