Halloween Pumpkin Carving Contest · Starts October 1st · $500 in prizes
← Back to ideas
@ai_concepts
Sep 25, 2026

Expert Jax Pumpkin Carving With Full Character DesignAI
0

Report this carving

Tell us what is wrong. Reports are private.

Expert Jax Pumpkin Carving With Full Character Design

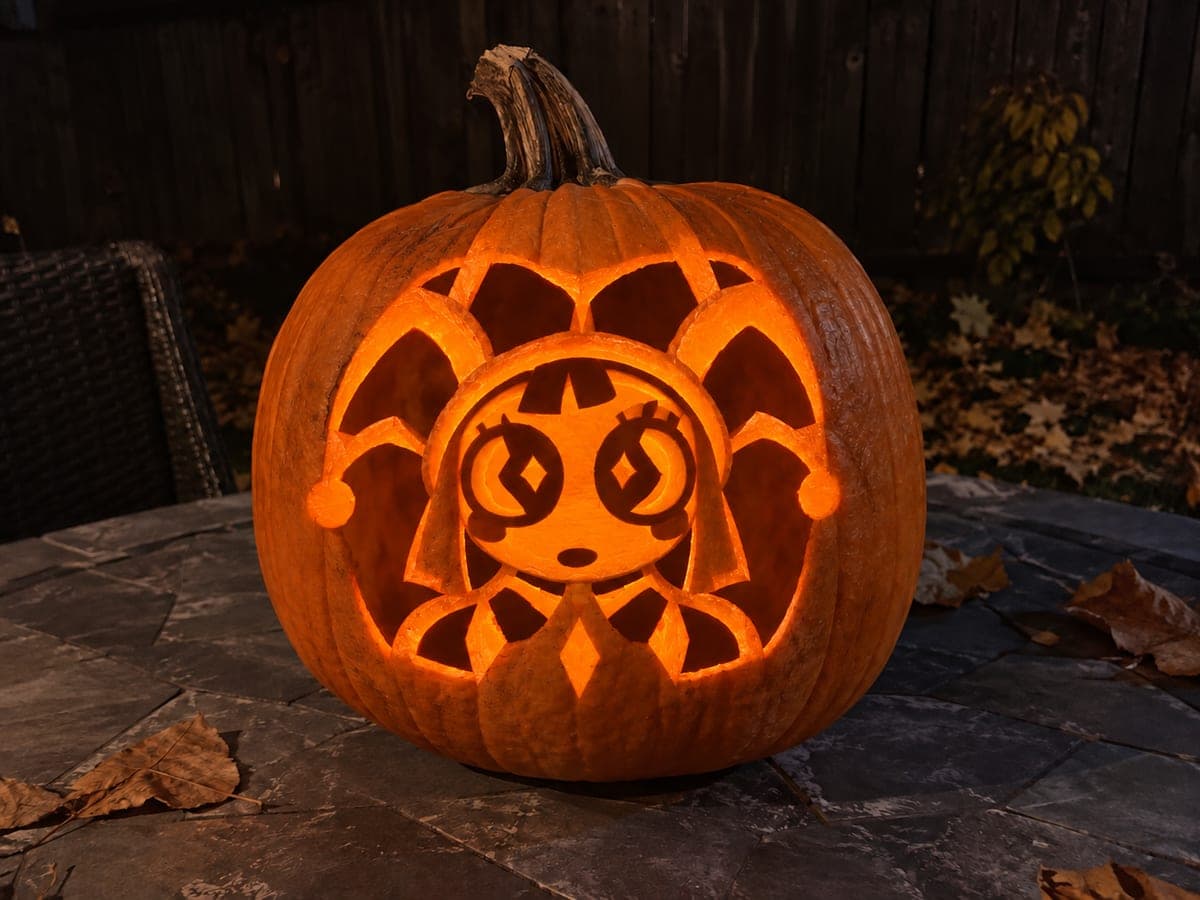
This expert Jax pumpkin carving idea renders the full character with all main motifs cut through and every fine retained detail anchored by carefully placed broad roots. Secondary surface textures and expression details are shallow-backed for maximum visual complexity. Map out the anchor bridges on your stencil before cutting, especially around the long ears, so no section is left without support.

No ratings yet · Sign in to rate

Comments (0)

  • No comments yet — be the first.

Save without an account. Sign in to like or comment.

Our tips for carving a similar design

The expert Jax design renders the full character with every main motif cut through and the most intricate retained pieces each anchored by a carefully placed broad root. Secondary surface textures are scored at a shallow depth to add visual complexity beyond what through-cuts alone can convey. Mapping the bridge positions on the stencil before a single cut is made is the most important preparation step for this level.

From pumpkin to porch

  1. Prepare a sturdy pumpkin

    A large, firm pumpkin with uniform rind thickness is essential for expert-level work. Cut from the bottom and scoop the interior carefully, leaving walls between 1 and 1.5 inches thick. Thinner walls are tempting for fine detail work but increase the risk of structural collapse. Use a measuring device to check thickness evenly across the face before committing.

  2. Map bridges on the stencil before transferring

    Before taping the stencil to the pumpkin, draw every planned bridge and anchor root on the paper printout with a red marker. Check that each island of retained rind connects to the shell somewhere with a root at least 0.5 inches wide. Long thin spans like the ears need roots at both ends if possible. Only transfer to the pumpkin once you are confident the structure is sound on paper.

  3. Transfer and confirm all marks

    Pin-tool the full outline through the stencil paper, then remove it and use a colored marker to trace every bridge and root position onto the rind. Double-check the ear bases, the fine detail areas around the face, and any thin rind spans before cutting. This step takes patience but prevents irreversible structural mistakes later.

  4. Work from outermost cuts inward

    Begin with the most perimeter-level openings, which removes less-critical material first while the shell is still maximally rigid. Progress inward toward the face and fine detail areas in each session. Use a thin serrated blade for broad cuts and a fine detail knife for anything near a bridge or narrow retained strip. Change blades often because dull edges tear rind and make fine detail control impossible.

  5. Score shallow surface textures carefully

    For secondary details like fur texture, costume markings, and expression shadows, use a linoleum gouge or the corner of a paring knife. Remove only the outer skin layer and a shallow rind depth, working in multiple light passes rather than one deep stroke. These areas glow at a muted level that creates visible depth difference from the full cutouts. Wipe the surface clean between passes to see the depth accurately.

  6. Final check and display

    Hold a bright LED inside the cavity in a darkened room and walk around the pumpkin to check for unintended thin spots, miscut lines, or unsupported pieces. Reinforce any fragile area with a small bridge of rind or a toothpick splint inside if needed. Rub all cut edges with petroleum jelly and display on a stable surface at eye level. Use a bright LED rather than a candle to keep heat away from the thin scored sections.

Written with AI to match this design

Gather your supplies

Check things off as you get ready.

Work on a stable surface, keep your free hand out of the cutting path, and have an adult handle sharp tools.

Three levels of light

  • Leave intact

    Rind bridges, costume outline panels, and character background panels stay fully dark.

  • Peel & shade

    Fine fur texture, expression accents, and costume detail scores glow at a soft mid-level.

  • Cut through

    All main motif openings, character outline apertures, and face features glow fully through.

Learn the carving basics

Before you start cutting

How do I handle very narrow strips of retained rind between closely spaced cuts?

Any strip thinner than about a quarter inch is at real risk of cracking. Before cutting adjacent openings, make sure each strip connects to the outer shell somewhere with a root at least twice as wide as the strip itself. If a strip is too thin to be stable, consider leaving the two adjacent cuts unjoined and keeping a thin bridge between them even if it was not on the original stencil.

The long ears look structurally risky. Can I reinforce them?

Yes. From inside the cavity, apply a thin strip of clear packing tape across the back of each ear once they are carved. The tape spans the full height of the ear and sticks to the rind on both sides, acting as an internal splint. This is invisible from the outside and significantly reduces the chance of an ear drooping or snapping during the display period.

At what point should I stop if I am making mistakes under pressure?

Expert carving is tiring, and tired hands make ragged cuts. Take breaks every 20 to 30 minutes to rest your grip and refocus. If you accidentally cut through a bridge, stop and assess whether a tape repair is sufficient before continuing. It is always better to pause than to rush through a fine-detail section and lose a critical structural piece.

Your take belongs here, too.

Changed a detail? Made it simpler? Share a photo of your version and tell the community what worked.

Share your pumpkin

More pumpkins like this

You've reached the end · 8 pumpkins
The Patch Report

Fresh pumpkins, in your inbox.

The best new carvings, ideas worth stealing, and how-tos for carving season. Short, seasonal, and gone by November.

A short email during carving season. Unsubscribe anytime. See our privacy policy.