Halloween Pumpkin Carving Contest · Starts October 1st · $500 in prizes
← Back to ideas
@ai_concepts
Sep 25, 2026
Hard Terrifier Art the Clown Jack-O-LanternAI
0

Report this carving

Tell us what is wrong. Reports are private.

Hard Terrifier Art the Clown Jack-O-Lantern

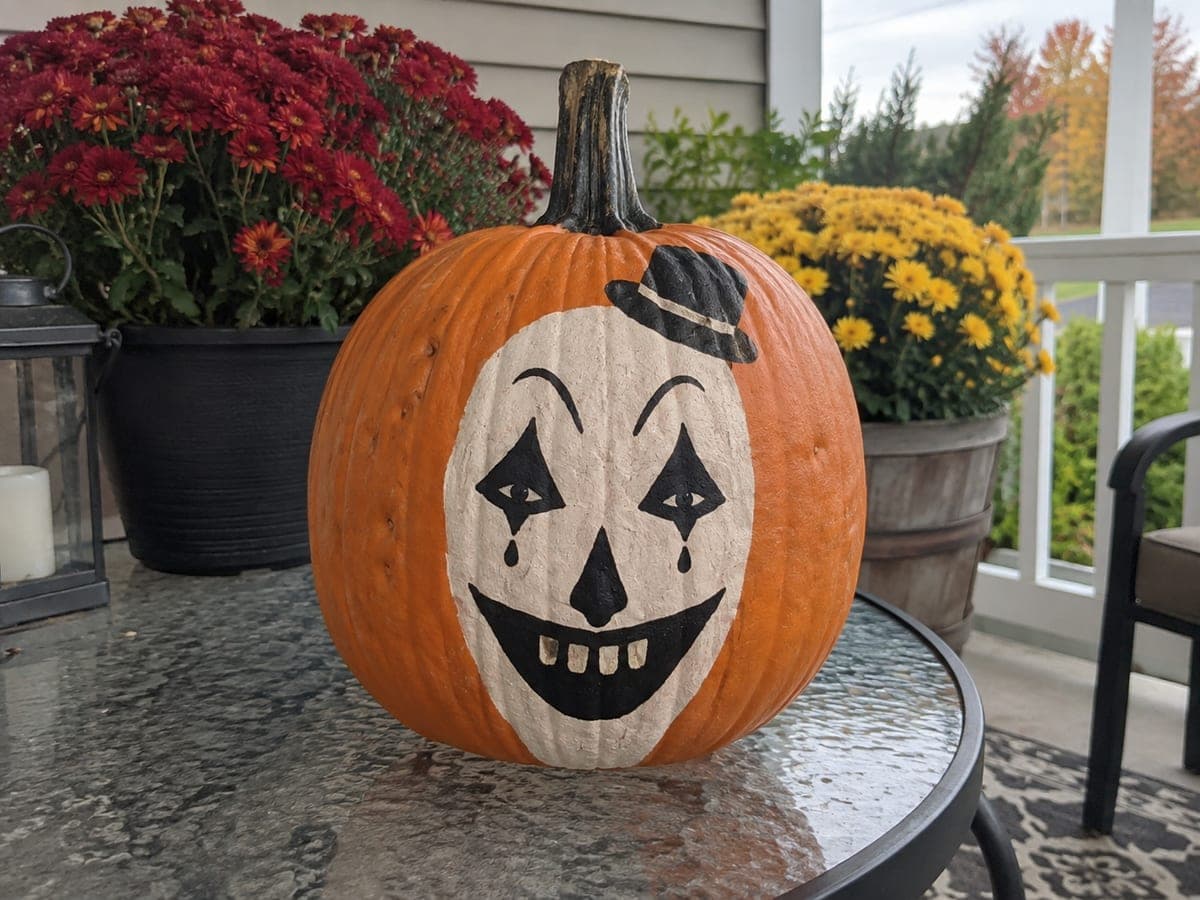
At hard difficulty this terrifier pumpkin carving idea adds more complex brow furrows, layered teardrop scoring, and fuller hat detail alongside the angular eye holes, block-toothed grin, and hat silhouette cutout that define the design. The key structural element is the broad connected rind spanning the cheeks and nose, which absorbs the stress of all the nearby cuts. Carve the hat cutout first, then the eye and grin apertures, and finish with the shallow engraving work on the brows and teardrops last. Photograph the finished piece at night with one direct backlight for the sharpest contrast.

No ratings yet · Sign in to rate

Comments (0)

  • No comments yet — be the first.

Save without an account. Sign in to like or comment.

Our tips for carving a similar design

At hard difficulty, this Terrifier design layers more complex brow furrows, multi-pass teardrop scoring, and fuller hat brim detail onto the angular eye holes, block-toothed grin, and hat silhouette that define the character. The broad connected cheek and nose rind absorbs the stress of all the nearby cuts and is the most important structural element to protect throughout. Cutting the hat cutout first, then the eye and grin apertures, and finishing with the shallow engraving last gives each step the most structural support.

From pumpkin to porch

  1. Hollow to consistent depth

    Cut a back opening and hollow to a 1 to 1.25 inch wall across the entire front face. The brow zone above the eyes receives multiple engraving passes and needs more wall depth than thinner sections. Check with a skewer at six or more points on the front face before proceeding.

  2. Transfer the full hard design

    Print and transfer the hard-level Art the Clown template with a stylus. Mark the hat brim detail lines, layered teardrop outlines, and brow furrow channels in separate perforation patterns from the hollow areas. At this difficulty the teardrops have inner detail lines that add a second engraving pass, so mark both the outer teardrop boundary and the inner vein line for each.

  3. Cut the hat silhouette first

    Remove the hat shape as a fully open cutout, working carefully along the brim line. At hard level the hat may include subtle brim-curve detail that requires precise cutting around a curved edge. Cut the brim from each end toward the center to avoid long unsupported saw runs.

  4. Score the brow furrows and teardrop layers

    Using a V-gouge, carve the brow furrow channels as deep, clean arced lines above the eye positions. For the teardrops, carve the outer boundary channel first, then add the inner vein line at a slightly shallower depth. Varying the depth between inner and outer teardrops creates a multi-level glow effect.

  5. Carve eyes and grin

    Cut the angular eye holes with a thin detail saw. Then cut the grin outer lip line and the gaps between block teeth from the outer corners inward. At hard level the teeth may be slightly narrower than in the easy and intermediate versions, so confirm each root is secure before continuing to the next gap.

  6. Light, adjust, and photograph

    Insert a bright single LED and evaluate the design in a dark room, looking specifically at whether the layered teardrop depths create distinct inner and outer glow rings. Deepen the outer teardrop channel if the two layers are reading as one flat patch. Photograph at night with a direct backlight for sharpest contrast.

Written with AI to match this design

Gather your supplies

Check things off as you get ready.

Work on a stable surface, keep your free hand out of the cutting path, and have an adult handle sharp tools.

Three levels of light

  • Leave intact

    Dark retained cheeks, nose bridge, hat crown, and outer forehead, anchoring the portrait in shadow

  • Peel & shade

    Outer teardrop channels, inner teardrop vein lines at reduced depth, and deep brow furrows, glowing in two distinct intensity levels

  • Cut through

    Hat silhouette, angular eye holes, and the block-toothed grin gaps, blazing with full light

Learn the carving basics

Before you start cutting

How do I create two visible light levels in the teardrop detail?

Carve the outer teardrop boundary channel to roughly two-thirds of the rind's thickness. Then carve the inner vein line to only one-third depth. In backlighting, the outer channel glows noticeably brighter than the inner line because less rind remains. The contrast is subtle but readable from about three feet away.

My hat brim cracked when I removed it. Can I repair it?

If the break is clean, reassemble the brim piece with a thin line of craft glue and hold it with a chip clip for 15 minutes. Once cured, the repaired brim will be visible up close but invisible once the pumpkin is lit and displayed at normal viewing distance. Alternatively, leave the brim open as a slightly wider cutout rather than forcing the repair.

How do I keep the block teeth uniform in width at hard difficulty?

Measure and mark tooth widths with a ruler before cutting any grin material. Consistent teeth look most deliberate, which suits Art the Clown's cold, precise character. Cut the vertical lines between teeth with a thin saw and keep each vertical cut parallel to the others, checking parallelism visually from a step back.

Your take belongs here, too.

Changed a detail? Made it simpler? Share a photo of your version and tell the community what worked.

Share your pumpkin

More pumpkins like this

You've reached the end · 8 pumpkins
The Patch Report

Fresh pumpkins, in your inbox.

The best new carvings, ideas worth stealing, and how-tos for carving season. Short, seasonal, and gone by November.

A short email during carving season. Unsubscribe anytime. See our privacy policy.