@maple_mae
Sep 5, 2026
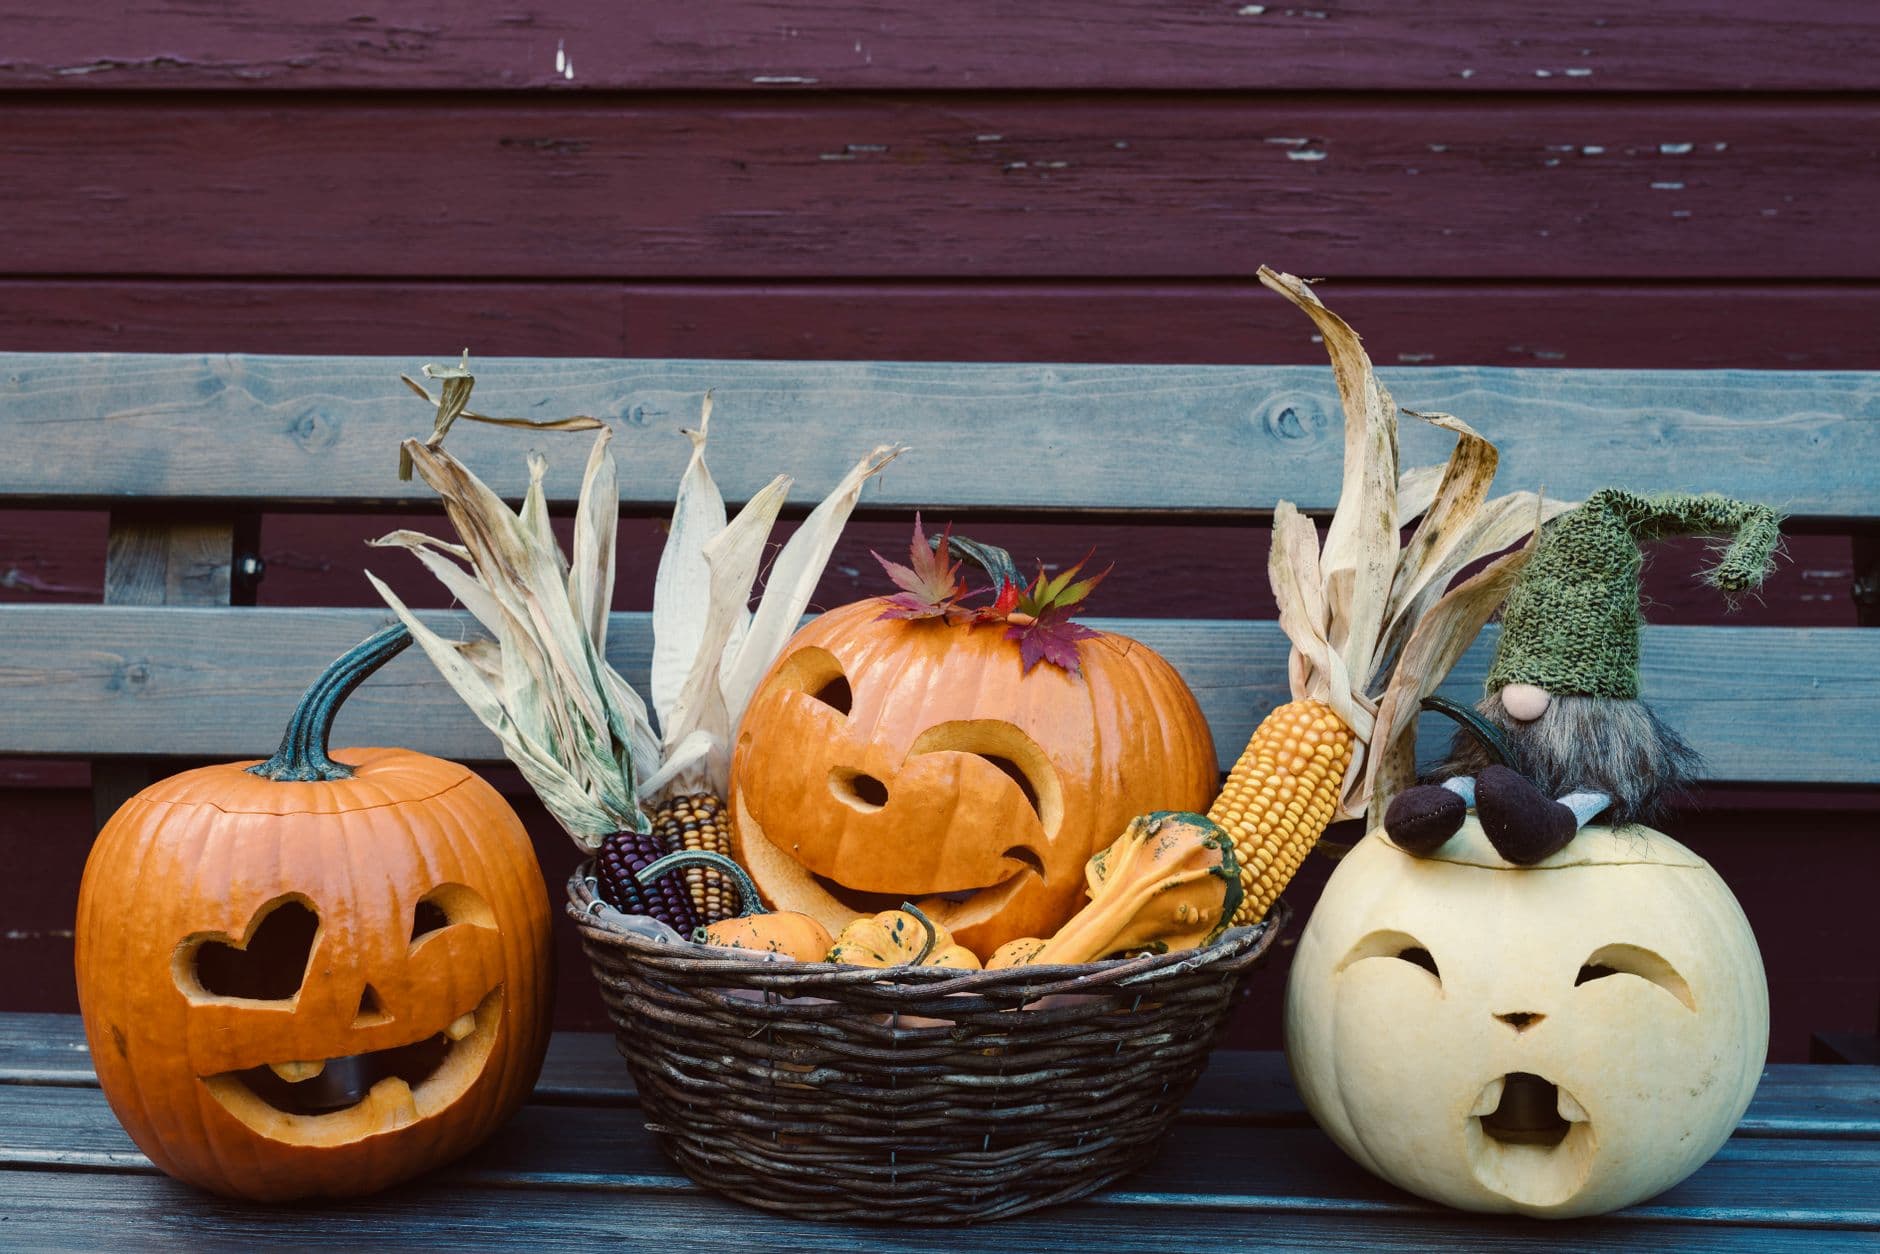
Harvest bench lineup
Heart eyes, a wink, and a gnome-hatted white singer sharing the bench with the corn basket. A whole personality per pumpkin.
No ratings yet · Sign in to rate
Heart eyes, a wink, and a gnome-hatted white singer sharing the bench with the corn basket. A whole personality per pumpkin.
The charm here is variety: one pumpkin wears heart-shaped eyes, another throws a playful wink, and a pale white pumpkin sings with an open mouth and a gnome hat perched on top. The core trick is giving each face a different eye and mouth shape so the group reads as three distinct personalities. Plan the trio as a set, carve them one at a time, then stage them together on a bench with a basket of corn and gourds.
Written by PumpkinCarvingIdeas.com, inspired by @maple_mae's photo above. These are our suggestions, not instructions from the uploader, and this approach hasn't been tested on their exact carve.
Choose two orange pumpkins and one pale white variety for contrast, all with flat-ish bottoms so they sit steady on a bench. Cut a lid on each, angling the knife inward so the lid rests on a ledge instead of falling in. Scoop out the seeds and pulp, then thin the carving-side wall to about one inch so your tools glide through. A thinner wall makes the curved cuts on the eyes and mouths much easier to control.
Tape a stencil to each pumpkin and poke the outlines with a pin or a dull nail to dot the pattern onto the skin. Give the first pumpkin two heart eyes and a wide toothy grin, the second a winking eye beside a curved open eye, and the white one gentle closed eyes with a round singing mouth. Keeping the designs distinct is what makes the lineup feel like a family. Step back and check that all three faces sit at a similar height so they look like they belong together.
Start with the smallest shapes, the eyes, using a fine detail saw or a sharp paring knife. For the heart eyes, cut the two top curves before the point so the shape stays crisp. Work slowly on the winking eye, since a thin curved slit can tear if you rush. Push cut pieces out from the inside with a fingertip rather than prying from the front.
Cut the mouths next, saving the largest opening for last so the shell stays rigid while you work. On the grinning pumpkin, leave small blocks of skin between the teeth as bridges so they stay firmly connected top and bottom. The singing white pumpkin gets a simple rounded mouth, an easy shape that still reads as a cheerful note. Take your time at the corners where two cuts meet, easing the blade rather than forcing it.
Set an LED tealight or a battery puck inside each pumpkin, never a real candle, since these will sit near dry corn husks. Perch a small gnome hat or knit cap on the white pumpkin for that singing-mascot look, and tuck dried corn, mini gourds, and husks into a basket for the center of the bench. A few maple leaves laid on top of the middle pumpkin add a harvest touch. Keep all the dried material clear of the light source.
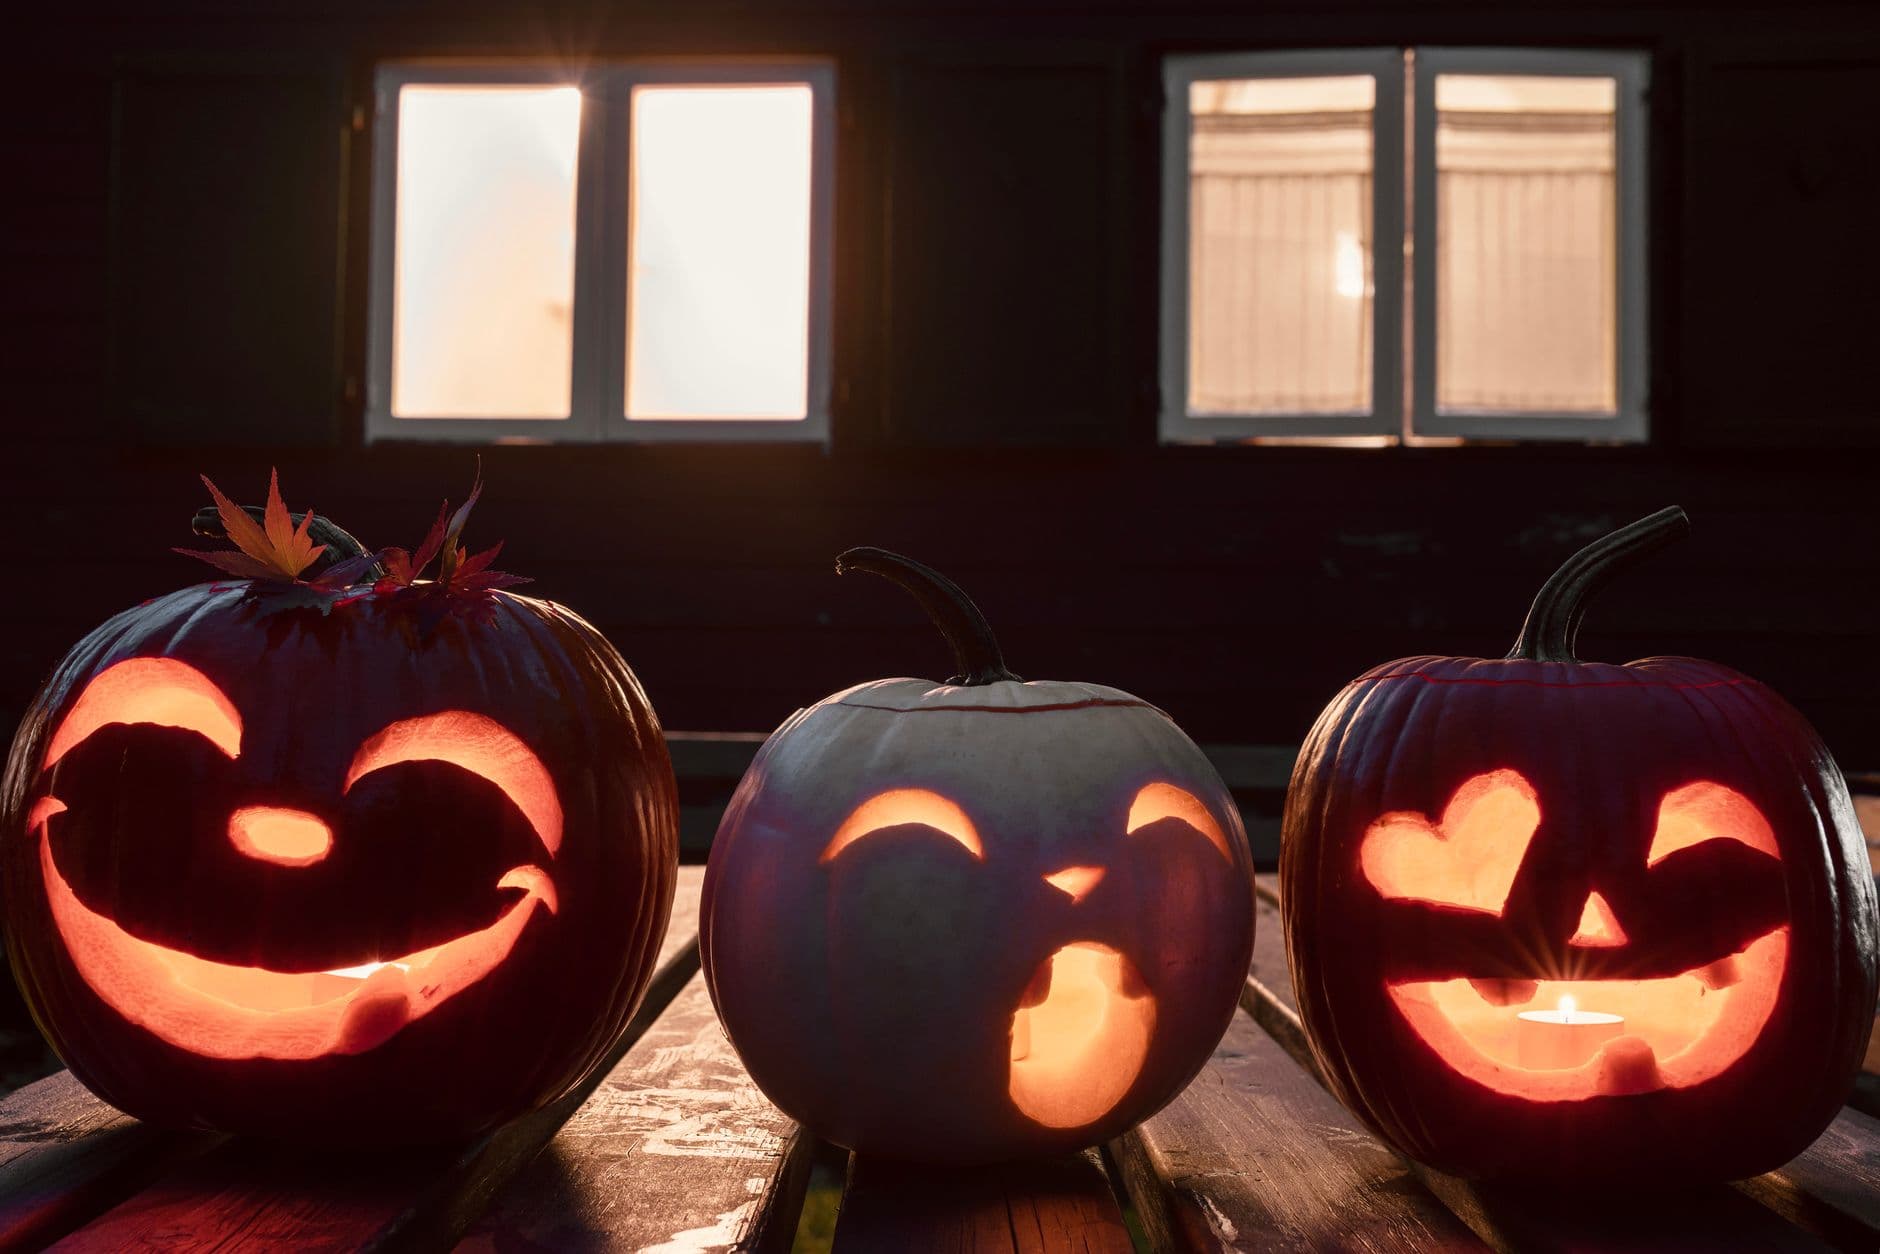
Line the three pumpkins along a weathered bench with the basket nestled between or beside them. Turn the faces slightly toward the camera so each personality shows. Shoot in soft evening light or dusk so the LED glow reads without washing out the daytime scene. Snap a few angles and share your trio with the community.
Check things off as you get ready.
Work on a stable surface, keep your free hand out of the cutting path, and have an adult handle sharp tools.
The full outer skin of each pumpkin and the pale surface of the white one stay untouched and dark.
Optional shallow shading around the eyes or cheeks can be skin-peeled for a soft dim glow, as seen faintly around the winking pumpkin's features.
The heart eyes, winking and curved eyes, grinning teeth, and the singing mouth are cut all the way through for the brightest light.
Leave a small block of uncut skin between each tooth so they stay bridged to both the top and bottom of the mouth. Cut the mouth opening last, after the eyes, so the shell stays firm while you work the fine gaps. If a tooth feels loose, stop prying and ease it free from the inside instead.
Yes, the flesh carves much the same, though some white varieties have a slightly thinner or firmer wall. Thin the carving side to about an inch and test a small cut first. The pale skin gives a lovely ghostly contrast next to the orange pair, so it is worth the small adjustment.
Use only LED tealights or battery pucks, never open flame, since dried husks and knit fabric catch fire easily. Keep the hat resting on top of the lid rather than draped over any opening. Position the basket of corn a few inches from the lit pumpkins for extra peace of mind.
Changed a detail? Made it simpler? Share a photo of your version and tell the community what worked.
The best new carvings, ideas worth stealing, and how-tos for carving season. Short, seasonal, and gone by November.

Comments (0)