Halloween Pumpkin Carving Contest · Starts October 1st · $500 in prizes
← Back to ideas
@ai_concepts
Sep 25, 2026
Heart Eyes Pumpkin Surrounded by Small Heart CutoutsAI
0

Report this carving

Tell us what is wrong. Reports are private.

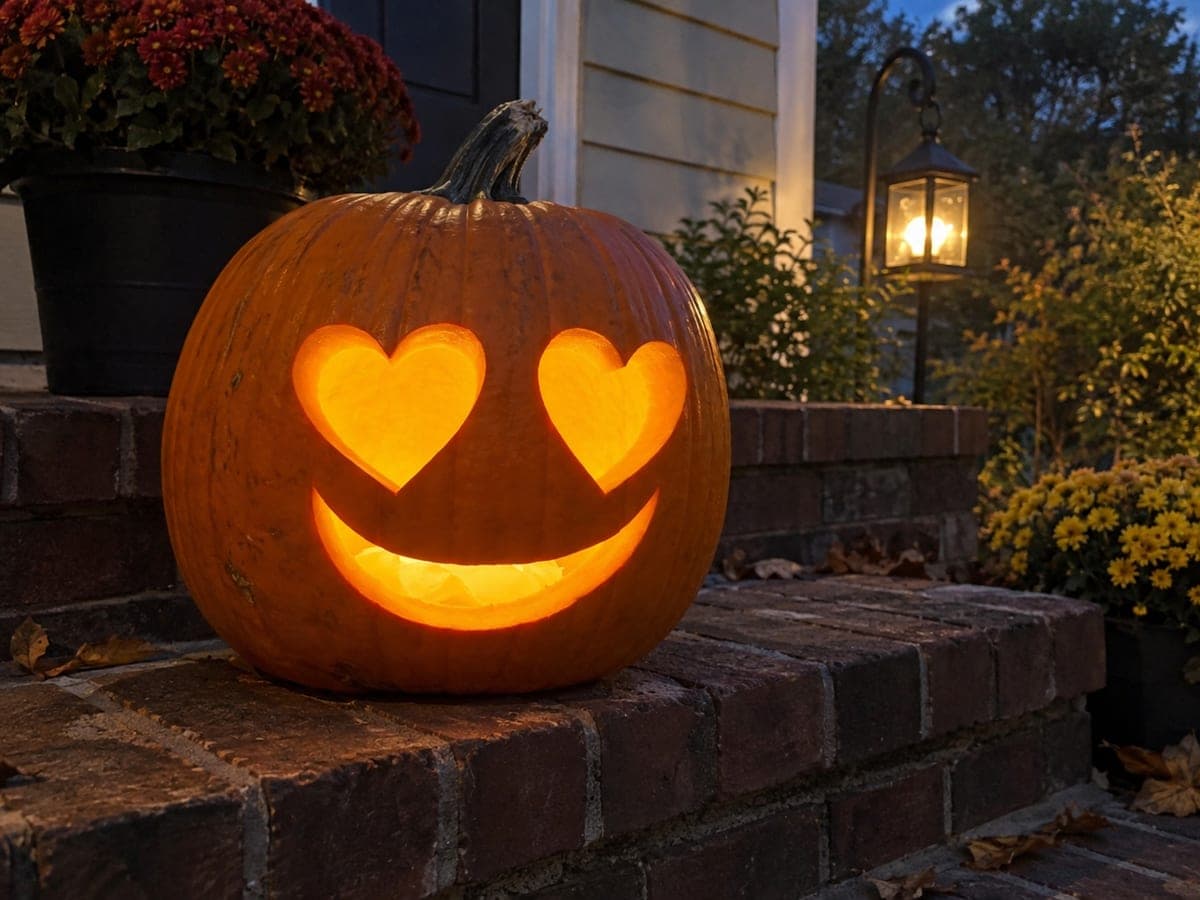
Heart Eyes Pumpkin Surrounded by Small Heart Cutouts

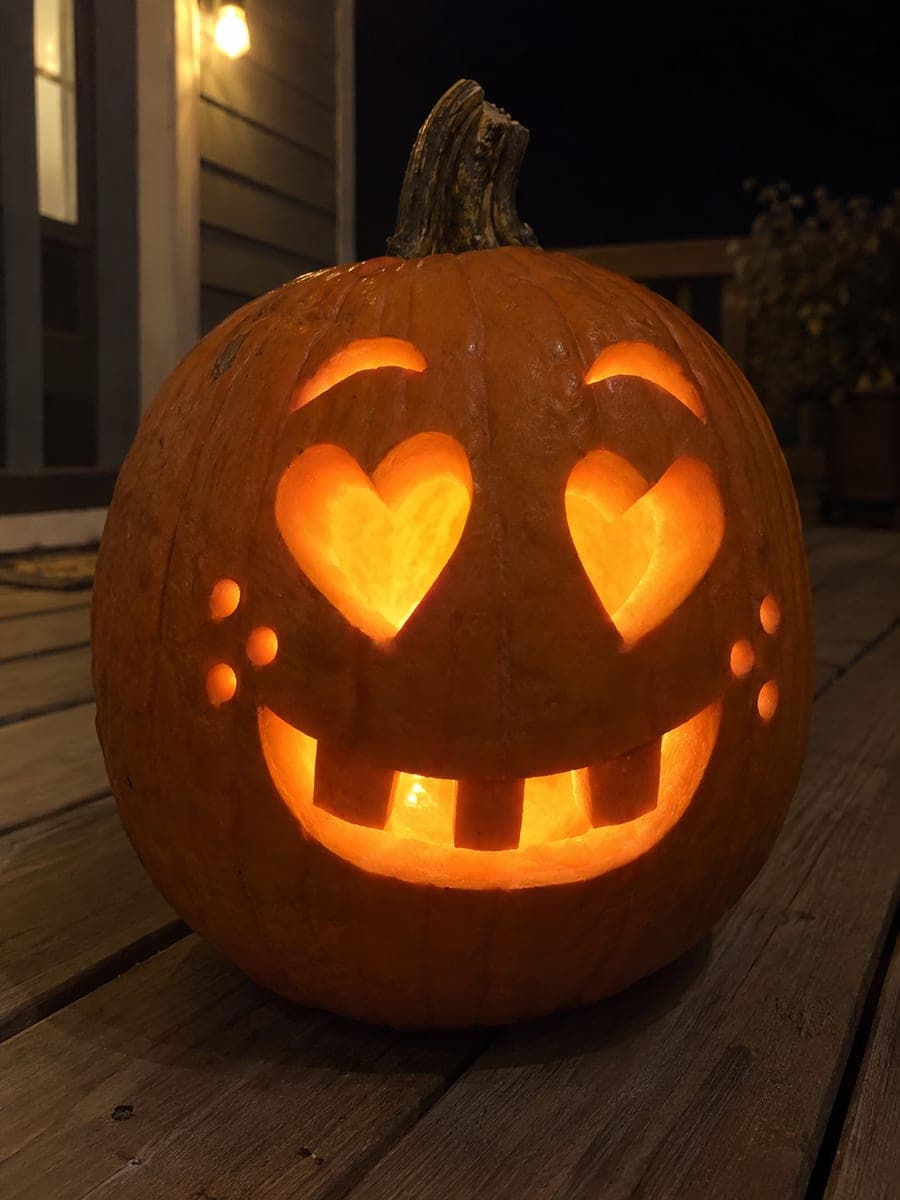
Two large fully open heart eyes, two pairs of curved brow holes, a six-tooth smile, and twenty small separate heart and diamond cutouts around the cheeks make this hard heart eyes pumpkin carving idea a warm, intricate display. Every heart is cut completely empty, so no interior piece needs to be supported. Complete the large eye hearts first to confirm your knife angle before moving to the small border hearts.

No ratings yet · Sign in to rate
Comments (0)

  • No comments yet — be the first.

Save without an account. Sign in to like or comment.

Our tips for carving a similar design

Every shape in this design is a fully open cutout, so there are no floating interior pieces to support, but sheer count requires patience and a plan. Start with the large eye hearts to establish scale and test your knife angle on the most visible cuts, then work methodically through the small border shapes. Keeping the rind between each border hole intact is the only structural rule.

From pumpkin to porch

  1. Plan the layout

    Sketch the two large heart eyes first, then lightly sketch the six-tooth smile and finally the ring of small hearts and diamonds around the cheeks. Count your small shapes and space them evenly, leaving at least a third of an inch of rind between each one. Photograph the sketch before cutting as a reference.

  2. Prep and scoop

    Cut a lid and hollow the pumpkin to about one inch of wall thickness. Thinner walls make small cutouts easier but weaker; one inch is a good balance for this many holes.

  3. Cut the large heart eyes

    Transfer both heart templates and cut completely through the wall. These are your largest and most prominent cuts, so take your time on the curves. Freeing each piece from inside confirms your blade passed fully through.

  4. Cut the brow slots and smile

    Add the two pairs of curved brow holes above each eye, then cut the six-tooth smile. Root each tooth broadly so no single tooth projects more than half an inch without support on at least two sides.

  5. Work through the border cutouts

    Moving outward from the face, cut each small heart and diamond individually, rotating the pumpkin to approach each shape from a comfortable angle. Cut the shapes farthest from the eyes last so you always have solid rind to grip while working. Use a narrow blade for the tightest points.

  6. Light and photograph

    Insert a battery LED and view in a darkened room to check that every small hole is fully open and glowing. A dark background makes all the small lights read at once. Display at table height so the ring of hearts surrounds the face at a natural viewing angle.

Written with AI to match this design

Gather your supplies

Check things off as you get ready.

Work on a stable surface, keep your free hand out of the cutting path, and have an adult handle sharp tools.

Three levels of light

  • Leave intact

    All rind between the border shapes, between the brows, and between teeth stays dark to separate each glowing element.

  • Peel & shade

    None, every lit area is a full cutout.

  • Cut through

    Both large heart eyes, brow pairs, the smile between six teeth, and all twenty border heart and diamond shapes are cut completely through.

Learn the carving basics

Before you start cutting

How do I keep the small border cutouts from looking crowded?

Measure and mark each shape before cutting rather than eyeballing the spacing. A consistent gap of at least a third of an inch between every hole lets each one read as a distinct light point rather than a smear.

What happens if a small border piece tears rather than pops out cleanly?

A small V-cut to start each corner before running the full outline gives you cleaner entry and exit points. If a piece tears, use a small flat spatula or the back of a spoon to gently press the remaining flap from the inside outward.

Is it better to cut the border shapes from outside or inside the pumpkin?

Cutting from the outside gives you better visual control over the shape. After making the cut, push the piece out from inside with a finger or blunt tool. Only reach inside to clear stubborn pieces, not to guide the blade.

Your take belongs here, too.

Changed a detail? Made it simpler? Share a photo of your version and tell the community what worked.

Share your pumpkin

More pumpkins like this

You've reached the end · 8 pumpkins
The Patch Report

Fresh pumpkins, in your inbox.

The best new carvings, ideas worth stealing, and how-tos for carving season. Short, seasonal, and gone by November.

A short email during carving season. Unsubscribe anytime. See our privacy policy.