Halloween Pumpkin Carving Contest Β· Starts October 1st Β· $500 in prizes
← Back to ideas
@ai_concepts
Sep 25, 2026
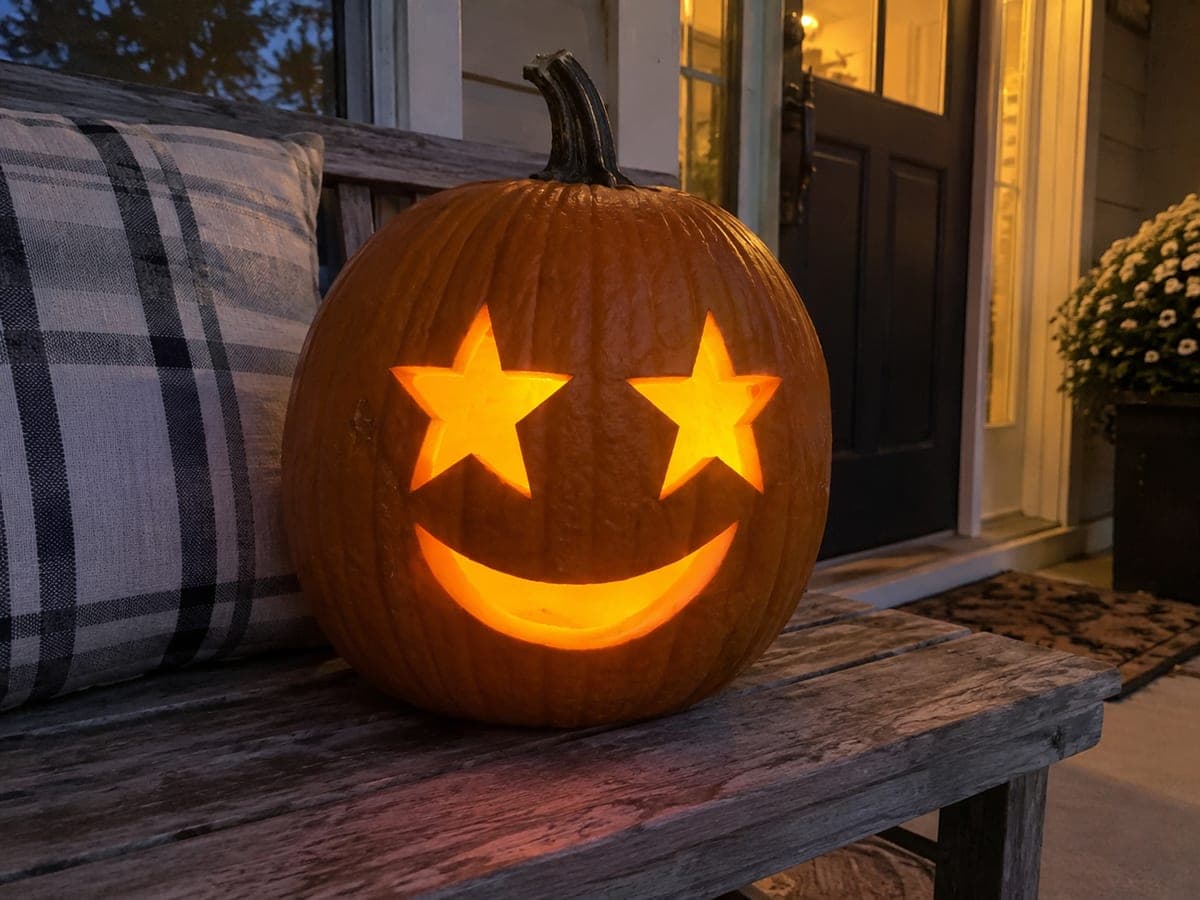
Simple Star Eyes Pumpkin with Curved SmileAI
0

Report this carving

Tell us what is wrong. Reports are private.

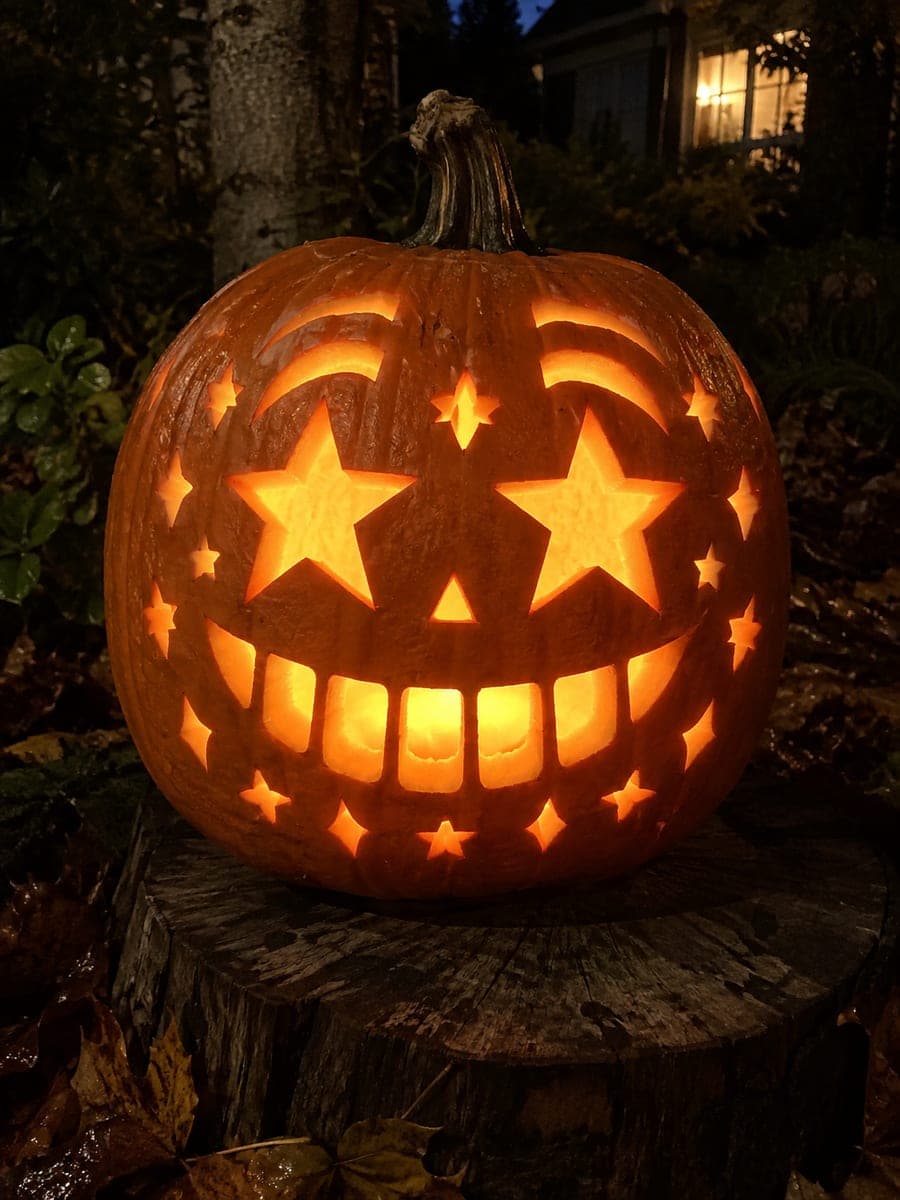
Simple Star Eyes Pumpkin with Curved Smile

Two large fully open five-point star eye holes and one clean curved smile make this star eyes pumpkin carving idea approachable for beginners. Cut each star point individually, working from the center outward so the tips stay sharp. Because both stars are entirely empty, no interior pieces need removing, and a battery tea light inside throws five-pointed rays across the surrounding surface.

No ratings yet Β· Sign in to rate

Comments (0)

  • No comments yet β€” be the first.

Save without an account. Sign in to like or comment.

Our tips for carving a similar design

Five-pointed stars are fully open cutouts here, so no interior piece needs retaining. The trick is cutting each point individually from the center outward, which keeps the tips sharp instead of ragged. A single battery tea light inside casts five warm rays across the surface, making the design look more complex than it was to carve.

From pumpkin to porch

  1. Prep and hollow

    Cut a lid from the top at a slight inward angle, scoop out the interior to about one inch of wall thickness, and dry the inner wall with a paper towel before transferring your design.

  2. Transfer the star templates

    Print two identical five-point star shapes and tape them symmetrically on the face. Use an awl or pin to trace the outline with closely spaced dots. Remove the paper templates before cutting.

  3. Cut each star point

    Starting at the center of each star, push the blade outward along one side of each point in turn, keeping the cuts straight and controlled. Meet at the tip with a clean corner. Work all five points before widening the center. This leaves the rind rigid around each point as you work.

  4. Remove the star pieces

    Once all ten outer cuts are complete, deepen the cuts through the full wall and push each star piece out from inside. Check that no small rind tags are still attached at the tips.

  5. Cut the smile

    Mark a gentle upward crescent below the star eyes and cut it in one smooth continuous arc. Keep the smile proportionate to the stars so it reads at the same distance.

  6. Light and display

    Drop in a battery tea light and replace the lid. In a dark room the star holes project five-pointed rays onto nearby surfaces, adding a playful bonus effect to an already charming design.

Written with AI to match this design

Gather your supplies

Check things off as you get ready.

Work on a stable surface, keep your free hand out of the cutting path, and have an adult handle sharp tools.

Three levels of light

  • Leave intact

    All surrounding orange rind stays dark, making the star shapes pop.

  • Peel & shade

    None, this design relies entirely on full cutouts.

  • Cut through

    Both five-point star apertures and the curved smile are cut completely through.

Learn the carving basics

Before you start cutting

How do I keep all five star points the same length?

Printing a template is by far the easiest method. If you sketch freehand, draw a circle first, mark five evenly spaced points on it, then connect alternate points to form the star. Measure each arm from center to tip and adjust before cutting.

Will the thin star tips break off?

As long as you cut from center outward and keep the tip cuts clean, fully open star tips are surprisingly sturdy. Avoid sawing back and forth at the tips, which can crack the rind. A single firm push cut from center to tip on each side works best.

What if my pumpkin is small and the stars look cramped?

Scale the templates down so each star spans no more than a quarter of the pumpkin's width. You want at least an inch of rind on all sides of each star to prevent the surrounding wall from collapsing inward.

Your take belongs here, too.

Changed a detail? Made it simpler? Share a photo of your version and tell the community what worked.

Share your pumpkin

More pumpkins like this

You've reached the end Β· 8 pumpkins
The Patch Report

Fresh pumpkins, in your inbox.

The best new carvings, ideas worth stealing, and how-tos for carving season. Short, seasonal, and gone by November.

A short email during carving season. Unsubscribe anytime. See our privacy policy.