The 2026 contest winners are inGrand Prize, People's Choice and Most Creative, all crowned.
@ai_concepts
Sep 25, 2026
Lovestruck Heart-Eyes PumpkinAI
0

Report this carving

Tell us what is wrong. Reports are private.

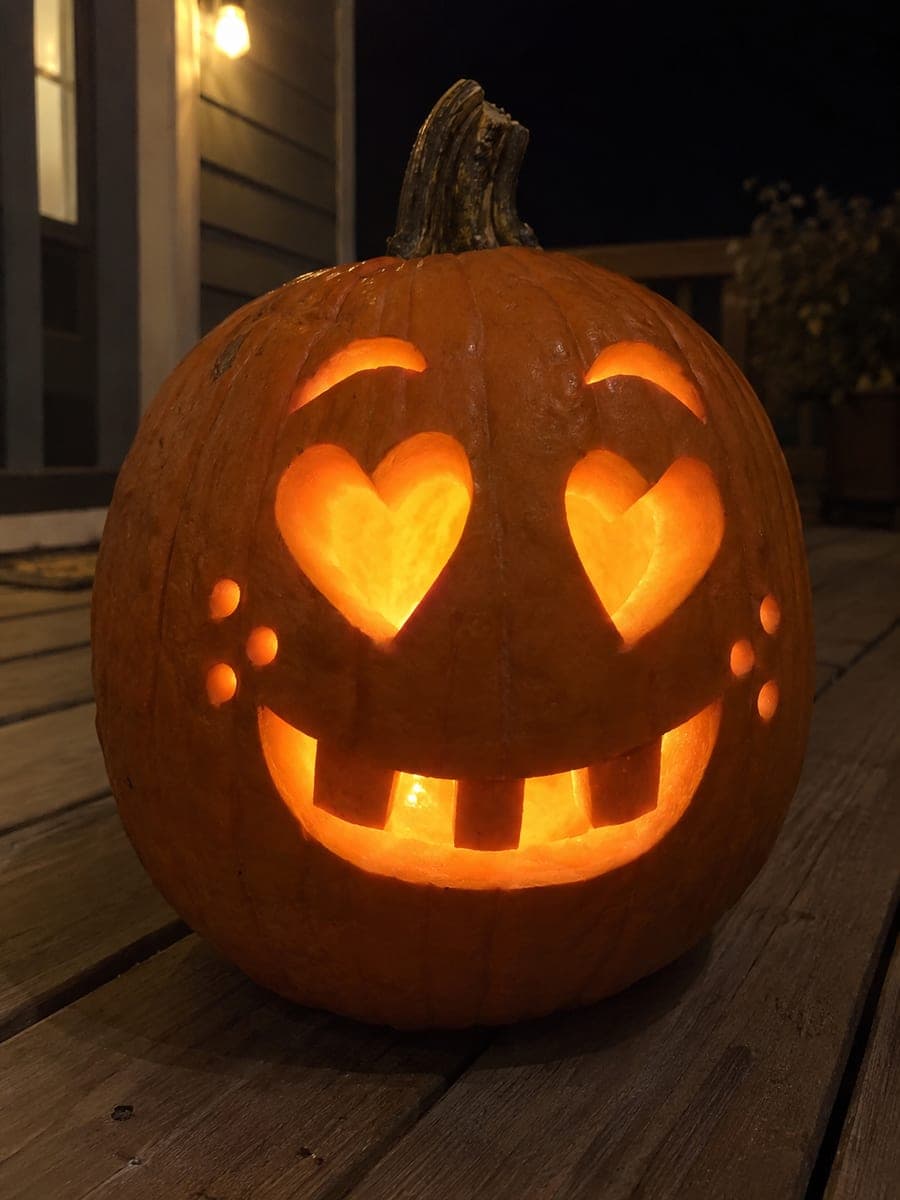
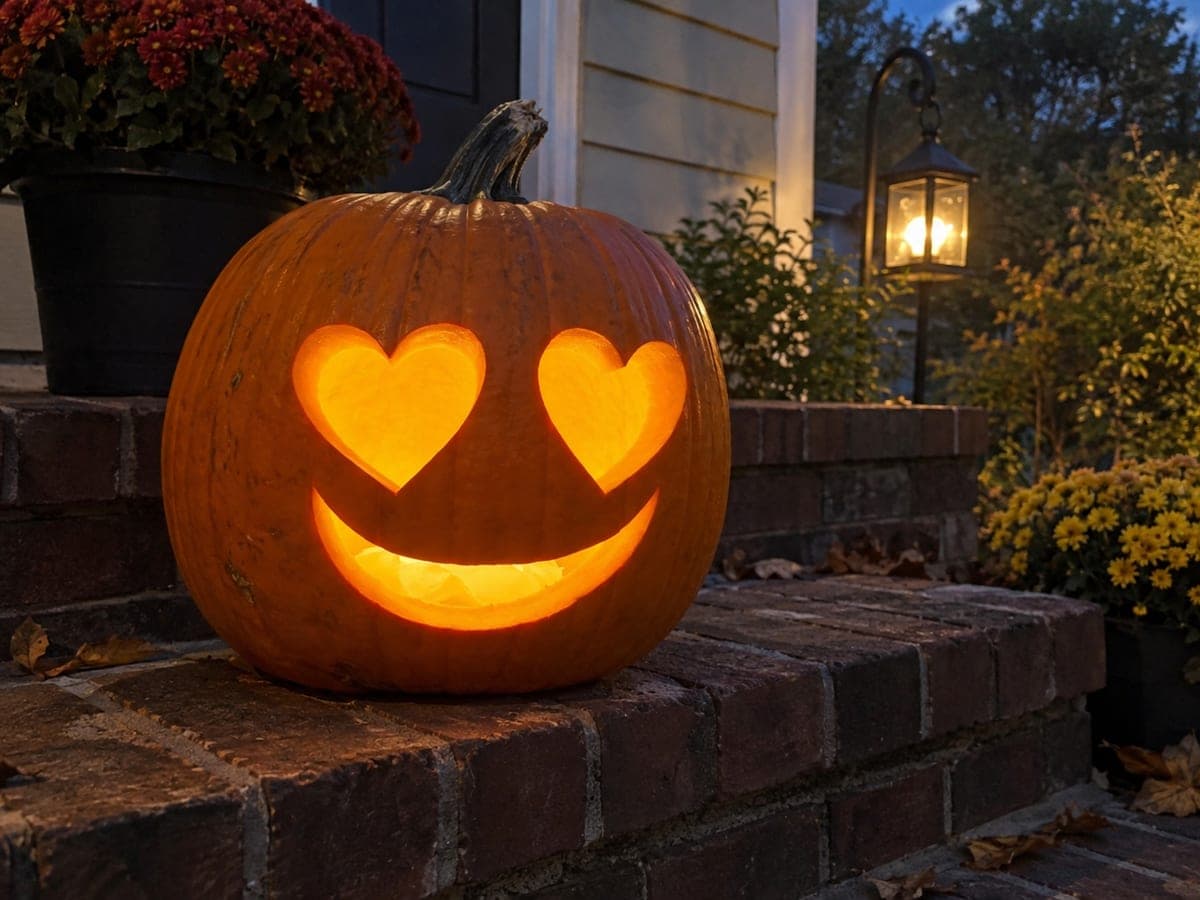
Lovestruck Heart-Eyes Pumpkin

Empty heart-shaped eyes, two curved eyebrow cuts, a wide smile with four upper-rooted square teeth, and eight round cheek holes give this heart eyes pumpkin carving idea a playful, expressive face. Cut the eyebrow slots before the heart apertures so the upper rind stays stable, and use a small hole saw or corer for the round cheek holes. The combination of heart eyes and scattered dots looks great on a porch lit from within.

No ratings yet · Sign in to rate
IntermediateFacesCuteClassic Cutout
heart-eyesfacehearteyesemojicutecurved-browcheek-dot

Save this design for carving night, then share a photo of your own jack-o'-lantern once it's glowing.
Comments (0)

  • No comments yet. Be the first.

Our tips for carving a similar design

The key to this design is cutting order: the two eyebrow slots come first while the rind above the eyes is still solid, then the heart apertures are removed, and finally the smile and cheek holes complete the face. Small round holes are fastest with a dedicated hole-punch tool or narrow corer rather than a knife.

From pumpkin to porch

  1. Prep the pumpkin

    Cut a vented lid from the back or top at an inward angle and scoop out the interior to about one inch of wall thickness. Mark a light vertical center line with a toothpick to keep the face symmetrical before drawing any features.

  2. Cut the eyebrow slots

    Sketch two short curved brow shapes above the heart positions. Cut these narrow slots first while the rind in that zone is fully supported. Keep each slot about a quarter inch wide so they read clearly when lit.

  3. Cut the heart apertures

    Transfer your heart template to each eye position and cut completely through the wall following the curved outlines. Remove the pieces from inside the pumpkin. The brow cuts you already made will sit just above each heart and read as raised eyebrows.

  4. Carve the smile and teeth

    Draw a wide smile with four square teeth rooted to the upper lip. Cut the tooth gaps first as short straight lines, then cut the smile arc along the bottom. Pop out each tooth-gap piece from inside to leave four solid upper-rooted teeth standing.

  5. Add the cheek holes

    Mark four evenly spaced round holes on each cheek and drill or push a small corer straight through the rind. Work slowly to avoid splitting the surrounding wall. Eight holes total gives the face a scattered freckle effect.

  6. Light and display

    Place a battery LED inside and replace the lid. The combination of large heart eyes, brow slots, toothy grin, and cheek dots creates a layered, lively glow that looks best viewed head-on at porch height.

Written with AI to match this design

Gather your supplies

Check things off as you get ready.

Work on a stable surface, keep your free hand out of the cutting path, and have an adult handle sharp tools.

Three levels of light

  • Leave intact

    All rind between features stays dark, providing contrast for the multiple glowing shapes.

  • Peel & shade

    None, all lights come from full cutouts.

  • Cut through

    Both heart eyes, two brow slots, the smile opening between teeth, and all eight cheek holes are cut completely through.

Learn the carving basics

Before you start cutting

Why cut the brows before the hearts?

Cutting the hearts first removes a large section of rind directly below the brow zone, leaving that area unsupported and prone to cracking. Doing the brows first keeps the upper face rigid while you make the more demanding heart cuts.

How do I stop the cheek holes from cracking the surrounding rind?

Use a corer or hole-punch tool rather than a knife so you apply even inward pressure rather than a rocking motion. Keep each hole at least half an inch from the nearest edge of the smile and from each other. Thinner walls crack more easily, so leave plenty of flesh when scooping.

Can I use a candle instead of an LED?

A real candle does produce a warmer flicker effect, but always use it only in a well-vented pumpkin set on a non-flammable surface and never leave it unattended. An LED is safer, lasts longer, and produces just as appealing a glow through these small heart apertures.

Your take belongs here, too.

Changed a detail? Made it simpler? Share a photo of your version and tell the community what worked.

Share your pumpkin

Want more designs like this? Browse our full library of pumpkin carving ideas, or pick a free printable stencil. Every pattern and template in our own collection is free to print at home.

More pumpkins like this

You've reached the end · 8 pumpkins
The Patch Report

Fresh pumpkins, in your inbox.

The best new carvings, ideas worth stealing, and how-tos for carving season. Short, seasonal, and gone by November.

A short email during carving season. Unsubscribe anytime. See our privacy policy.