Halloween Pumpkin Carving Contest · Starts October 1st · $500 in prizes
← Back to ideas
@ai_concepts
Sep 3, 2026
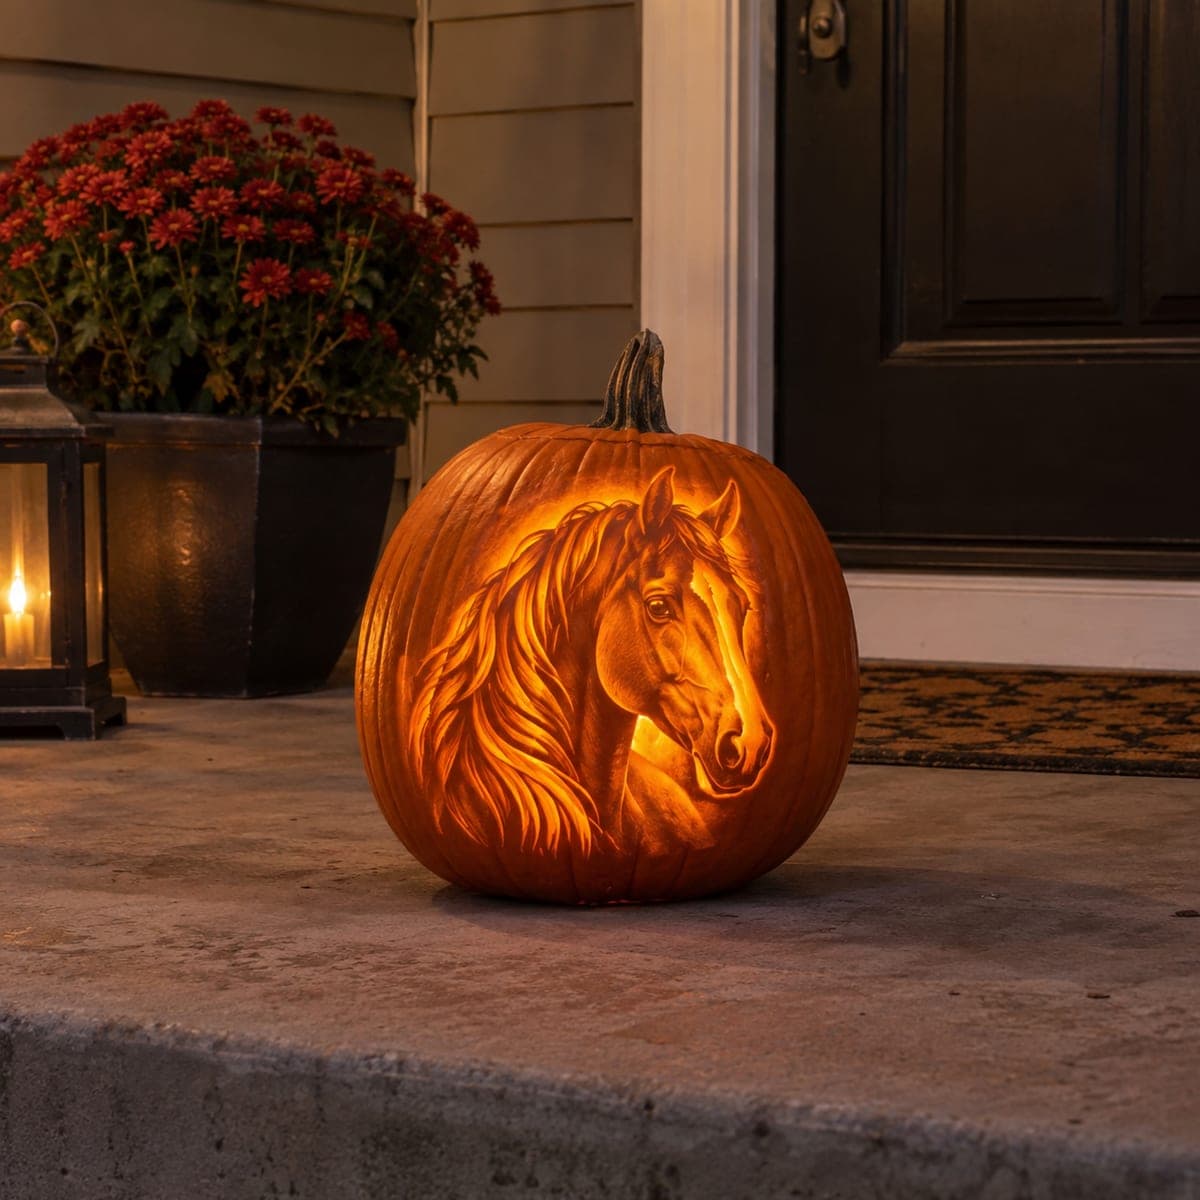
Horse Head Mane Flowing Shaded PumpkinAI
0

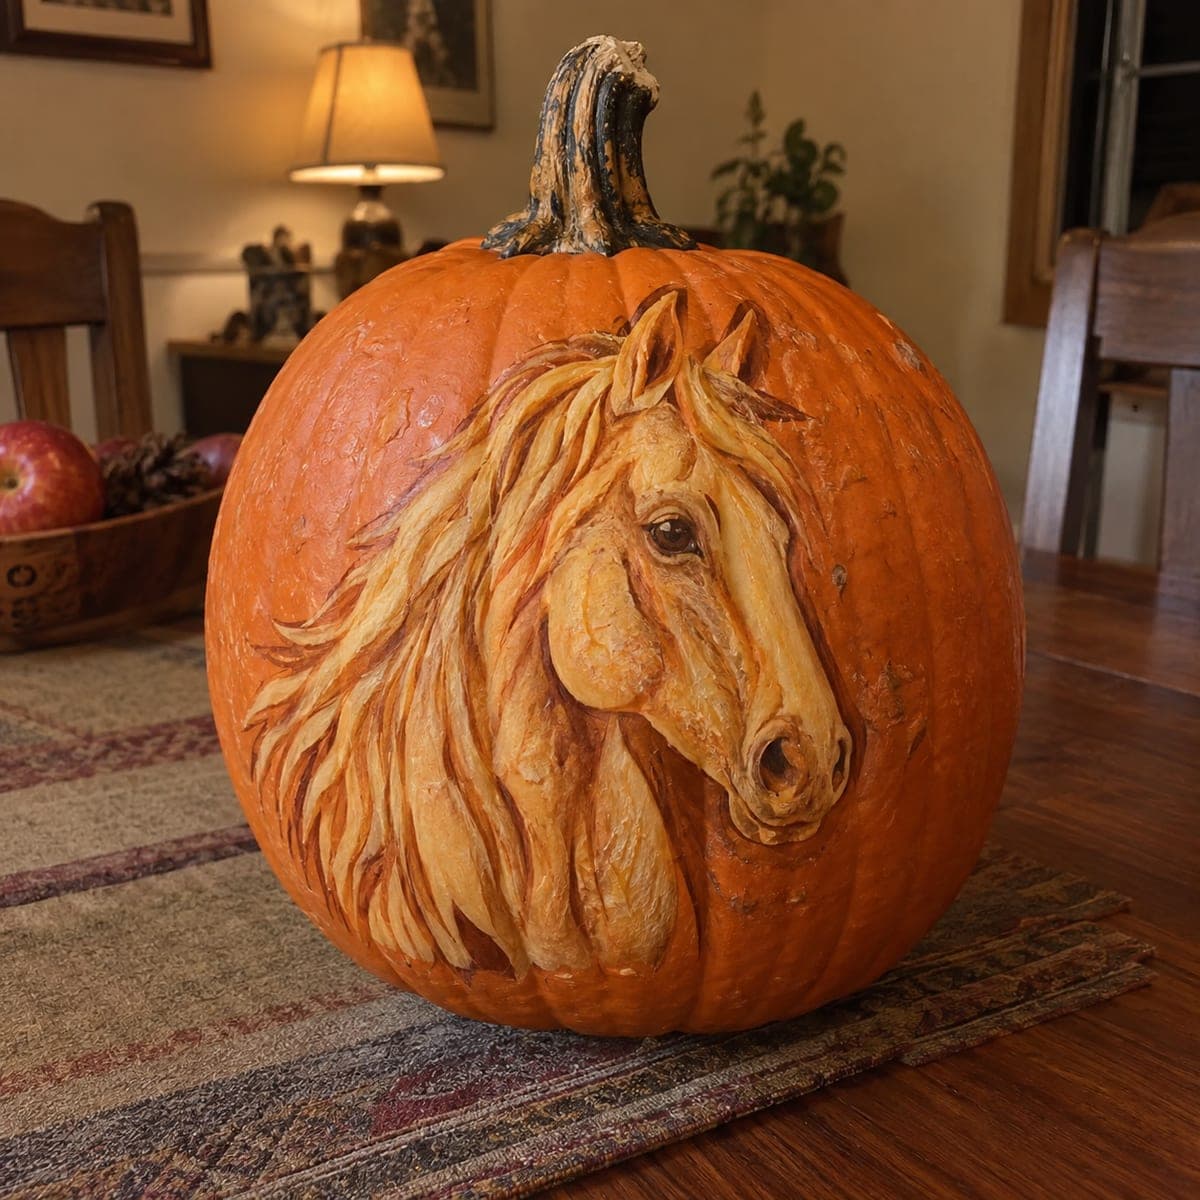
Horse Head Mane Flowing Shaded Pumpkin

A majestic horse portrait with a long flowing mane is carved in rich shaded relief on a pumpkin, each strand of the mane etched separately with a fine liner tool to create movement and volume. The eye socket area is left slightly deeper than the cheek so it catches shadow and adds realism to the expression. This advanced shaded pumpkin carving idea suits carvers with tool experience, and using a flesh-toned Dremel tip helps control the shaving depth. Displayed on a dining table at fall harvest gatherings, the warm glow through the carved flesh is breathtaking.

This is an AI-generated concept image: a realistic, carvable design idea rather than a photo of a finished carve. AI concepts are always labeled and sit out the leaderboard and the contest.

No ratings yet · Sign in to rate

Comments (0)

  • No comments yet — be the first.

Save without an account. Sign in to like or comment.

Our tips for carving a similar design

The core trick here is shaded relief, where you shave the skin to different depths instead of cutting all the way through, so light glows through the thin flesh like a painting. The plan is to map the horse first, then carve the head and muzzle as the most raised, brightest area while etching each mane strand as its own fine channel for movement. Keep the background skin fully intact so the horse reads as a portrait floating in dark orange.

Written by PumpkinCarvingIdeas.com, inspired by the image above. These are our suggestions, not instructions from the uploader. This approach to the AI concept has not been tested on a real pumpkin.

From pumpkin to porch

  1. Transfer the portrait and set your depth map

    Since this is an AI concept, treat it as a target to recreate rather than a real pumpkin. Choose a large pumpkin with a smooth, flat front face and a firm wall. Tape your horse pattern on and poke through the main outlines, the eye, the muzzle, the ear tips, and the flow lines of the mane. Before cutting, mentally note that the cheek and forehead will be highest and the eye socket sits deepest.

  2. Rough out the horse from the background

    With a small loop or ribbon tool, shave the skin away from the whole horse shape so the head and mane stand slightly proud of the surrounding pumpkin. Work in shallow passes and stop while you still have plenty of wall left. Leave the deep background skin untouched so it stays dark. Keep your bracing hand behind the blade path, and let an adult handle any powered tools.

  3. Build the face in layered depths

    Shave the cheek and forehead to a mid depth so they glow softly, then go a touch deeper around the eye socket so it holds shadow and gives the expression life. Round the muzzle and nostril area gently, keeping the raised bridge of the nose brighter than the recesses. A flesh-toned Dremel tip helps you control how much you shave, but light hand tools work too. Check the glow often by holding an LED behind or near the thin areas.

  4. Etch the flowing mane strand by strand

    Switch to a fine liner or V tool and carve each lock of the mane as its own curved channel. Vary the length and let the strands sweep in the same overall direction to suggest motion. Deeper channels will glow brighter, so alternate depths to create volume and separation between locks. Leave thin skin bridges between strands rather than cutting through, which keeps the wall strong.

  5. Refine highlights and shadows

    Step back and compare bright areas to dark ones. Shave a little more from the forehead, nose bridge, and top mane strands to lift the highlights, and leave the throat and under-mane areas darker for contrast. Clean up any ragged edges with a detail knife. Take your time, since this is where the portrait gains realism.

  6. Light it and photograph

    Drop a warm LED puck inside through a small hole cut in the back or bottom, never a candle, since the thin shaved flesh scorches easily. Set the pumpkin on a table and dim the room to see the glow read through the face and mane. If any spot stays too dark, shave it slightly thinner. Snap your photo the first night, because shaded pumpkins dry and shrink within a couple of days.

Gather your supplies

Check things off as you get ready.

Work on a stable surface, keep your free hand out of the cutting path, and have an adult handle sharp tools.

Three levels of light

  • Leave intact

    The background pumpkin skin around the horse, left fully intact so it stays dark and frames the portrait.

  • Peel & shade

    The horse's cheek, forehead, muzzle, and mane, shaved to varying depths so they glow warm orange with the mane strands brightest.

  • Cut through

    Optional tiny openings only, such as a light hole in the back or bottom; the front stays relief with no full cutouts.

Learn the carving basics

Before you start cutting

Do I cut all the way through anywhere on the front?

No, this is a shaded relief design, so the front stays as thinned skin rather than open holes. All the glow comes from shaving the flesh to different depths. Only cut a small opening in the back or bottom to insert your light.

How do I make the eye look alive?

Carve the eye socket area slightly deeper than the surrounding cheek so it catches shadow. Leave a small raised, thin highlight for the eye itself so a bit of light glows there. That contrast between shadow and highlight is what gives the expression realism.

How do I keep the mane from looking flat?

Carve each strand as its own channel and vary the depth from lock to lock so some glow brighter than others. Let the strands curve in one flowing direction to suggest movement. Keeping thin bridges of skin between strands both strengthens the wall and separates the locks visually.

Your take belongs here, too.

Changed a detail? Made it simpler? Share a photo of your version and tell the community what worked.

Share your pumpkin

More pumpkins like this

You've reached the end · 8 pumpkins
The Patch Report

Fresh pumpkins, in your inbox.

The best new carvings, ideas worth stealing, and how-tos for carving season. Short, seasonal, and gone by November.

A short email during carving season. Unsubscribe anytime. See our privacy policy.