Halloween Pumpkin Carving Contest · Starts October 1st · $500 in prizes
← Back to ideas
@ai_concepts
Sep 14, 2026
Little Ghost Against a Round Glow PumpkinAI
0

Little Ghost Against a Round Glow Pumpkin

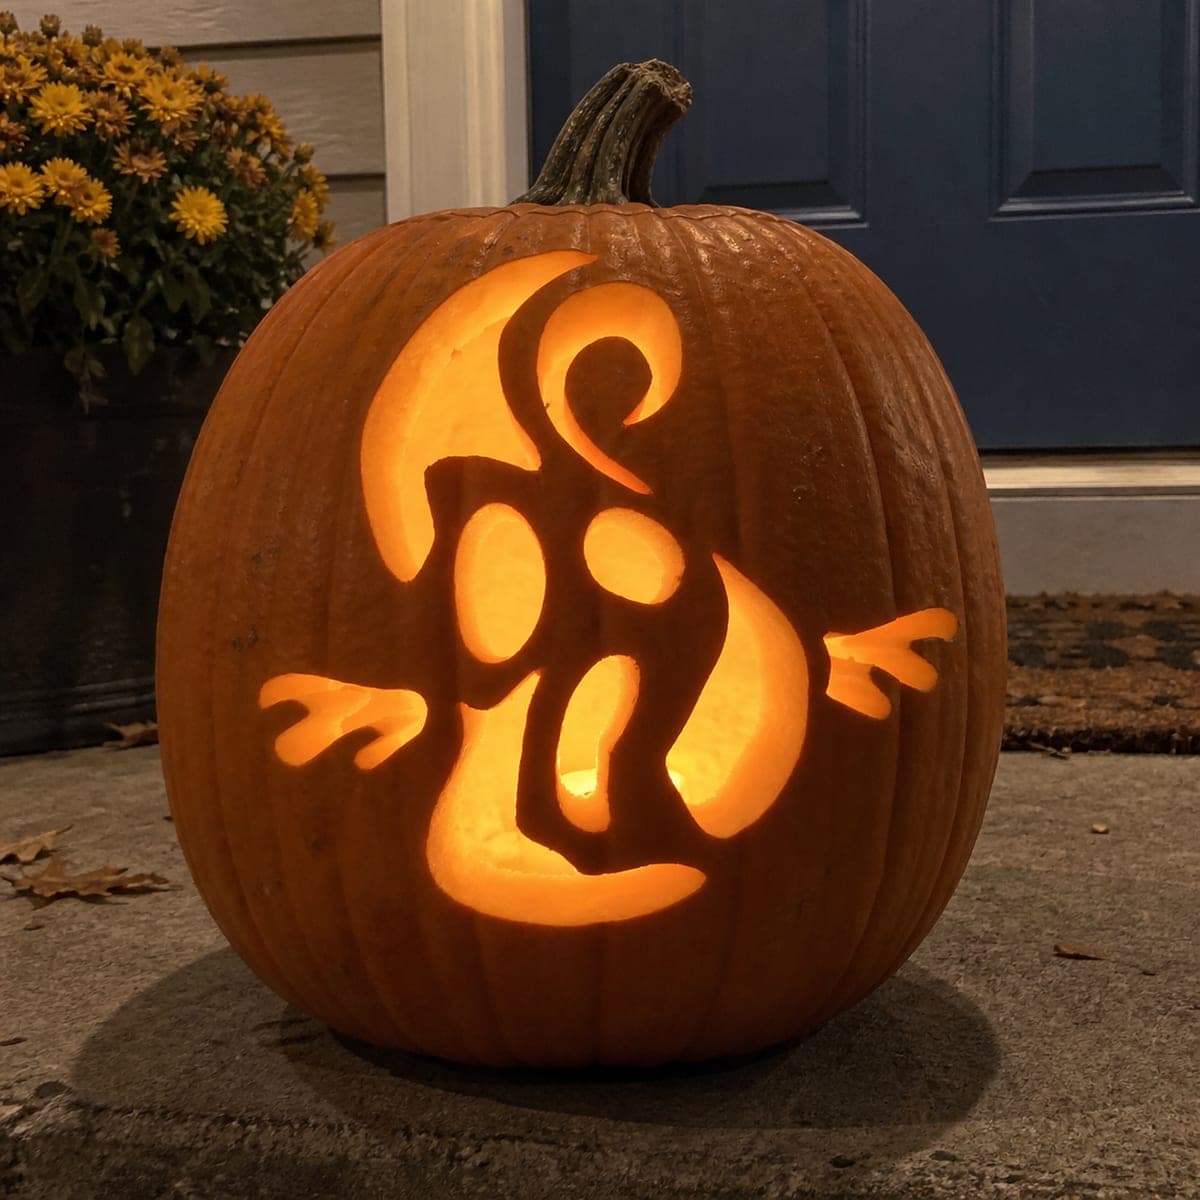
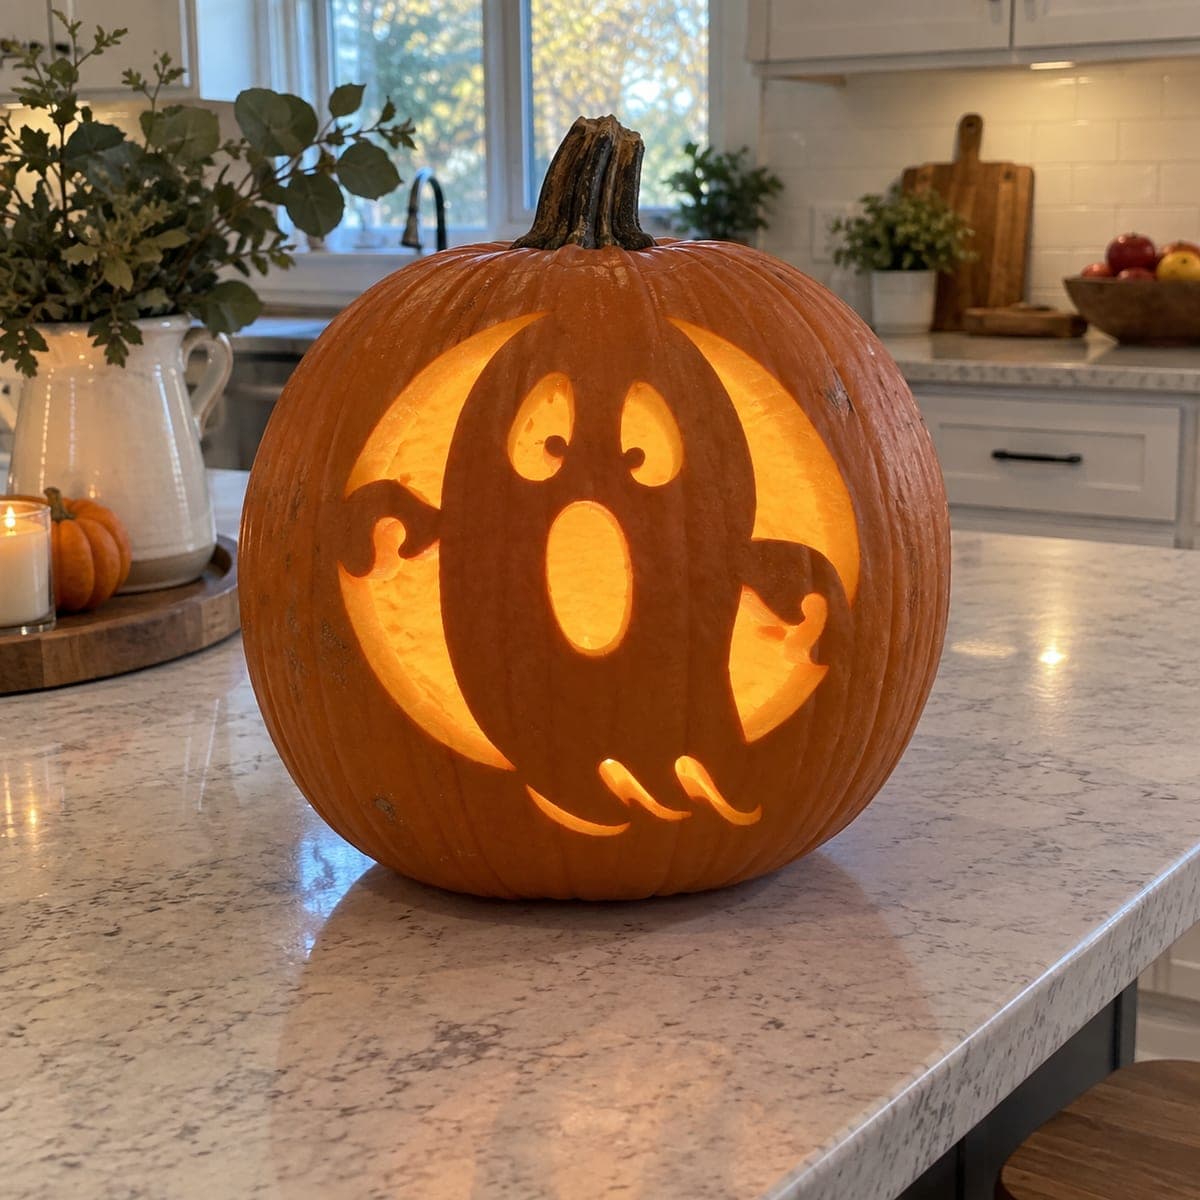
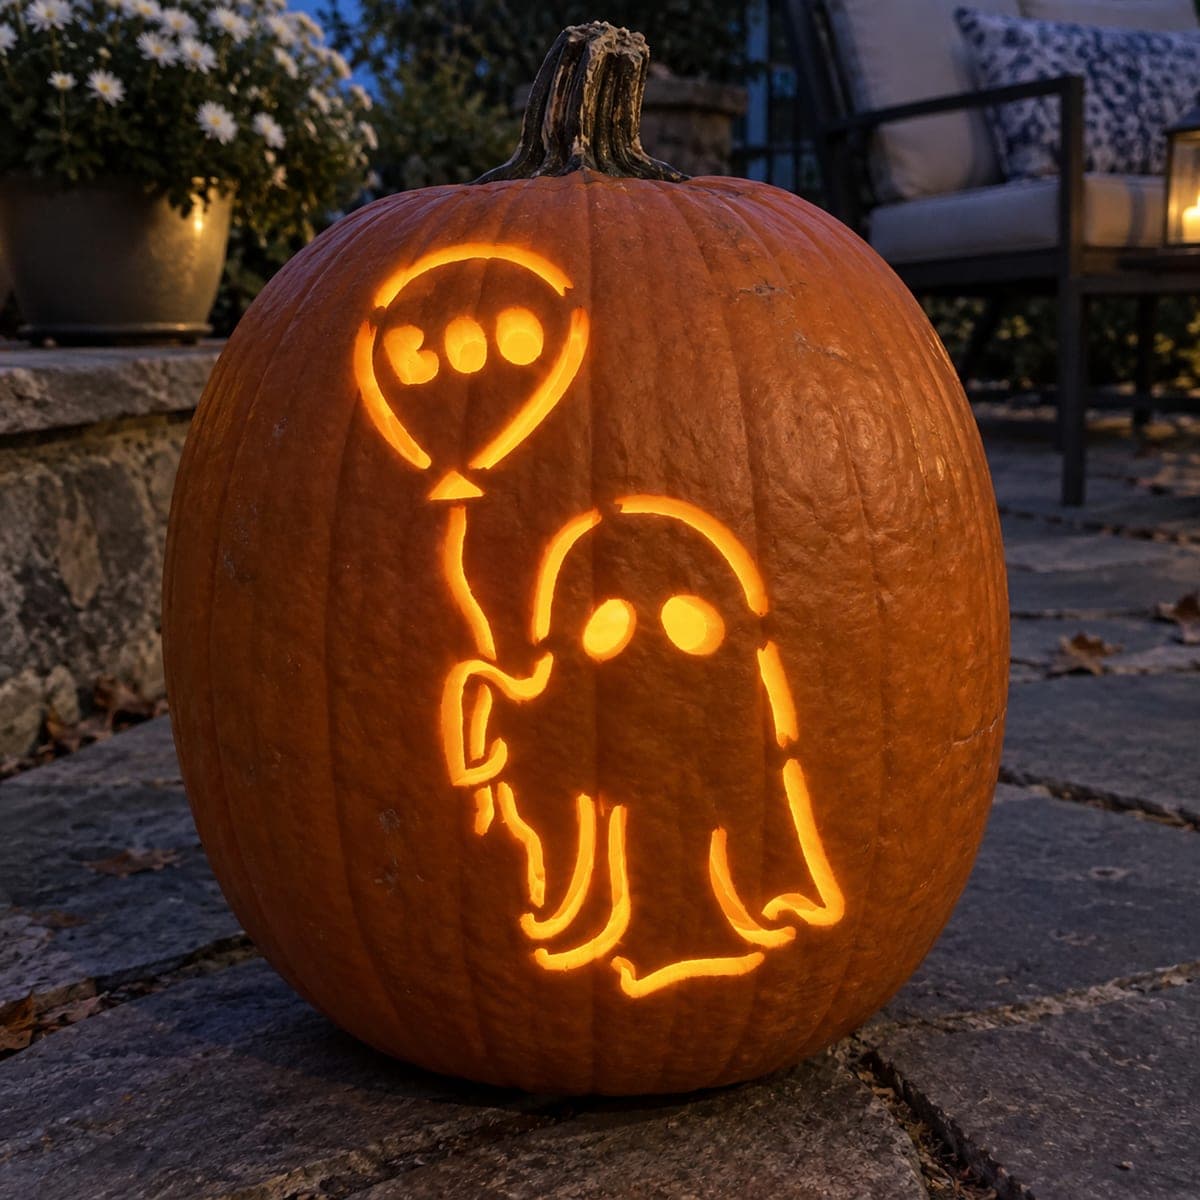
A chubby ghost with curled claw-hands and a wide oval mouth floats as a dark silhouette against a large crescent-shaped glow carved into a round pumpkin. The silhouette technique keeps the ghost itself uncut while the bright backdrop is pierced through, so the figure reads as a dark shape against warm light. Leave a generous rind bridge connecting the ghost's body to the top of the carved crescent so the figure does not droop as the pumpkin ages.

This is an AI-generated concept image: a realistic, carvable design idea rather than a photo of a finished carve. AI concepts are always labeled and sit out the leaderboard and the contest.

No ratings yet · Sign in to rate
Comments (0)

  • No comments yet — be the first.

Save without an account. Sign in to like or comment.

Our tips for carving a similar design

The core trick here is reverse silhouette carving: instead of cutting the ghost, you cut a bright crescent shape all around it so the uncut ghost reads as a dark figure against warm light. Plan the ghost's body, curled claw hands, eyes, and oval mouth first, then treat everything outside those shapes as the open glow area. A generous rind bridge at the top keeps the ghost anchored to the pumpkin so it will not sag.

Written by PumpkinCarvingIdeas.com, inspired by the image above. These are our suggestions, not instructions from the uploader. This approach to the AI concept has not been tested on a real pumpkin.

From pumpkin to porch

  1. Pick a round pumpkin and plan the layout

    Choose a tall, round pumpkin with a smooth, flat face so the crescent glow has room to spread. Since this is a concept design, you get to place the ghost yourself, so lightly sketch or tape a stencil with the ghost centered and a crescent of open space curving around one side. Make sure the ghost's head nearly touches the top rim of the crescent so you can leave a connecting bridge there. Keep the whole design in the sturdy middle band of the pumpkin, away from the stem and base.

  2. Open a lid or back door and clean out the wall

    Have an adult cut a lid around the stem or, better for this design, a hole in the back so the front face stays unbroken. Scoop out the seeds and pulp, then scrape the inside of the carving wall down to about one inch thick. A thinner wall is much easier to pierce cleanly and lets more light pass through the crescent. Save some scooped flesh in case you want to patch a mistake later.

  3. Score the ghost outline and mark your bridge

    Transfer the stencil, then use a small detail saw to score, not cut through, the full outline of the ghost including the curled claw hands. This scored line is your safety border so you never carve into the figure by accident. Mark the spot at the top of the head where the ghost meets the crescent and leave that section of rind uncut as a bridge. That bridge is what holds the whole shape steady as the pumpkin ages.

  4. Cut the crescent glow around the ghost

    Now saw fully through the pumpkin in the open crescent area outside the ghost, working in small sections and letting each piece drop inward or pull free gently. Cut the narrow tips of the crescent last since thin points are the weakest. Keep checking your scored ghost border so the blade stays on the bright side of the line. Leave the ghost body, claw hands, eyes, and mouth completely uncut for now.

  5. Cut the eyes and oval mouth, peel the details

    Pierce the two small eyes and the wide oval mouth all the way through so they glow brightly from inside the dark figure. For the tiny curled lines on the mouth and hands, use a shallow skin-peel or a thin narrow cut rather than large openings so the details stay strong. Take your time on the small oval and round shapes, turning the pumpkin toward you for control. Keep every fine line connected to solid rind so nothing crumbles.

  6. Light it and take your photo

    Set a battery LED puck or string inside, never a candle, and aim it so the crescent behind the ghost glows evenly. Dab petroleum jelly on the cut edges to slow drying, and store the pumpkin somewhere cool between showings. Photograph it in a dim room so the warm backdrop pops and the ghost reads as a crisp dark shape. If edges soften after a day or two, a light trim will sharpen the glow again.

Gather your supplies

Check things off as you get ready.

Work on a stable surface, keep your free hand out of the cutting path, and have an adult handle sharp tools.

Three levels of light

  • Leave intact

    The ghost's body and curled claw hands stay as untouched skin so the figure reads as a solid dark shape.

  • Peel & shade

    The small curled accent lines on the mouth and hands can be skin-peeled for a soft dim glow that adds detail without weakening the shape.

  • Cut through

    The wide crescent backdrop, the two eyes, and the oval mouth are cut fully through for the brightest light.

Learn the carving basics

Before you start cutting

How do I keep the ghost from drooping since so much is cut around it?

Leave a solid rind bridge at the top of the head where the ghost meets the crescent, and do not thin that spot. That connection carries the weight of the figure. It also helps to keep your wall around one inch thick so the ghost body stays rigid.

Should I carve the ghost or the background?

You carve the background, not the ghost. This is a reverse silhouette, so the crescent of open space around the figure gets cut through while the ghost stays as uncut skin. Only the eyes and oval mouth inside the ghost are pierced.

What order keeps the design strongest?

Score the ghost outline first, then cut the large crescent, saving the narrow crescent tips for last. Add the eyes and oval mouth after the big openings are done. Cutting the thin points and small shapes last means the pumpkin stays firm while you do the heavy sawing.

Your take belongs here, too.

Changed a detail? Made it simpler? Share a photo of your version and tell the community what worked.

Share your pumpkin

More pumpkins like this

You've reached the end · 8 pumpkins
The Patch Report

Fresh pumpkins, in your inbox.

The best new carvings, ideas worth stealing, and how-tos for carving season. Short, seasonal, and gone by November.

A short email during carving season. Unsubscribe anytime. See our privacy policy.