@veiledvine
Sep 7, 2026

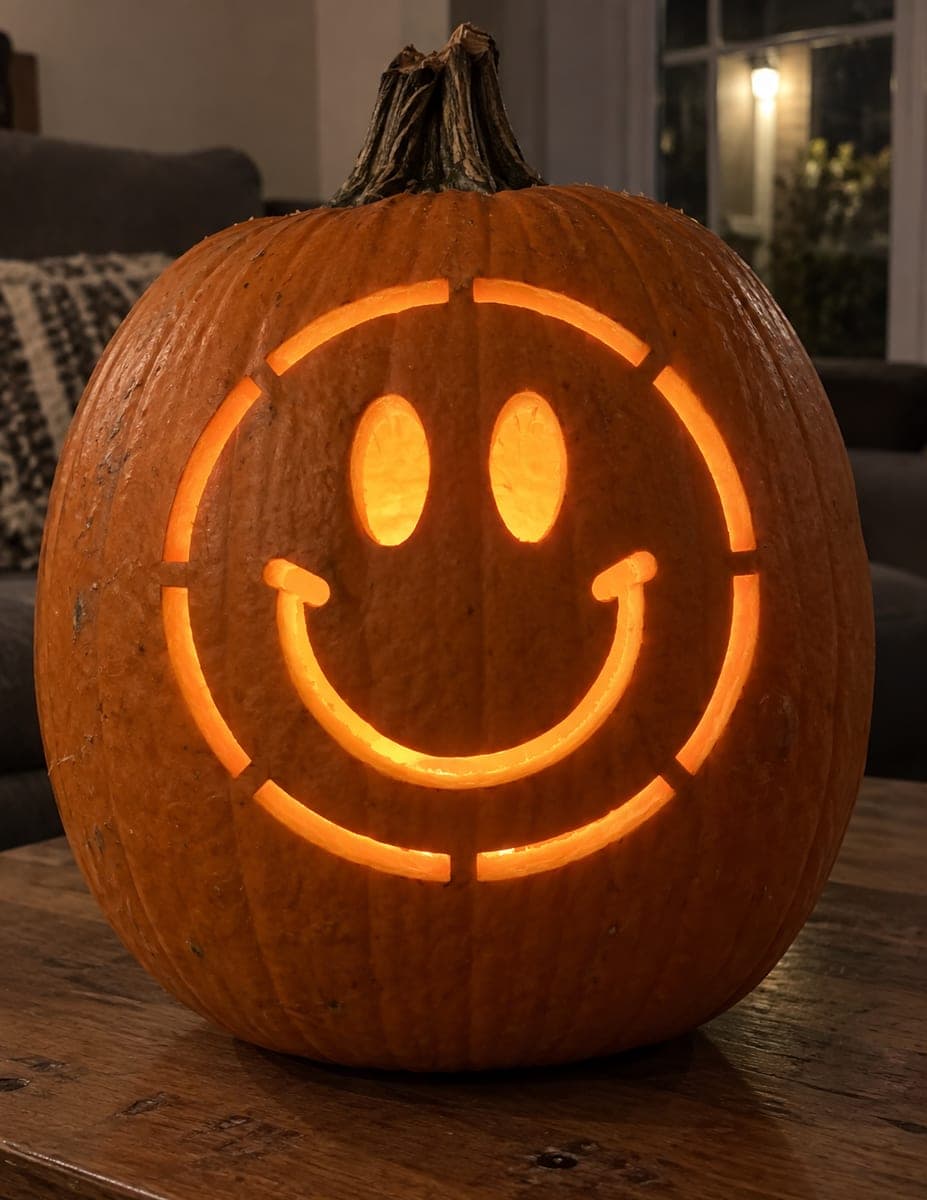
The whole charm here is simplicity: three triangle eyes and nose plus a wide zigzag grin, all cut clean through so the light pops. The trick is keeping the mouth's little teeth even and leaving enough skin between the cutouts so the face stays sturdy. Plan your shapes with a marker first, then cut them out one at a time.
Written by PumpkinCarvingIdeas.com, inspired by @veiledvine's photo above. These are our suggestions, not instructions from the uploader, and this approach hasn't been tested on their exact carve.
Choose a round, slightly squat pumpkin with a smooth front area big enough for a face. Wipe it down and set it on a towel so it does not roll. A medium pumpkin like this one is easy to hold in your lap while you work. Have an adult handle the cutting tools throughout.
Cut a lid around the stem at a slight angle so it rests back in place without falling in. Scoop out the seeds and pulp with a sturdy spoon or scraper. Thin the front wall to about one inch so your cuts go through easily. A thinner wall makes the small teeth much simpler to carve.
With a washable marker, draw two triangle eyes and a smaller triangle nose, all pointing up. Sketch a wide mouth with a simple zigzag of triangle teeth along the top and bottom edges. Keep the teeth evenly spaced and leave a little skin between each point so the grin holds together. Step back and check the spacing before you cut.
Start with the small shapes. Poke your blade in at the center of each triangle and cut out to the corners, then push the piece out from inside. Take it slow on the corners so the edges stay crisp. These three shapes set the whole expression.
Save the big mouth for last since it is the largest opening. Cut each tooth by following your zigzag line, working in short strokes rather than forcing the blade. Support the surrounding skin with your free hand as you push each piece free. Clean up any ragged edges with a gentle trim.
Drop in a battery LED tealight or a small puck light and pop the lid back on. Set it on a step or porch at dusk so the glow reads well. Snap your photo slightly off-center to catch the warm light spilling from the eyes and grin. Share it with the community when you are happy with it.
Check things off as you get ready.
Work on a stable surface, keep your free hand out of the cutting path, and have an adult handle sharp tools.
The full orange rind across the face and body stays dark and solid.
You could lightly shave a thin outline around the eyes or grin for a soft halo, though this design keeps it minimal.
The two triangle eyes, the nose, and the zigzag grin are cut clean through for the brightest glow.
Leave a small strip of skin between each tooth instead of cutting them into thin points. Thinning the front wall to about an inch also helps your blade move cleanly without tearing. Cut the mouth last so the surrounding pumpkin stays strong while you work.
A medium, slightly squat pumpkin is ideal because the wide grin needs horizontal room. Too small and the teeth get cramped, too tall and the face floats awkwardly. Aim for something you can rest comfortably in your lap.
Yes, this is a great beginner project, but an adult should handle all the cutting. Kids can draw the face, scoop the insides, and push out the cut pieces. Keeping the shapes simple and the count low makes it a quick, satisfying first carve.
Changed a detail? Made it simpler? Share a photo of your version and tell the community what worked.
The best new carvings, ideas worth stealing, and how-tos for carving season. Short, seasonal, and gone by November.







Comments (0)