Halloween Pumpkin Carving Contest · Starts October 1st · $500 in prizes
← Back to ideas
@ai_concepts
Jul 29, 2026
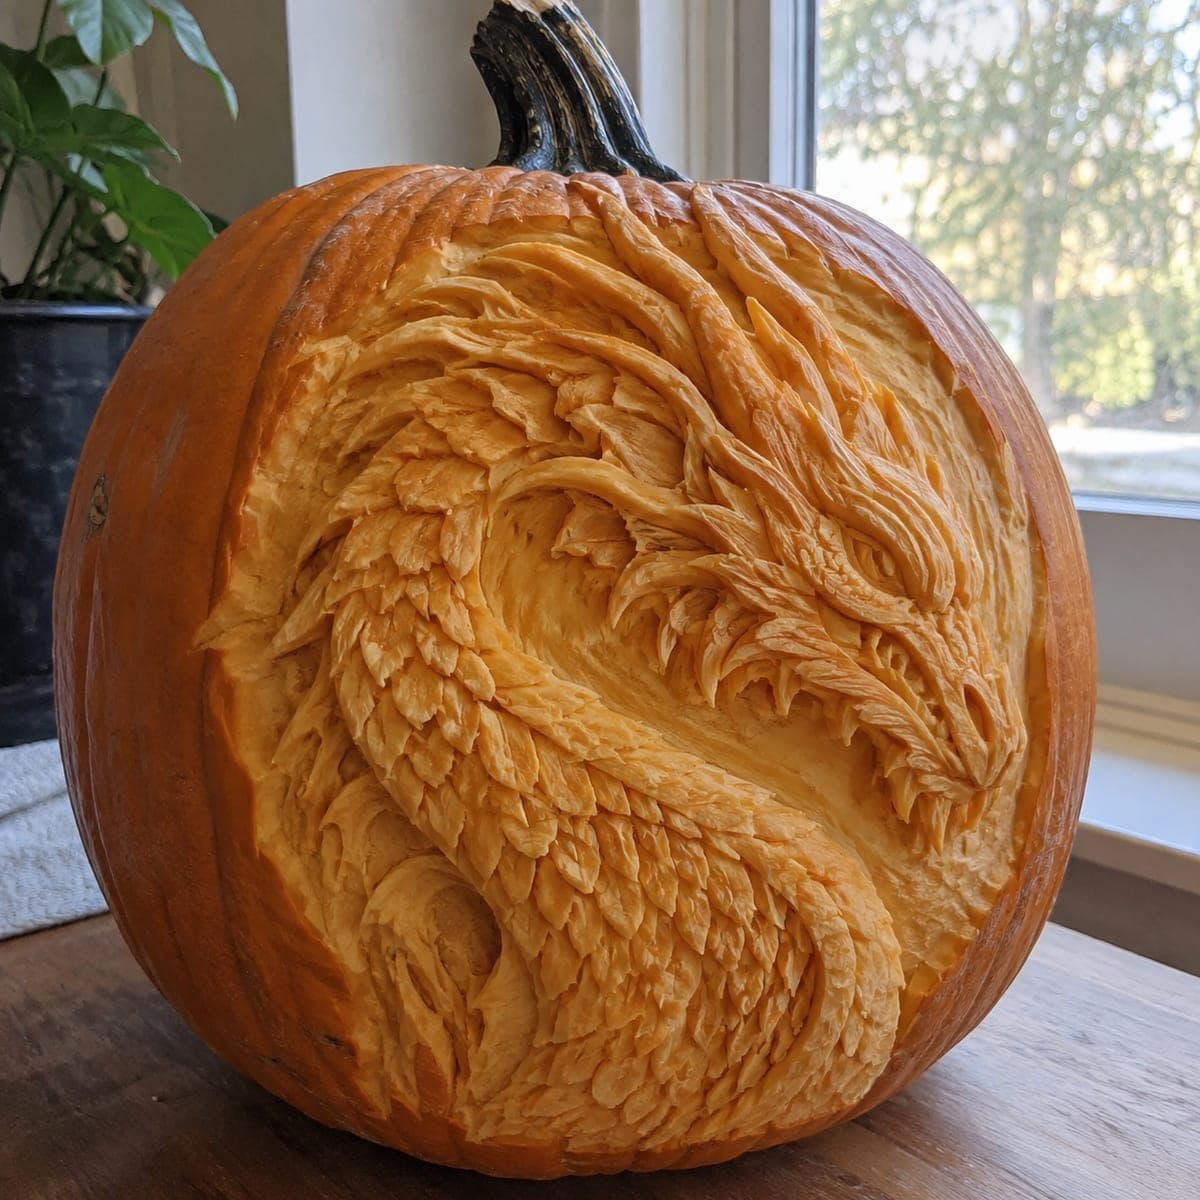
Majestic Griffin Relief Pumpkin CarvingAI
0

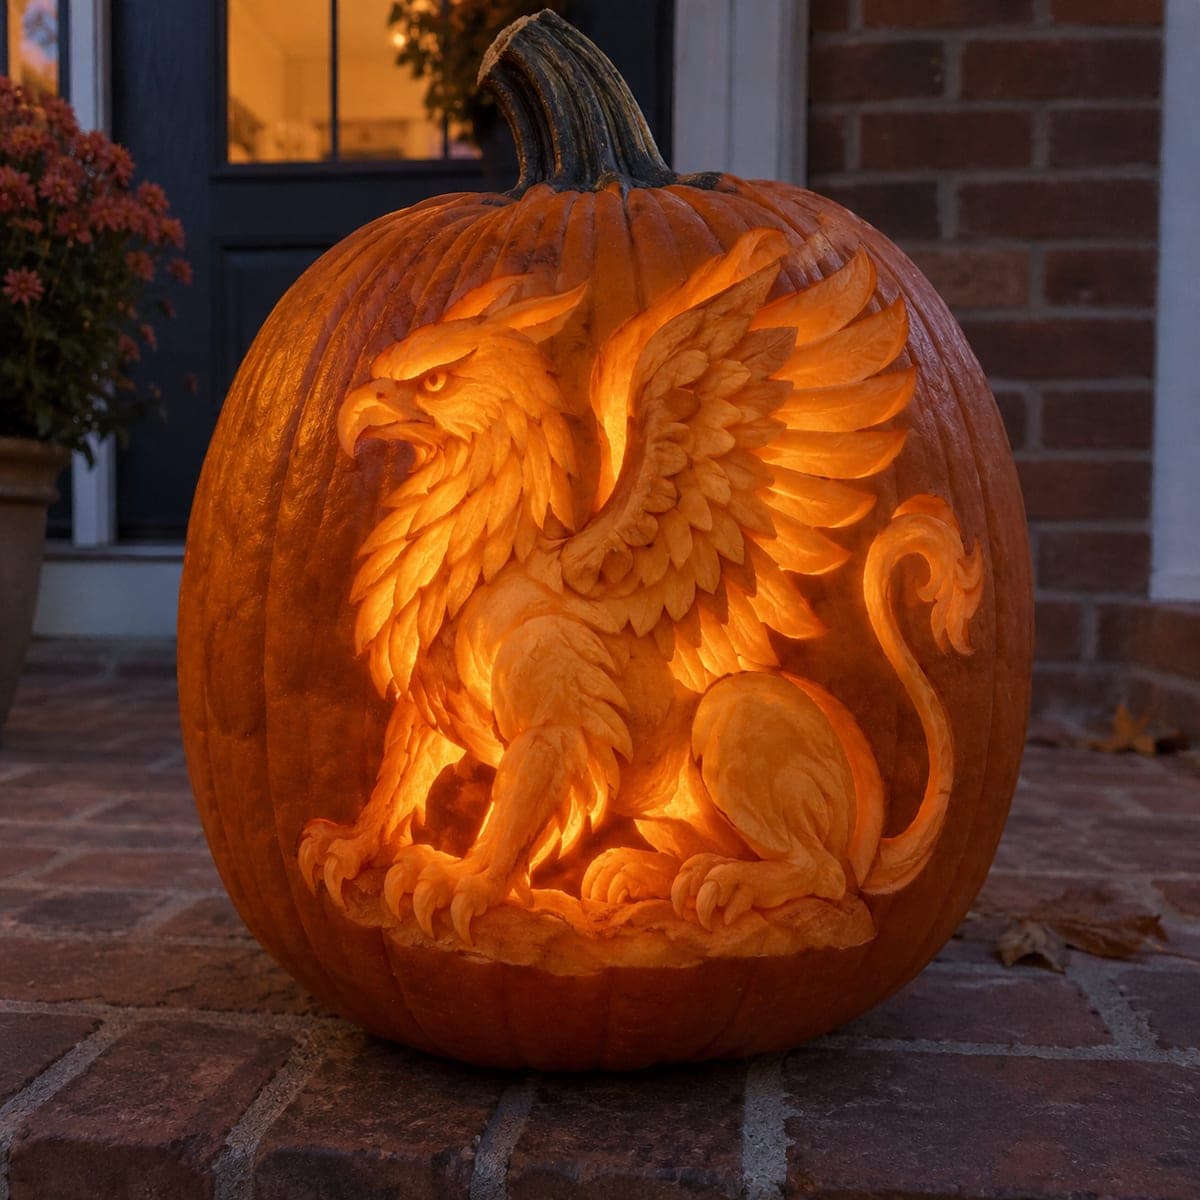
Majestic Griffin Relief Pumpkin Carving

A seated griffin with a hooked eagle beak, layered wing feathers, and a lion's tufted tail glows in warm relief across this show-stopping pumpkin. The mythical beast is carved at many depths, thinnest behind the chest feathers so the creature seems lit from within. Work from a printed pattern, establish the silhouette by removing the background skin, then feather the wings row by row from the top down. This is a competition-level fantasy pumpkin carving that deserves a bright internal light.

This is an AI-generated concept image: a realistic, carvable design idea rather than a photo of a finished carve. AI concepts are always labeled and sit out the leaderboard and the contest.

No ratings yet · Sign in to rate
Comments (0)

  • No comments yet — be the first.

Save without an account. Sign in to like or comment.

Our tips for carving a similar design

The whole illusion here comes from relief carving at several depths rather than cutting all the way through. You establish the griffin's silhouette by peeling away the background skin, then shave the body to varying thicknesses so the thinnest spots, like the chest feathers, glow the most. Save any true cutouts for last and keep every feather tip anchored to the flesh around it.

Written by PumpkinCarvingIdeas.com, inspired by the image above. These are our suggestions, not instructions from the uploader. This approach to the AI concept has not been tested on a real pumpkin.

From pumpkin to porch

  1. Prep the pumpkin and pattern

    Pick a large pumpkin with a broad, flat carving face and a clean rind. Cut a lid from the bottom or the back rather than the top so the stem stays intact, then hollow the wall on the carving side down to about one inch. Print the griffin pattern, tape it flat over the face, and transfer every line with a poking tool or transfer paper. Take your time mapping the wing rows, since accurate lines make the shading much easier.

  2. Establish the silhouette

    With the pattern removed, use a fine gouge or a peeling loop to remove just the skin from the background around the griffin. This drops the background to a dim glow and pops the creature forward. Keep the outline crisp along the beak, wing edges, and tail curl. Do not carve deep yet, you only want the outer shape defined at this stage.

  3. Shade the body from high to low

    Now think in layers. The parts you want darkest, like the top of the head and the outer wing edge, stay thickest. Shave the chest and shoulder areas thinner so more light passes through, using a loop tool in smooth passes. Check your progress by holding a light inside so you can read the depths as you go.

  4. Feather the wings row by row

    Work the wing feathers from the top down, one overlapping row at a time. Carve a shallow scoop for each feather and leave a raised ridge at its tip so the rows read as separate, layered plumes. Vary the depth slightly across each feather to give it a rounded, dimensional look. Keep every feather connected to its neighbors so nothing snaps loose.

  5. Detail the head, claws, and tail

    Sharpen the hooked beak and the eye with your smallest tool, keeping the eye area thin so it catches light. Round the front legs and shave thin lines to suggest fur, then carve the individual claws with narrow relief cuts, leaving bridges between them so the toes stay strong. Give the lion tail its tufted, curling flourish last, shading it thinner along the inner curl for a warm glow.

  6. Light it and photograph

    Set one or two bright LED lights inside, warm white works well for this design. A brighter light really sells the lit-from-within chest and wings. Photograph at dusk with the internal light on and the surroundings dim so the relief depths show. Mist the carving and bag it in the fridge between showings to keep the fine feather edges fresh.

Gather your supplies

Check things off as you get ready.

Work on a stable surface, keep your free hand out of the cutting path, and have an adult handle sharp tools.

Three levels of light

  • Leave intact

    The background skin around the griffin, the top of the head, and the outer wing edges stay untouched and dark.

  • Peel & shade

    The body, shoulders, and inner feather rows get skin-peeled for a soft mid glow that gives the relief its depth.

  • Cut through

    Reserve only tiny true cutouts, such as the eye highlight or a gap in the tail curl, for the brightest points.

Learn the carving basics

Before you start cutting

Do I carve any holes all the way through?

Mostly no. This is a relief design, so the glow comes from thinning the flesh to different depths rather than cutting openings. If you want a few bright accents, limit full cutouts to tiny spots like the eye and save them for the very end so the face stays sturdy.

How do I keep the feather rows from looking flat?

Vary the depth within each feather and leave a slightly raised ridge at every tip. Working top down lets each row overlap the one below, which reads as layered plumes. Shining a light inside as you carve helps you judge whether a feather is thin enough to glow.

This is an AI concept, so can a real pumpkin actually hold this detail?

Yes, with patience. Keep the thin chest area no thinner than the width of a coin so it does not collapse, and leave bridges between the claws and feather tips. Choose a thick-walled pumpkin and carve over a day or two, misting the surface to slow drying.

Your take belongs here, too.

Changed a detail? Made it simpler? Share a photo of your version and tell the community what worked.

Share your pumpkin

More pumpkins like this

You've reached the end · 8 pumpkins
The Patch Report

Fresh pumpkins, in your inbox.

The best new carvings, ideas worth stealing, and how-tos for carving season. Short, seasonal, and gone by November.

A short email during carving season. Unsubscribe anytime. See our privacy policy.